What version of code blocks. Code Blocks IDE - setup and use. Installing the MinGW compiler
Good afternoon dear friends. With this article I begin a series of lessons dedicated to one of the most popular programming languages - C++. The lessons are aimed primarily at users who are not familiar with programming, so professionals, do not be strict, although I support criticism, especially against myself. In my lessons I will use the Code::Blocks development environment, which is free to download and use. Let's start of course with the classic Hello, world =)
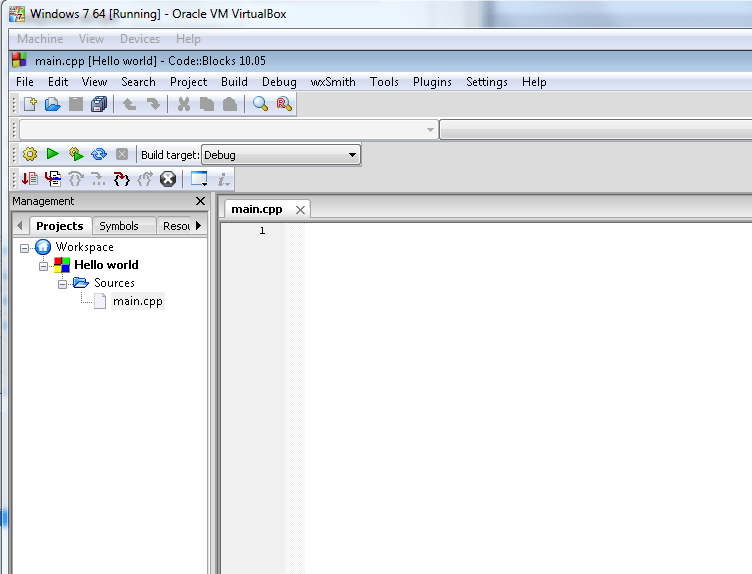
I hope that you have already downloaded and installed Code::Blocks, if so, let's get started. Launching the development environment
First of all, create a new empty project File->New->Project and select Empty project
click Go, then Next

and in the window that appears, in the Project title field, type the title of the project, in Project filename the name of the project and again Next.

In the next window, remove the Objects dir from the Create "Debug" configuration and Create "Release" configuration sections, as shown in the screenshot above and click the Finish button. A project called "Hello world" should appear on the right.

The next step is to add the file File->New->FIle... to the project and select c/c++ source in the window that appears.

Go, Next again, select C++, Next and see the following window
 ,
,
here we need to indicate the name of the file (I called main) and its path, preferably the folder with the project. Check the Debug and Release boxes and click Finish.
And we got empty file C++, in which we will write the program code itself.
Now we begin to write the program code itself. To display information on the screen, we need the iostream I/O library.
#include
using namespace std ;
Then we will write the main function that will be executed when the program starts
int main()
it must be called “main” and we indicate its type int (we will talk about this in the next lessons). Between the curly braces and will be the program code. We will write a simple program, which will display the greeting “Hello, world!” in the console.
cout<<"Hello, world!" ;
After each command you must put a ";", this tells the compiler that the command is finished and the next one can be processed. cout - Prints variable values or strings to the command line.
Full program listing.
#include
using namespace std;
int main ()
cout<< "Hello, world!" ;
return 0 ;
We launch the project and see the result.

Below I attach a video lesson to this article.
If you have any questions, please write comments to This email address is being protected from spambots. You must have JavaScript enabled to view it. ,">This email address is being protected from spambots. You must have JavaScript enabled to view it., I will refine the lessons or simply help in studying the materials.
- < Назад
Code::Blocks is a free, open source integrated development environment (IDE) that supports the use of various compilers. By default, Code::Blocks uses the MinGW compiler, which is included in the kit (you can download the distribution without a built-in compiler). MinGW is a variant of the GNU C/C++ compiler for Windows. MinGW is short for "Minimalist GNU for Windows". The MinGW suite includes open source programming tools that do not rely on any paid third party libraries. It is used by many development environments (Visual Studio uses its own compiler). MinGW includes the GNU Compiler Collection (GCC), including C, C++, ADA, and Fortran compilers. Code::Blocks has an open architecture, which allows it to scale using plug-ins (you can write programs for Windows, Linux, and various microprocessors such as avr and stm32). The code debugger in Code::Blocks supports breakpoints in the source code or in the data that the program processes.
Code::Blocks is available for Windows, Linux and Mac OS X. The project website is codeblocks.org.
Installing the MinGW compiler
Installing Code::Blocks itself is not difficult. It is only advisable to install it in a folder where there are no spaces or Cyrillic characters in the path. Let's look at installing the MinGW compiler. As a rule, the Code::Blocks distribution contains an old version of the MinGW compiler, so it is advisable to download Code::Blocks without the MinGW compiler and install the compiler separately. First, download the installer from the project website mingw.org. After launch, the following window will appear.

Click Install and we get the following window.

Here in the field Installation Directory indicate the location of the compiler files. The default is C:\MinGW, we leave it. Click Continue and the download and installation of the manager for installing MinGW begins.

Click Continue and we get the following window.

For programming in C++, select packages to install mingw32-base-bin (A Basic MinGW Installation) And mingw32-gcc-g++-bin (The GNU C++ Compiler), and then click on the menu Installation -> Apply Changes. A window will appear showing the download of the selected packages.

When the packages are downloaded, click on the button Close
The first time you run Code::Blocks, it will automatically detect the installed compiler. If problems arise, you need to go to the menu Settings -> Compiler... and on the tab Toolchain executables check the correctness of the path to MinGW, as well as the names of the compiler and linker files. Now you can create a project.
Creating a Project
To create a project you need to go to the menu File -> New -> Project...

In the window that appears, select the required project type. Here we see that Code::Blocks has a large number of project templates. In our case it is Console application(console application).

In the next window, select the programming language to use. Select C++ and click on the button Next.

Next in the field Project Title enter the name of the project. In our case it is Test. We immediately indicate the location of the project on disk (field Folder to create project in). In the folder we specified, Codeblcoks will automatically create a folder with the previously specified project name. After specifying the folder name and file name, click on the button Next.

In the next window, select the compiler. By default, GNU GCC Compiler is selected, which is what we will use.

Click Finish and we get a minimal program, the so-called Hello World!

Press F9 to compile and run the program and get the following window.

Cyrillic support in the console
The standard project code generated by the Code::Blocks environment does not support input and output of Cyrillic characters in the console. To solve this problem, you must first make small changes to the project code. An example source code is shown below.
Source
#include
Next, you need to run the program, left-click on the window title (where the path to the running .exe file is shown) and select the item in the context menu Properties. Then on the tab Font install font Lucida Console and choose a convenient font size. After this, messages in console applications will support Cyrillic characters.
Code::Blocks is a free cross-platform development environment in C/C++. This is currently the best free C development environment.
Code::Blocks is developed for Windows, Linux and Mac OS X.
In the Windows environment, it is most convenient to download this environment as part of an assembly, which already contains all the necessary libraries to get started. The assembly does not require installation and works on the principle: “Unpack and go.”
Code::Blocks supports the following compilers:
- GNU GCC (incl. G77) (Linux)
- MinGW GCC (incl. G77) (Win32)
- MSP430 GCC (Win32)
- TriCore and PowerPC GCC (Win32, Linux)
- Apple GCC (Xcode) (Mac OS X)
- Microsoft Visual C++ Toolkit 2003 (Win32)
- Microsoft Visual C++ 2005 (Win32)
- Borland's C++ Compiler 5.5 (Win32)
- DigitalMars C/C++ (Win32)
- OpenWatcom (Win32)
- Intel C++ compiler (Win32)
- Small Device C Compiler (SDCC)
- Digital Mars D
- GDC D Compiler
- LLVM D Compiler
Ready-made templates
CodeBlocks has ready-made project templates that allow you to quickly create a minimal application.
Code editor

The code editor has all the features for a comfortable programmer's work:
- Syntax highlighting (can be customized)
- Tabbed interface
- Code completion
- Class Browser
- Smart indentation
- One-click exchange between .h and .c/.cpp files
- Custom keyboard shortcuts
- External custom “Tools”
- Managing a to-do list with different users
The number of editor settings is simply huge:

In addition to general settings, you can also configure:
- Code folding
- Fields and cursor
- Syntax highlighting (separately by file type)
- Default code for created files (you can insert an auto-signature)
- Abbreviations (when you enter an abbreviation, it is automatically expanded into code)
- Code Formatting
- A way to save and return to lines of code
- Code completion
- Setting up code statistics
- Generating Code Documentation
- and much more
Plugins
The editor's capabilities can be expanded using plugins. For example:
- HEX editor
- Diagrams by Nassi Schneiderman
- Export source code to other formats
- Keystroke macros
- Hotkeys for menus
- Incremental Search
- Environment Variables
- and many others
Debugger
CodeBlocks uses GDB as its default debugger, the most popular debugger for the C language, which was developed by Richard Stallman.
The debugger allows you to set breakpoints and then step through your code while monitoring variables and arrays. You can also track the stacks of called functions.
Results
The number of features and settings of the CodeBlocks environment allows you to turn this environment into an excellent tool for a C programmer.
Code::Blocks is a free cross-platform development environment. Code::Blocks is written in C++ and uses the wxWidgets library. Having an open architecture, it can be scaled through plug-ins. Supports programming languages C, C++, D (with limitations).
Code::Blocks is developed for Windows, Linux and Mac OS X. The environment can be compiled from source code for almost any Unix-like system. [ http://ru.wikipedia.org/wiki/Code::Blocks ]
In order to enable the Russian language you need to do the following:
1. The archive must be unpacked into the program subfolder (where it is installed), for example C:\Program Files (x86)\CodeBlocks\share\CodeBlocks
2. After starting the program, select Settings -> Environment -> View, check the “Internationalization” box and select “Russian” from the list.

3. Restart the CodeBlocks program and get Russification. 
The Russian language has been successfully connected to Code::Blocks version 13.12.
The archive already contains the locale\ru_RU folder structure (to be placed in \CodeBlocks\share\CodeBlocks)
Translation status:
Messages: 2173
Translated: 2173 (100.0%)
Untranslated: 0 (0.0%)
Shared between Ubuntu and upstream: 2173 (100.0%)
Translated differently between Ubuntu and upstream: 0 (0.0%)
Only translated on this side: 0 (0.0%)