No icon Wireless network connection. Wi-Fi for beginners or how to install a simple connection? Connect to router
Imagine the opportunity to travel over the Internet, sitting on the sofa in your room, talking to your friends on the web, comfortably located in the evening in a soft bed, or send documents from a computer that is in the kitchen to the printer in the home office. The wireless network has the highest possible flexibility and does not require a complex setting. This article describes the configuration and launch of the wireless network.
Before starting configuring a wireless network, the following components will need.
Broadband Internet connection is a high-speed connection, in contrast to the switched connection, which has a low data transfer rate and is not quite productive for the wireless network. The most common ways of broadband connection are DSL lines and cable. To get a broadband connection, you need to contact the Internet service provider. Internet connection using DSL lines typically provide telephone companies, and cable connections can be obtained from cable TV companies. Internet service providers usually provide high-speed modems and can even connect them to a computer. Some suppliers may even offer a set - modem and wireless routers. This equipment can also be found in stores selling computers and electronics.
Example of a cable modem (left) and DSL modem (right)
The router provides data exchange between the local network and the Internet. Thanks to the wireless router, computers instead of wires and cables are connected to a local network using radio signals. There are several different types of wireless network technologies, including 802.11a, 802.11b standards, 802.11g and 802.11n. It is recommended to use routers supporting the standard 802.11g or 802.11n, since such routers provide high bandwidth and a powerful radio signal. For more information about wireless local networking technologies, see Wireless Networks: Questions and Answers.
An example of a wireless router
Network adapter is a device connecting a computer with a local network. To connect a laptop or desktop computer to a wireless LAN, a wireless network adapter is required. Many laptops and desktops are equipped with built-in wireless network adapters. To check if a wireless network adapter is installed on the computer, follow these steps:
Open Device Manager. To do this, click Start, select the Control Panel, System and Security components, and then in the System section, select Device Manager. When an administrator password request appears or confirm the password or provide confirmation.
Double-click the Network Boards icon.
Find a network adapter, in the title of which there is a word "wireless".
If the computer is not installed on the computer, you can buy it in the store, selling computers or electronic technology, and install yourself. It is recommended to use adapters based on a universal serial tire (USB). Such adapters have small sizes, easy to install and transfer them from one computer to another. Check that the adapters belong to the same type as the wireless router. The adapter type is usually indicated on the package - as a rule, this is a letter, for example G or A.
Examples of USB Wireless Adapters
After all the equipment is purchased, you will need to install the modem and configure the Internet connection. If the modem was not installed by the representative of the Internet service provider, to connect the modem to the computer and the Internet, follow the instructions in the modem documentation. When using the DSL line, connect the modem to the phone outlet. When using the cable, connect the modem to the cable outlet. For more information, see Configuring high-speed cable or DSL connection.
Install the wireless router in such a place where it will take the strongest signal at a minimum interference level. To achieve the best results, follow the advice below.
Place a wireless router in the center of the service area. Set the router as close as possible to the center of the house to ensure the maximum possible level of the radio signal in all rooms at home.
Place a wireless router higher from the floor and away from walls and metal objects, such as metal cabinets. The smaller the physical obstacles between the computer and the router, the greater the likelihood that the power of the router signal will be fully used.
Reduce interference. 802.11g network equipment uses 2.4 GHz radio frequencies. Many microwave ovens and cordless phones are used the same frequency. When you turn on the microwave and call on a wireless phone to a radio signal, interference may affect. You can avoid many problems if you use a wireless phone, working at a higher frequency, for example 5.8 GHz.
Security is always important, but especially in the case of a wireless network, since the network signal can go beyond the building. If you do not protect the network, then people who have a computer that have a computer can access information stored on network computers and access the Internet through your connection. To ensure the security of the LAN, follow these steps.
Open the Network and Shared Access Center component. To do this, click Start and select Control Panel. In the search field, enter the network and then select Network Management Center and Common Access.
Click Create and configure a new connection or network.
Select Create and configure a new network and click Next.
Protect the router by changing the default username and password. Many manufacturers are specified for the router the default username and password, as well as the default network name. This information can be used to obtain unauthorized access to the router. To avoid this, you need to change the default username and password for the router. Check with the device documentation.
Set the network security key. Like wiring keys and protective combinations for safes, network security keys are defined for wireless local networks to protect the network from unauthorized access. To configure the network security key, follow these steps.
The wizard will help create a network name and security key. The default wizard will suggest using the Wi-Fi Protected Access (WPA or WPA2) method if the router supports it. If possible, it is recommended to use WPA2, because it provides a higher level of security than WPA or WEP (Wired Equivalent Privacy) protocol. WPA2 or WPA methods also allow password phrases, which eliminates the need to memorize the secret sequences of letters and numbers. For more information, see Wireless Network Protection Methods.
Write down the security key and keep it in a safe place. You can also save the security key on the USB flash memory device, following the instructions of the wizard.
Use firewall. Firewall is software or equipment that helps protect the computer from attackers or malicious programs. Using a firewall on each LAN computer allows you to monitor the spread of malware on the network, as well as protect computers when accessing the Internet. Windows Firewall is enabled in this version of Windows. For more information, see Firewall: Questions and Answers.
To connect a laptop or desktop computer to a wireless network, you must perform the following steps.
Open the "Connection to the network" component by right-clicking the network icon (or) in the notification area.
In the list of networks, select the network to which you want to connect, and click the Connect button.
Enter the security key. You can enter the security key manually or insert a USB flash memory device on which the key is stored in the USB port of the computer.
Many users have wireless networks that allow you to access the Internet from any room at home, but they would like to get wireless access to files and printers.
The simplest way to provide sharing files on the network is to configure sharing with a home group. If the home group is missing, you can provide sharing files by placing them in one of the shared folders. Any file or folder placed in a shared folder is automatically accessible to other users connected to the local network. To open access to the shared folder, follow these steps.
Enable shared access to network users can read and record files in public folders.
Disable sharing (users who have logged in to this computer will have access to shared folders).
Open the Document Library. To do this, click the Start button and select Documents.
In the transitions area, in the library node, double-click, and then double-click General Documents.
In the section Access to shared folders, select one of the following parameters.
The actions described must be repeated on each computer, to the files of which you want to open sharing.
To share files, save them to a shared folder on your computer or copy to it. The shared folder is provided for each type of libraries (documents, music, video and images). Each user who has an account on this computer can use this folder. For example, to open the "General Documents" folder, follow these steps.
If a printer is connected to one computers, printing on it can be performed from any computer connected to the wireless network. The simplest way to provide sharing to the printer is to establish flag printers when setting up a home group. In the absence of a home group, you can perform the following steps.
Log in to the computer to which the printer is connected.
Open the "Advanced Sharing Settings" section. To do this, click Start and select Control Panel. In the search field, enter the network, select the Network Management Center and Common Access Center, and then in the Transfer Area, click Edit Advanced Sharing Options.
Click the icon in the form of dual quotes to deploy the current network profile.
In the Sharing File and Printer section, click Enable Sharing Files and Printers, and then click Save Changes. When an administrator password request appears or confirm, enter the password or provide confirmation.
If you have enabled with password protection, users for access to the printer will need to have an account and password for this computer.
To access the printer from another computer on the network, follow these steps:
Open the "Network" component To do this, click Start and select Control Panel. In the Search field, enter the network and then in the "Network and Shared Access Center" section, click View Network Computers and Devices.
Double-click the computer icon to which the printer is connected.
Double-click the printer icon. Windows will automatically add a printer to a computer and install the printer driver.
On this, everything is a wireless network ready to work. You can stretch on the sofa or get on the balcony, while traveling through the Internet, sending email or buying something interesting.
sites.google.com.
On a laptop no Wi-Fi wireless network connection
When you try to connect a laptop to a Wi-Fi network, many are faced with a problem when there is no wireless connection on the laptop. Simply put, no Wi-Fi. The notification panel does not display the Wi-Fi network icon, there are no networks available for connecting networks, and there is no wireless adapter in the adapter management: "Wireless Network Connection", or "Wireless Network". If you have on your Windows 10 computer, and the same problem, when there is simply no Wi-Fi, then watch a separate one: how to enable Wi-Fi in Windows 10, when there is no Wi-Fi button and the error "Could not find wireless devices on this Computer. " Well, we will now try to deal with this problem on the example of Windows 7.
It looks like this problem as follows. On the notifications panel, most likely there will be such an Internet connection status:
And if you enter the control panel \\ Network and Internet \\ network connections, then there most likely you will not detect a wireless adapter, and it should be there.
That's the whole problem, it is clear that Wi-Fi will not work, and it does not include it. Even tips from this article will not help, most likely.
From this you can make two outputs:
- On your computer, or the laptop does not have a wireless adapter, the board itself. If you have a stationary computer, then most likely it is, and for connecting to Wi-Fi, you need to buy and install an external, or internal Wi-Fi adapter. I already wrote about how to connect a PC to a wireless network. If you have a laptop, the adapter must be built-in.
- Not installed driver. It is because of this, most often on a laptop it is impossible to find a wireless connection.
It turns out that there is no Wi-Fay on the laptop, but the Internet only works on the cable. Now we will check it, and correct.
Why is there no Wi-Fi on a laptop?
As I wrote above, the problem is most likely in the drivers. Therefore, let's go to the device manager, and let's see what. To open the device manager, you can go to the "computer", right-click on an empty area, select Properties, and in the new window, on the left open the Device Manager.
Or, press the Win + R key combination, copy the DevmGMT.msc command in the field and click OK.

In the Device Manager, go to the Network Adapters tab. Most likely, you will have only one adapter - network card. And in the device dispatcher itself there will be unknown devices with a yellow icon (at least one device). Like that:

In this case, you need to install the driver on Wi-Fi. How to do this, I wrote in a separate instruction: how to install drivers on a Wi-Fi adapter in Windows 7. After installing the required driver, everything will work, and the wireless connection will appear. There may be another case when the driver is installed, but it works incorrectly. Near it will be a yellow exclamation mark. In this case, as well as try to reinstall it.
I think after these actions you can connect your laptop to the Internet on a wireless network. If anything, write in the comments, we will understand.
Windows 10 - All Instructions for Configuring the Internet and Solving Problems Configuring the router - instructions for different models and manufacturers Useful programs - to configure hotspot, Wi-Fi, 3G / 4G modems.
help-wifi.com.
Velvet female buddies
How to create a wireless connection
If you once again ask a similar question on a computer theme, you should not call a paid specialist with departure to the house. Be smarter, save your money and get additional knowledge on your own, just resorting to reading this article. It will bring you weighty benefits:
Teach you how to create a wireless connection
Available and correctly explain the essence of this concept.
Create a database for your intellectual and creative development in the field of programming
Create a wireless connection in Windows 7
If you are already ready to learn how to create a wireless connection, read the attached instructions:
1. Click on the launch, find the control panel tab
2. Change the type of page being viewed (right upper angle) to view: Category; Immediately select the Parameter View network status and tasks
3. Now we go to the measurement of the adapter parameters and open the tab menu of the Rifode Network Connection; Open the Properties tab
4. Take a look at the General tab, and you will immediately notice the designated items applicable to a specific connection.
5. Find in the open Internet Protocol Version 4 (TCP / IPv4) and indicate the "checkmark"
Complete the connection process
Now, in order to clearly see the successful end of the operation, you need to restart the computer. Now you know how to create a wireless connection, it remains only to log in and connect to the network! As you can see, there is nothing complicated in this process to create a wireless connection. The most important thing is to accurately with the instructions specified steps, and you will definitely work out. Successful completion of the procedure \u003d the appearance of your Internet access computer.
Network connection settings in Windows 7 video
video How to Create Wireless Network Computer - Computer
Configuring Wi Fi Wireless Network for WindowsVideos
ulada.Ru
How to fix the "Wireless Network Connection" icon
On the taskbar in Windows or in the menu "Center Network Management" no Wi-Fi icons? This does not mean equipment failed. Framing of technology - only one of the probable reasons. In some cases, you can independently configure the wireless connection.

What to do if there is no Wireless Network Connection icon.
- 1 reasons
- 2 Is there a Wi-Fi receiver?
- 3 Drivers
- 4 Settings
The reasons
This problem appears if:

Is there a Wi-Fi receiver?
If a receiver is not installed on the computer, you will not see the Wi-Fi network icon. But how to check what you have for the adapter? The simplest thing is to see the characteristics of the PC. On laptops there should be a sticker on which the specifications of the device are specified. Another option is to find out the adapter model and find information about it. Do you have a landline computer? Then find out the ports on the system unit to connect the modem. If an antenna is installed there, then the product is suitable for working via Wi-Fi.

And the easiest way:
- You need a Windows Control Panel.
- Open the Device Manager. He is in the category "Equipment and Sound".
- Expand the "Network Adapters" menu.
- Look, whether there are models there in which "Wirelles", "802.11" or "WiFi".

If there are no such inscriptions, the wireless connection cannot be configured. But you can purchase a Wi-Fi module or a network card, which is already worth an antenna. There are also external Wi-Fi Receivers.
Driver
Usually, Windows independently loads the software you need. But if the network hardware driver is missing or damaged, it must be installed manually.

To connect, you need to download software. There are several ways. The first will suit if the driver was set incorrectly.
- In the Manager, right-click on the item with a yellow triangle.
- Select "Delete" and confirm the action.
- Restart the computer.
- After launching Windows detects the presence of a new device.
- If this happens, go to the dispatcher again.
- Highlight any item.
- "Actions - update the configuration."

It will work only with the equipment that is installed on the principle of "Plug and Play" (which means "insert and play"). Software for these devices is loaded itself. You can use them immediately after connection. If in the board, in general, there is no such function:
- Highlight any item in the dispatcher.
- "Actions - Install an old device"
- A window will open with explanations. Click "Next".
- Check "Automatic Search" or "Manual".
- Select "Network Adapters".
- If you know the model and type of the gadget, find it in the list.
- Wait until the installation is completed.
To download an outdated update:
- In the dispatcher, click on the device with the right mouse button.
- In the drop-down list, click on "Update Driver". This option will be active if Windows defined the equipment model.
- Select "Automatic Search" so that the system finds the software on the network and downloaded it.
- Or click "Search on a computer" to specify the path to the installer.
Included with a new Wi-Fi adapter or laptop should go disk. You can download the necessary software from it. If you do not have a CD with the driver, and the system itself did not find it:
- Go to the manufacturer's website of the network equipment.
- In the search string, copy the model name.
- Open the page with information about your adapter.
- Download from there by software. Usually it is in the "Support" section, "downloads" ("downloads"), "Files" ("Files") or "Programs" ("Programs").
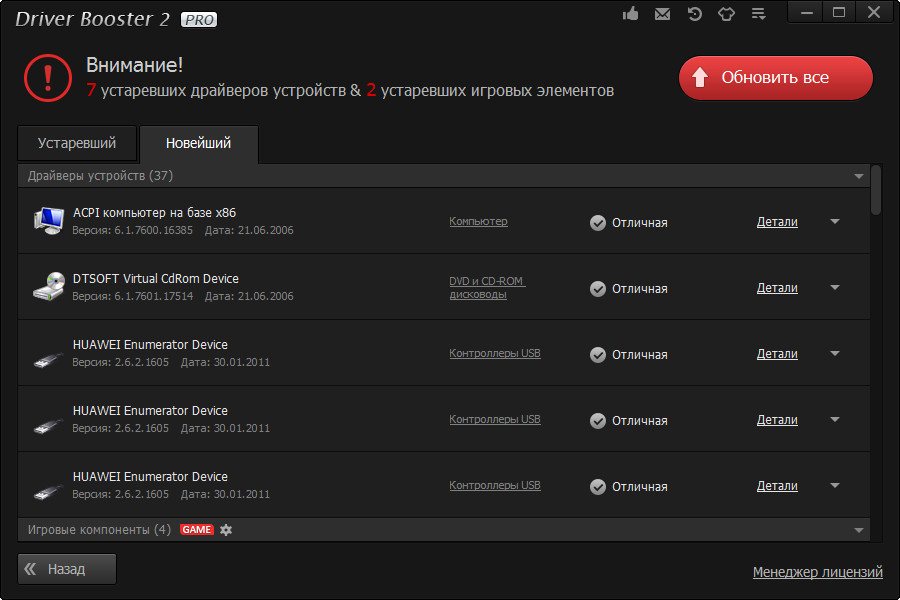
There are special applications for installing system software. For example, Driver Booster. It defines the equipment model and loads current versions of drivers for it.

Settings
Perhaps you have incorrectly selected network configuration. To connect to Wi-Fi, you must configure it. Initially, make diagnostics.

To connect to the access point, the Wi-Fi module must be active. On laptops, they can be controlled using a key combination. Which buttons click, depends on the gadget model. For example, "Fn + F5", "Fn + F7" or "Fn + F9". They draw on the relevant images. But sometimes users hurt them by chance. Yes, and on a stationary computer, the Wi-Fi module can be disabled. For settings:

Now you can restore the connection "by air" if the Wi-Fi icon disappears. But if the network board still broke, it is better to contact the master to the service center.
Nastroyvse.ru.
Wireless Connection Settings byFly on Windows 7
Not everyone else has the opportunity to connect to the Internet by means of a fiber optic cable or twisted pair, and in the office, house or apartment for connecting multiple devices, you should use a wireless connection method (WiFi) into one network with the ability to exit each of them to the Internet. If a computer is not suitable for a computer with Windows 7, the use of broadband BYFLY is the best option. Today and consider how the Wi-Fi is configured on a laptop running Windows 7.
Set the network card settings
First you need to configure the network adapter.
- We go to the "Network Management Center".
- We go to the edit menu of the adapter parameters.
- In the properties of the active connection, select the TCP / IP protocol of the 4th version and call the "properties" of the connection.
- Enter the following parameters.
- Everywhere click "OK" to exit.
Connect with modem
Setting up Wi-Fi starts with a modem connection and log in to the parameters of its configuration on a laptop. For the first - use the instructions or services of the wizard, and the input to the interface where the modem is configured, is carried out by entering 192.168.1. In the address bar. Instead of "x", we enter 1 or 0 (depending on the device model).
A dialog box should appear asking you to enter data to enter the menu where WiFi is configured. We enter the standard value of both lines as "admin" and click "ENTER".
Activate WiFi Module: We are looking for the "Access Point" string (it should be topped) and move the checkpoint to the value "Activated" - actively.
We fall to the Broadcast SSID and activate the option by setting it the value as "Yes".
The SSID value is typing absolutely any - this is the name of the future Wi-network network, under which it will be seen by users of all devices located in the access point area.
Look more: how to create a USB flash drive for installing Windows 7
The data encryption type (Pre-Shared Key) of the wireless connection is recommended to choose WPA2-PSK due to the fact that it has the most advanced protection mechanism used everywhere today.
Password necessarily change to reliable when the first adapter setting is performed.
Setting on a laptop with an activated WiFi network module and on a computer connected to a router that operates running Windows 7, is carried out similarly.
Configure connection
Let us turn to the configuration of the wireless network on the laptop by setting the modem adapter operation parameters in the router mode.
- Going to the modem interface, click on the Interface Setup button.
- Below click "Wireless" - the parameter is responsible for switching on the Wi Fi of the adapter.
- Go to the "Encapsulation" section and set the value of the only parameter as "PPPOA / PPPOE".
- After changing the view of the window, enter the username and the password provided.
- Activate the BRIDGE INTERFACE parameter.
- The value of the "Default Route" function is set as "YES".
- We click "Save" to apply the new parameters of the Wi Fi adapter.
- After carrying out a restart of the modem, so that new parameters were activated.
By configuring a wireless network in Windows 7, you can safely disconnect the modem and use the access point on the laptop by selecting a new WiFi connection and entering the password that it is protected.
If all the Wireless Configuration Instructions are configured correctly, the Internet connection will be connected in seconds on a device with Windows, Android or other operating system, the main thing is to be near the signal source.
(Visited 1 775 Times, 1 Visits Today)
Today, the wireless network is popular than ever. Yes, it is not surprising, because it is incredibly convenient: you can use the Internet without binding, say, to the cable. The main condition with which the use of a wireless network becomes possible is the presence of Wi-Fi coating.
Setting
So, first note that there is a chief computer and other network computers. In the first case, your PC acts as a wireless network conductor, and in the second the remaining computers use the main to connect to Wi-Fi. There are also programs that allow you to easily create an access point, for example, you can read as. To configure the Windows 7 wireless network, you must: enable a wireless module, then go to "Start" and then to "Computer". Next, you should select "Properties", where, on the left side, there is an active line "Advanced system parameters".
There you will see the "Computer Name" tab, where you should enter your network name (it may be, for example, your name). If you also want to change the computer name and the name of the working group, then click below the "Change" button, click on it and rename everything to your taste. If you don't need to do anything else, then after filling out the line "Description" just click "OK".

Please note that in the tray, near the clock, there is an icon that the network is indicated, click on it.

You will have a window with current connections, and at the bottom there is an active string of the "Network and Common Access Center".

Having passed on it, on the left side, see a category with the control of wireless networks, and click the Add button.

To manually add a network, select the "Create Computer Network" and "Next" section.
You will appear with a short manual about this network, you will need to set an arbitrary network name, invented by your password, is the security key, and the type of security, namely WP2-Personal. And finally, enable access to the Internet.

Wireless security
Information on your computer should be protected from unauthorized access to other users, because the network signal can go far beyond your apartment or office. To do this, select the username and password by default, as the system offers, but come up with your personal. The same applies to the network security key, it should be original so that no one can choose the right one. In addition, to increase the level of protection, it is recommended to use a firewall - a program that allows you to protect the system from viruses and other negative programs that negatively affect the computer.
Introduction
The use of various devices with WiFi is rapidly breaking into our lives, now WiFi is equipped not only the complex technique like laptops and communicators, but even such simple gadgets like a photo frame. To configure them to connect to wireless networks, it becomes not easy business, so it is not surprising to appear technologies that greatly simplify the setup procedure.
Creating a new wireless network starts directly from the configuration of the access point (wireless router) of connecting computers and other wireless equipment.
Technology
A traditional way to configure from the point of view of a regular user looks very difficult: you need to make difficult steps to connect to the access point for the first setup, you need to create a manually name of the wireless network, specify a complex and hard-proof security key. And this setting requires that the user has basic WiFi knowledge. It will be much easier for him to just click on the button or enter a pin so that everything itself is configured and connected.
Wireless Protected Setup. (WiFi Protected Setup - WPS) It is just invented to quickly, as simple as possible and safely configure network devices and computers. For example, one of the methods for connecting the game console with WiFi to a wireless network: just click on the WPS buttons on the wireless router and on the game console.
WiFi Protected Setup.now is the standard for simple and secure wireless network. In Microsoft Terminology, this Windows Connect Now. (WCN.).

Wireless Device Configuration Wednesday can be different: Ethernet, WiFi., USB cableor USB flash drive.The configuration of the wireless device can be carried out through Pin (PIN. - Personal Identification Number), through clusters of configuration buttons (PBC - Push Button Configuration, Briefly Push Button) or through network settings.
Setting up a wireless router
The device is unpacked and connected to the power grid. You can customize it via Ethernet using the patchcord (which is included in the package) or via WiFi, but this does not depend on the process of setting. On a laptop or desktop you need to go to Control Panel - - Configuring a new connection or networkwhere to choose Creating and configuring a new network.

Wireless devices with WCN support will be visible in the device list. We choose exactly our access point (wireless router) (not neighboring, if we configure WiFi).

The next step is needed to conduct a PIN code from the label on the router.


Or set your own, there is a need for this: Wireless Network Name, Password For Network Access, Security Level and Encryption Type.


When the setup is completed, you can print a detailed instruction for connecting other computers to the access point (wireless router), as well as prepare a flash drive with settings to import a network profile to other wireless devices. If at the moment there is no need for this, then this can be done later, in the properties of the wireless network.
Connect to access point via Push Button
When connecting to our wireless network from a computer running Windows 7, you can not enter the security key, and click the WCN button on the router. Connecting to a wireless network will occur automatically.

On wireless devices that support the PBC method, it is enough to press the WPS button on the router, and then on the wireless device, after which the device is connected to the wireless network.
On computers running the older Windows operating systems, as well as on wireless devices that do not support the Push Button method, you need to use the import connection profile to the wireless network.
Connecting to access point through the import connection profile
If the USB flash drive with the network profile settings has not been created upon completion of the access point setting (wireless router), then you need to create it. To do this, you need to connect a USB flash drive, in center connections call properties Wireless network and choose Copy this network profile on USB flash memory device. You can also open properties Wireless network view Control Panel- Network and Shared Access Control Center - Wireless network management.


Upon completion of the USB wizard, the flash drive can be used to connect various wireless devices, as well as computers equipped with a wireless adapter and running Windows XP / Vista / Windows 7.
For devices with a wireless adapter, such as photo frames, printers, game consoles, you need to connect a USB flash drive to them with a network profile and agree with the import of settings. At the end of the setup, the device will automatically connect to the wireless network. Similar actions and for Windows operating systems: Connect a USB flash drive with a network profile,

in the window Avtozave choose Connecting to a wireless network using Windows Connect Now,

agree with import settings.

If the autorun function is disabled on a Windows computer, you must open a USB flash drive, start the file Setupsnk.exe. And agree with the import settings for connecting to a wireless network.

Windows Connect Now greatly simplifies configuring a wireless network and now you will not need to memorize network credentials and spend a lot of time to connect new PCs.
On the taskbar in Windows or in the menu "Center Network Management" no Wi-Fi icons? This does not mean equipment failed. Framing of technology - only one of the probable reasons. In some cases, you can independently.
What to do if there is no Wireless Network Connection icon.
This problem appears if:

Is there a Wi-Fi receiver?
If a receiver is not installed on the computer, you will not see the Wi-Fi network icon. But how to check what you have for the adapter? The simplest thing is to see the characteristics of the PC. On laptops there should be a sticker on which the specifications of the device are specified. Another option is to find out the adapter model and find information about it. Do you have a landline computer? Then find out the ports on the system unit to connect the modem. If an antenna is installed there, then the product is suitable for working via Wi-Fi.

And the easiest way:
- You need a Windows Control Panel.
- Open the Device Manager. He is in the category "Equipment and Sound".
- Expand the "Network Adapters" menu.
- Look, whether there are models there in which "Wirelles", "802.11" or "WiFi".

If there are no such inscriptions, the wireless connection cannot be configured. But you can purchase a Wi-Fi module or a network card, which is already worth an antenna. There are also external Wi-Fi Receivers.
Driver
Usually, Windows independently loads the software you need. But if the network hardware driver is missing or damaged, it must be installed manually.

To connect, you need to download software. There are several ways. The first will suit if the driver was set incorrectly.
- In the Manager, right-click on the item with a yellow triangle.
- Select "Delete" and confirm the action.
- Restart the computer.
- After launching Windows detects the presence of a new device.
- If this happens, go to the dispatcher again.
- Highlight any item.
- "Actions - update the configuration."

It will work only with the equipment that is installed on the principle of "Plug and Play" (which means "insert and play"). Software for these devices is loaded itself. You can use them immediately after connection. If in the board, in general, there is no such function:
- Highlight any item in the dispatcher.
- "Actions - Install an old device"
- A window will open with explanations. Click "Next".
- Check "Automatic Search" or "Manual".
- Select "Network Adapters".
- If you know the model and type of the gadget, find it in the list.
- Wait until the installation is completed.
To download an outdated update:
- In the dispatcher, click on the device with the right mouse button.
- In the drop-down list, click on "Update Driver". This option will be active if Windows defined the equipment model.
- Select "Automatic Search" so that the system finds the software on the network and downloaded it.
- Or click "Search on a computer" to specify the path to the installer.
Included with a new Wi-Fi adapter or laptop should go disk. You can download the necessary software from it. If you do not have a CD with the driver, and the system itself did not find it:
- Go to the manufacturer's website of the network equipment.
- In the search string, copy the model name.
- Open the page with information about your adapter.
- Download from there by software. Usually it is in the "Support" section, "downloads" ("downloads"), "Files" ("Files") or "Programs" ("Programs").
There are special applications for installing system software. For example, Driver Booster. It defines the equipment model and loads current versions of drivers for it.
Settings
Perhaps you have incorrectly selected network configuration. To connect to Wi-Fi, you must configure it. Initially, make diagnostics.

To connect to the access point, the Wi-Fi module must be active. On laptops, they can be controlled using a key combination. Which buttons click, depends on the gadget model. For example, "Fn + F5", "Fn + F7" or "Fn + F9". They draw on the relevant images. But sometimes users hurt them by chance. Yes, and on a stationary computer, the Wi-Fi module can be disabled. For settings:

Now you can restore the connection "by air" if the Wi-Fi icon disappears. But if the network board still broke, it is better to contact the master to the service center.