How to remove the Windows 7 activation pop-up window. How to activate Windows7 so that the activation never fails. Deactivating the Notification Center
After the initial installation of the Windows 10 operating system from removable media, it is necessary to activate it to confirm the license rights to own this version. This is required to prevent the use of pirated content and to verify the product license key with valid Microsoft keys. Before entering the key, the system will operate in trial mode for thirty days, after which it will stop starting. Within the prescribed period, the user is obliged to activate or uninstall the system. Windows 10 will automatically remind you to activate every time you start it by displaying a watermark with reminder text in the lower right corner of the display. This sometimes annoys many users, which is why they start looking for ways to remove the automatically pop-up message. The removal process itself is not difficult and does not require special preparation.
Why does the Windows 10 activation watermark appear?
A watermark with an activation reminder may appear in test versions, in pirated copies of a licensed OS, or if the user for some reason forgot to activate Windows 10 after installation on the computer.
A Windows 10 activation message appears on the desktopThis function is fixed in the registry and does not have any effect on the speed and performance of the computer. You can also use the non-activated version of Windows 10 (with some restrictions), but this is not very convenient. Most users try to remove the annoying reminder using third-party programs or editing branches in the registry.
There are a certain number of rules that must be followed when removing the activation watermark, since in most cases third-party software is used. Often, not everyone wants to take risks and change entries in the registry, rightly fearing that they will disrupt the normal operation of the computer.
Basic rules that must be followed when removing a watermark:
- Always create a system restore point before starting to remove a watermark using the registry;
- use software only from the official websites of manufacturers;
- Methods for removing watermarks and activation reminders should have good recommendations on the web and be tested many times.
If you do not follow at least one of these rules, then no one can guarantee you that deleting a small problem will not result in a big problem that entails a complete reinstallation of Windows 10.
How to remove the Windows 10 activation message
There are several ways to remove the system's automatic reminder about the need to activate the software product. Sometimes the result is achieved immediately, sometimes you need to try several methods to achieve success. The main ways to remove the Windows 10 activation watermark include using third-party programs and adjusting the registry. You can also use the system's built-in software, but in home versions, not all notification removal features are included in the Windows 10 installation package.
How to remove the activation message through the registry
There are two easiest ways to remove the activation message.
First way:

The second method (for those who are afraid to manually enter registry corrections):

Remove notification about activation by third-party programs
You can remove the watermark that says you need to activate Windows 10 using third-party programs. There are several such programs, and they have been repeatedly tested in practice by various user groups.
The Universal Watermark Disabler utility has the following advantages:
- can quickly erase watermarks on any version of Windows;
- provides support for any languages during operation;
- does not harm system files;
- instantly removes all watermarks on the display.
How to use the utility:

Video: Removing watermarks using the Universal Watermark Disabler utility
In addition to the most common utility, Universal Watermark Disabler, two small utilities are used for the same purposes:

How to remove the activation window and disable pop-up notifications
You can remove the activation window and turn off notifications in Windows 10 using the built-in Notifications and Actions service.
This service includes the following features:
- Allows and disables pop-up notifications from Windows 10 and third-party programs;
- allows you to show the system alerts about various events and updates received from the network;
- Using pop-up menus, it speeds up the process of removing removable media, activating and disabling various adapters.
Using this service, you can turn off annoying notifications, block them, and turn off the notification center.
Disable Action Center
In Windows 10, you can disable the Action Center in three different ways:
- using changes to Windows 10 settings;
- by editing the Windows 10 registry;
- changing system group policies.
Disable notifications by changing the settings
This is the fastest way to prevent unnecessary notifications from appearing on your display. It is performed in several stages:

Video: Disabling notifications by changing Windows 10 settings
Disable pop-up notifications using the Registry Editor
This method is suitable for users who already feel quite confident working in the Registry Editor. Changes that need to be made to the registry and disabling alerts require the following steps:

Pop-up notifications are now disabled.
It should be taken into account that in the latest versions of Windows 10 developed, regardless of the user’s wishes, the settings for turning off notifications in the registry may already have been created. This can only be tracked during a clean installation from a licensed distribution.
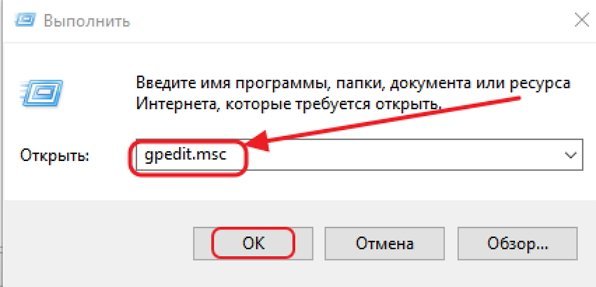
Disable notifications when general group policy changes
Video: Disable Notification Center and Toast Notifications
Removing watermarks and notifications in Windows 10 is a fairly easy process. At the same time, it is necessary to clearly understand that they were not developed by chance. It is quite possible that activation for some reason did not go through or there was a failure in the system files. A watermark that was previously removed as annoying will not appear. This may lead to the fact that at the most inopportune moment you will not be able to start the system and will see a warning on the display about the end of the period allotted for activating Windows 10. You will need to waste time searching for the key, which, as always, will not be at hand. Therefore, you need to think carefully about whether it is worth removing watermarks and inscriptions about the need for activation.
On the screens of those computers that use an unactivated version of Windows 7 or the activation failed after the update, the following message is displayed: "Your copy of Windows is not genuine" or a message of similar meaning. Let's figure out how to remove the annoying notification from the screen, that is, disable authentication.
There are two options for disabling authentication in Windows 7. Which one to use depends on the user's personal preferences.
Method 1: Editing the Security Policy
One of the options for solving this problem is to edit the security policy.
- Click "Start" and go to "Control Panel".
- Open section "System and Security".
- Follow the inscription "Administration".
- A list of tools will open in which you should find and select "Local politics...".
- The Security Policy Editor will open. Right click ( RMB) by folder name "Restricted Use Policy..." and from the context menu select "Create a policy...".
- After this, a number of new objects will appear on the right side of the window. Go to the directory "Additional Rules".
- Click RMB on an empty space in the directory that opens and select the option from the context menu “Create a hash rule...”.
- The rule creation window opens. Click the button "Review…".
- A standard file opening window opens. In it you need to go to the following address:
C:\Windows\System32\Wat
In the directory that opens, select the file called "WatAdminSvc.exe" and press "Open".
- After completing these steps, you will be returned to the rule creation window. In his field "File Information" The name of the selected object will be displayed. From the dropdown list "Security level" select value "Forbidden", and then press "Apply" And "OK".
- The created object will appear in the directory "Additional Rules" V "Security Policy Editor". To create the next rule, click again RMB on an empty space in the window and select “Create a hash rule...”.
- Again, in the rule creation window that opens, click "Review…".
- Go to the same folder called "Wat" at the address given above. This time select the file with the name "WatUX.exe" and press "Open".
- Again, when you return to the rule creation window, the name of the selected file will be displayed in the corresponding area. Again, select the element from the security level selection drop-down list "Forbidden", and then press "Apply" And "OK".
- The second rule has been created, which means that OS authentication will be disabled.


Method 2: Deleting files
The problem posed in this article can also be solved by deleting some system files responsible for the verification procedure. But before that, you should temporarily disable the standard antivirus, "Windows Firewall", remove one of the updates and deactivate a specific service, since otherwise problems may occur when deleting the specified OS objects.
- After you have deactivated your antivirus and "Windows Firewall", go to the section already familiar from the previous method "System and Security" V "Control Panels". This time open the section "Update Center".
- A window opens "Update Center". Click on the inscription on the left side of it "Viewing the log...".
- In the window that opens, click on the inscription to go to the update removal tool "Installed updates".
- A list of all updates installed on your computer will open. You need to find an element in it KB971033. To make your search easier, click on the column title "Name". This will list all updates in alphabetical order. Search in a group "Microsoft Windows".
- Having found the desired update, select it and click on the inscription "Delete".
- A dialog box will open where you need to confirm the removal of the update by clicking on the button "Yes".
- After the update is removed, you need to disable the service "Software Protection". To do this, go to the section "Administration" V "Control Panels", which has already been discussed when considering Method 1. Open element "Services".
- Starts "Service Manager". Here, just as when deleting updates, you can arrange the list items in alphabetical order for ease of finding the desired object by clicking on the column name "Name". Having found the name , select it and click "Stop" on the left side of the window.
- The service responsible for software protection will be stopped.
- Now you can proceed directly to deleting files. Open "Conductor" and go to the following address:
C:\Windows\System32
If the display of hidden and system files is disabled, then you must first enable it, otherwise you simply will not find the necessary objects.

- In the directory that opens, find two files with a very long name. Their names begin with "7B296FB0". There won't be any more objects like this, so you can't go wrong. Click on one of them RMB and select "Delete".
- After the file is deleted, do the same procedure with the second object.
- Then return to "Service Manager", select the object "Software Protection" and press "Run" on the left side of the window.
- The service will be activated.
- Next, do not forget to enable the previously deactivated antivirus and "Windows Firewall".


As you can see, if your system activation has failed, then it is possible to disable the annoying Windows message by deactivating authentication. This can be done by setting a security policy or by deleting some system files. If necessary, everyone can choose the most convenient option for themselves.
After installing Windows 7 on your computer, you can use it for free for a while. According to the terms of the agreement, this period is 30 days. To continue using the system, you will have to activate it, that is, officially register the license key that you received upon purchase. What to do if there is no such key? There are two options here: buy a key or hack the activation mechanism.
Legal activation of Windows 7
To launch the activation application, open system properties: right-click on the “Computer” icon or select the “System” applet in the control panel.

At the very bottom of the Windows 7 properties window it is written how many days are left until the end of the trial period and an offer to activate the system right now. Click on this text.

Activating Windows 7 by phone
If you have a choice, this option is preferable. With its help, you can activate a boxed or OEM version of Windows 7 of any edition: from starter to ultimate. This way you will receive all the necessary keys that will help you legally activate the system in case of reinstallation. With automatic activation via the network, all data exchange occurs hidden - the key is not communicated to the user.
- From the list of activation options, select “Show other methods.”

- Click “Use an automated telephone system.”

- Enter the Windows 7 product key. It is written on the box or envelope with the installation disk if you have a boxed version of the system. Don’t get confused, the “maximum” edition key will not fit the “home”, “pro” or “starter” versions, and vice versa. Therefore, use only the correct key.

- Next, select your location.

- Switch the phone to tone mode. At the request of the robot (the automatic telephone system works without live operators), you need to dial the numbers on your phone that are indicated in the “Step 2” section and then enter the code received from the robot in the “Step 3” section. Next, click “Next” and wait for the activation success message.

Activating Windows 7 via the Internet
Automatic activation over the network is the fastest and easiest option, requiring a minimum of user actions. If you have a license key, you can activate the system in this way already at the installation stage. Suitable for any edition of Windows 7: Ultimate, Professional, Both Home and Basic.
- Select “Activate Windows over the network” from the list.

- Enter your product key (in the same way as for telephone activation). It may take some time for the key to be verified.

- If the key fails verification, make sure you haven't mixed it up. So, the key for Windows 7 maximum, as in the case of activation by phone, will not work with home and vice versa.

- If the key is correct, you will see a message indicating that the activation was successful.

In addition to the option with a permanent Internet connection, there is an activation method using a modem connection. It may be convenient for you if you have a modem.

Pirate activation of Windows 7
A great variety of “pseudo-activators” for Windows 7 have been released. In one way or another, they bypass or block the Windows Activation Technologies system - that which is responsible for legal activation and, after the end of the trial period, blocks the operation of Windows. “Pseudo-activators” either “deceive” the counter of the remaining days of the trial, forcing the system to “think” that 30 free days have not yet passed, or force it to accept a fake activation key, or modify some of the system files so that the lack of activation ceases to affect the operation of Windows at all .
Most pirated activators are as simple as possible to use and work according to the principle - launch, press a button and you're done. There are universal activators that work on all editions of Windows 7 and highly specialized ones, for example, only for Windows Ultimate or Pro.
Here are some of the methods of illegal activation that exist today:
- modification of the SLIC table in the computer BIOS, where information about system and program licensing is stored;
- emulation of an SLIC table at an early stage of PC boot, which is “slipped” to the system instead of the original one;
- using KMS services (key management services) in two versions: online - to activate professional and corporate editions of Windows 7 and offline (via KMS virtualization), with which the maximum and home editions can be activated.
We suggest looking at a live example of how one of the activation hacking utilities works.
Download the activator Windows 7 Loader 2.2 follow one of the active links, unpack and launch it. This utility is intended for all editions of Windows 7: maximum, professional, etc., both 32 and 64-bit versions. In our example, we use Windows Ultimate.
You must disable it before starting. You must run the file as an administrator.

In the activator window, just click the “Install” button, the program will do the rest itself, including restarting the computer. After this, activation information will appear in the Status line of the Installation tab - the word Licensed. This means your system is activated and you can now install updates as if your license was genuine.

To deactivate the key, just click the “Uninstall” button in the same window. Everything is as simple as shelling pears.
How to remove Windows 7 activation
 Deactivating or removing activation information from the system may be necessary when you are going to restore the computer to its factory state, for example, before selling it, so that the buyer has the opportunity to activate the system with his own key. And your key will remain with you and can be used on another machine.
The method works on any boxed edition of Windows 7 (ultimate, professional, etc.). It is not suitable for OEM versions, since in them the system is physically “tied” to the PC motherboard.
Microsoft uses authentication to identify pirated copies of Windows. Authentication is installed with operating system updates. You may not even notice it, and one day you will see the inscription “Your copy of Windows is not genuine.” There is one way to disable authentication.
The first step is to remove the installed update KB971033. To do this we do the following.
1. Press START (the checkbox in the circle in the lower left corner of the monitor) and select CONTROL PANEL. Switch viewing to small icons.
2.Then select WINDOWS UPDATE CENTER.
Then VIEW THE UPDATE LOG
Then click on INSTALLED UPDATES
We find the update with number KB971033. Right-click on it and select DELETE.
To prevent this update from installing again, you need to disable it. To do this, go to the CONTROL PANEL and select WINDOWS UPDATE CENTER. Click CHECK FOR UPDATES.
When windows says there is an update, click on it
There we will see the same update for authentication under the number KB971033. Uncheck the box next to it, then right-click on the update and select hide update.
All! Now you can safely update, and the authentication update will not be installed.
Now, to remove the message, your copy of Windows is not genuine and the black desktop you need to restart your computer and complete the activation procedure.
Many users have encountered the problem of unwanted watermark after updating the Windows operating system to version ten. This icon will pop up above all windows and applications to remind you that you are using an inferior version of the Windows OS. You can remove this element in two ways: using third-party utilities and using the operating system support center settings. You will learn how to use them in this article.
How to remove the Windows activation message through the Support Center
This method does not always work, since Microsoft has prohibited removing the desired option in some versions of the software. If this option works for you, then you will not have to install third-party programs.
- Find the flag icon in the tray of your computer or laptop.
- Right-click on it and click on the line “Open Windows Action Center”.

- In the window that appears, find the menu on the left. In it, select the “Support Center Settings” link.

- You will find yourself in the settings window for all Windows notifications. In the first section, “Security Messages,” uncheck the box next to the words “Windows Activation.” Now the watermark will disappear from your desktop.
If this method does not work in your version of the software, and you cannot uncheck the box, then resort to the second step of installing a special program.

How to remove the Windows activation message using the utility
Using the Universal Watermark Disabler software as an example, we will further clearly show how you can remove the software activation notification from the monitor screen. Of course, there are a lot of similar utilities, and you can use any other at your discretion.
Before using the method, be sure to close all documents and applications, as you will not be able to save them after installation. The procedure for erasing a watermark is as follows:
- Save all files and close all programs.
- Download and unzip the Universal Watermark Disabler program file.
- Install the software.
- Restart your computer.
After installing the software, your screen will completely change, and all the icons will disappear. Don't be alarmed - this is how it should be. After a reboot, everything will return to its previous state, and the Windows activation notification will disappear.
- Go to the official website of the developer and download the program by clicking on the “Download Universal Watermark Disabler” link. The download will begin immediately.

- After saving the file, open the resulting archive. It will contain only one file with the extension .exe
Double click on it to begin installation.

- In the window that appears, click the “Install” button in the lower right corner.

- As soon as the button changes its name to “Uninstall”, the installation is complete. All buttons, icons and your desktop screensaver will disappear. Restart your computer or laptop.

After completing all the steps, the watermark about activating the Windows operating system will no longer bother you.