The rufus program has advantages. Installing Ubuntu Linux from a USB flash drive using Rufus. Formatting, path to ISO and start of operation
Rufus is a small portable utility designed to creation Bootable USB devices – flash drives, USB-HDD, memory cards. Supports Russian language, distributed for free. Meaningful benefits Compared to many analogues, Rufus has four:
- The process of creating bootable media occurs quite fast;
- Devices formatted both as a separate stage and in a single process directly when recording the distribution kit on them;
- Supported anyISO-images– installation processes of Windows, other operating systems, LiveDisk, as well as DD images;
- Not provided To work with BIOS UEFI, distribution kits (which are Windows 7, individual builds of Linux and LiveDisk) are adapted by the utility to the firmware of new generation computers.
Program settings
Rufus is so minimalistic that among the general settings it only provides change language interface.
The settings offered directly in the utility window are creation parameters bootable media, optimally set by default, but changeable if necessary. Let's look at these parameters using the example of creating a bootable USB flash drive for installing Windows.
Selecting a flash drive and BIOS type
First of all, in the column “ Device" necessary indicate the flash drive itself, if several external devices are currently connected.
The most significant column for creating a bootable UEFI flash drive is the second one. This parameter, adapting the media to its definition in the BIOS UEFI. If the computer is based on this and the hard drive has a partition style GPT, from the drop-down list of the second column select “ GPT for computers with UEFI».
For computers based on regular BIOS (Legacy) and in cases where the UEFI interface is intentionally disabled, in this column you must select “ MBR for computers with BIOS or UEFI». 
File system
Column three is responsible for file system carrier. In most cases choice will stand between two types - FAT32 and NTFS. 
For BIOS UEFI, choosing FAT32 is important. A flash drive with this file system will boot successfully and will also work on a computer with a regular BIOS. However FAT32 will not see files with weight more than 4 GB. Suppliers of operating system distributions are well aware of this nuance. And that’s why official ISO images of Windows installation processes always weigh less than 4 GB. Usually this size is exceeded by collectors of unofficial Windows builds and geeks who create LiveDisks for all occasions. For such distributions you need to specify NTFS. If the question is about taking advantage of UEFI for Windows, then we are looking for a system installation ISO file of suitable size.
Check for bad sectors
In the column " Formatting options"Rufus offers a non-preset option - checking for bad blocks. This is an additional operation that will increase the total recording time, but you can resort to it if the flash drive periodically signals about the presence of bad sectors.
Formatting, path to ISO and start of operation
Even if the flash drive is already formatted, do not uncheck the box below “ Quick formatting" In this case, the media will be subject to full formatting - a very time-consuming procedure that does not have the best effect on the service life of flash drives.
Below we indicate the path to the ISO image to be written. Then click " Start" below. 
Confirm launch and wait for the operation to complete. 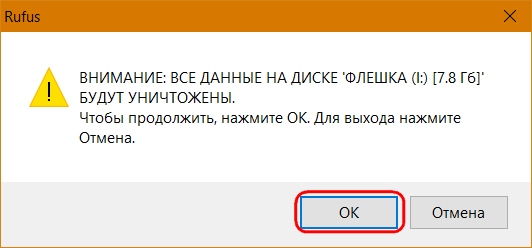
UNetbootin (Universal Netboot Installer) is a cross-platform utility that can create Live USB systems and can download various system utilities or install various Linux distributions and other operating systems without a CD.
Free Open source Mac Windows Linux PortableApps.com
YUMI
YUMI (Your Universal Multiboot Installer) is the successor to MultibootISOs. It can be used to create a Multiboot Flash drive containing multiple operating systems, antivirus programs, disk cloning, diagnostic tools, etc. Unlike MultiBootISO, which used grub to boot ISO files directly from USB, YUMI uses syslinux to boot extracted distributions stored on a USB device and reverts to using grub to boot multiple ISO files from USB if necessary
Free Open source Windows Linux PortableApps.com Wine Mac OS X WineBottler
Universal USB Installer
Universal USB Installer is a Live USB USB Creator that allows you to choose from a variety of Linux distributions to install on your USB drive. The universal USB installer is easy to use. Simply select your Live Linux distribution, ISO file, your Flash disk and click Install. Other features include; Save (if available) and fat32 ability to format flash drive (recommended) to ensure a clean install
Free Open source Windows
Ultra ISO
CD image files are easily created using UltraISO. Duplicate discs to CD image, create bootable CDs and audio CD images, and UltraISO also handles DVD image files. If you need to know how to make a CD image or you need to edit an ISO image file, UltraISO is the tool you need
Paid Windows
BurnAware
BurnAware is a complete and easy-to-use burning software that allows users to burn all types of files such as digital photos, images, archives, documents, music and videos to CDs, DVDs and Blu-ray Discs (in including M-Disk). With BurnAware you can also create bootable or
Free (with restrictions) Windows
WinToFlash
WinToFlash launches a wizard that will help you make the USB bootable and extract the contents of the Windows installation CD or DVD and prepare the USB drive to replace the optical drive. It can also do this using LiveCD or DOS.
Free (with restrictions) Windows
MultiBootUSB
MultiBootUSB is software for creating multi-user Linux boot on removable media. USB disk. This is similar to UNetbootin, but many distributions can be installed if you have enough free disk space. MultiBootUSB also provides the option to remove distribution(s) at any time if you wish.
Free Open source Windows Linux
WinSetupFromUSB
WinSetupFromUSB is a Windows program that prepares a multiboot USB flash drive or fixed disk to install any version of Windows since 2000/XP, loads various versions of Linux and *BSD, and many Windows OS, Linux, DOS and other utilities. Since version 1.1 of the program can create a USB drive with Windows versions that support (U)EFI (Vista x64 SP1 and later x64 versions), this USB drive can be used in U(U)EFI and Legacy BIOS modes
Free Windows
SARDU
SARDU (short for Shardana Antivirus Rescue Disk Utility) creates a multi-boot USB drive, CD or DVD without crashing (personal and non-commercial use). Hard drives, external hard drives and all removable media are supported.
The boot device can include extensive collections of antivirus rescue CDs, utilities, and popular Linux distributions
Free (for personal use) Windows Linux
Many modern laptop models come without a CD/DVD drive. This allows you to significantly reduce the price and accommodate additional ports and connectors.
But the lack of a DVD drive makes administering the computer a little more difficult.
For example, there are sets of utilities for defragmenting files, fighting viruses, or working with hard drives and partitions, which can be downloaded as ISO files.
We also used an ISO image with the system when we looked at installing Ubuntu on a new computer in a previous article.
So, if you purchased such a brand new compact PC, then now you will have to learn how to create bootable USB drives and boot the computer from a flash drive.
Let's get started. To burn an ISO image of Ubuntu to a flash drive, we will use special software.
Create a bootable USB drive using Rufus
Rufus is a program for creating bootable USB drives. Works on any Windows systems, and supports many languages, including Russian and Ukrainian.
If you have a bootable Linux or Windows disk, you can use ISO image creation software to clone it and create a bootable USB flash drive from the resulting image.
First you need to download Rufus from the site https://rufus.akeo.ie, you can choose the portable version. Next, we’ll look at how to burn an Ubuntu image to a USB flash drive.
We launch the program, the interface is simple and clear, we have to make a few simple settings.
As you can see, our USB drive was detected automatically.
"Partition scheme" parameter - for modern computers you need to select "GPT for computers with UEFI".
For older PC models, you should leave it at "MBR for computers with BIOS or UEFI."
"Format options" - from the drop-down list, select the source type "ISO image". Click on the disk icon and select the ISO file with the Ubuntu image.
This completes the settings. We press the "Start" button and two more dialog boxes await us.
Check the box "Burn in ISO image mode" and click "OK".
Now, if you disconnect the flash drive and connect it again, the disk will have a new volume label and a characteristic icon.
Let's make sure that the computer is configured correctly and will select the USB drive when booting. The procedure may vary depending on the PC model:
- 1. Enter the BIOS by pressing the F2 key when booting the computer.
- 2. Move to the "Boot" section using the "Right Arrow" and "Left Arrow" keys.
- 3. Go down to the "Boot priority order" section.
- 4. Select the device called "USB HDD" using the up and down arrow keys.
- 5. Move the selected device to the first position in the list using the F6 and F5 keys.
- 6. Exit the BIOS, saving the changes you made.
When you restart your computer, the GNU GRUB boot loader will now launch, and you can navigate through the menu using the Up Arrow and Down Arrow keys.
Writing an image to a flash drive is a very common task for those who are still trying to choose a distribution or testing new versions of Linux. In Windows, we are accustomed to Rufus - this is one of the best, most intuitive and most popular utilities for writing disk images to a USB flash drive. It is rightfully considered the best and is used quite often. But, unfortunately, there is no version of this program for Linux; If you are a beginner and want to burn an image to a flash drive, you may encounter a problem with how this can be done.
In fact, the Linux operating system has its own programs for writing an image to a Linux flash drive, and there are quite a lot of them. In this article we will look at the best Rufus analogues for Linux, as well as how to use them to solve your problems. Let's get straight to the list.
If you have already tried to ask on the forums how to burn an image to a flash drive in Ubuntu, then you have probably already heard the advice to use the dd utility. This is a simple console utility that allows you to transfer data byte-by-byte from one place to another, for example from a file to a flash drive.
Despite its simplicity, it is very popular among experienced Linux users because it can write data correctly in most cases. Using this utility is very simple. You need to specify the image file from where the data and partition on your flash drive will be copied, for example:
dd if=~/your_image.iso of=/dev/sdc bs=5M
Please note that there are two possible ways to write an image to a flash drive using dd. This is directly to the /dev/sdc flash drive or to the flash drive partition - /dev/sdc1. The first option usually works, but you can try the second one. Writing the image to the flash drive will take some time, so you will have to wait.
After copying is completed, the flash drive will be ready for use. But these are not all the ways to write an image to disk; there are programs with a graphical interface, full-fledged analogues of Rufus Linux.
Unetbootin is an open source graphical utility for burning an image to a USB flash drive. It works completely differently. Unlike dd, here the flash drive must be mounted to the system and formatted into the correct file system. The utility will unpack the contents of the image onto the USB flash drive, and then add the necessary partition flags and install the bootloader so that everything works as it should.
You can select an image from the file system or download the system automatically via the Internet. In addition, you can burn images of floppy disks as well as hard drives. You can also leave free space on the flash drive so you can write files there in the future. It is an excellent alternative to Rufus Linux and is used as often as Rufus on Windows.
You can install the program from the official repositories. On Ubuntu, to install, type:
sudo apt install unetbootin
This is the next generation of programs for burning an image to a Linux flash drive. Etcher is an open source utility that can run on Windows, Linux and Mac OS. But it is distinguished by another feature - a modern graphical interface.

The utility works very simply. First you select the disk image you want to burn, then the flash drive, and then just press the button Write down(Flash!). The program will do everything itself. It's new, so it's not in the official repositories yet, but you can find a portable AppImage image on the official website.
4. YUMI
This is not just an alternative to Rufus Linux, but something more. With this utility, you can write not just one image to a flash drive, but several at once. Thus, you can create a multiboot flash drive with Linux or Windows systems.

The utility's interface is extremely simple; you can select a flash drive to burn, format it, and configure the boot menu for installed operating systems. A new version of the utility for Linux is expected to be released soon.
5.Multisystem
Another open source utility similar to YUMI. It also allows you to write several operating system images onto a flash drive. Everything is done quickly and easily. Take a flash drive, select it in the program, then select several images and write them down.

Before the images are added, the program will install the Grub2 boot loader on the flash drive, so be careful when choosing a flash drive, otherwise you may damage the hard drive.
After that, all we have to do is write down the images and we can use them. In addition, the utility has many settings for the Grub and Brug boot loader, backup and recovery of flash drives, as well as support for downloading the images you need from the Internet.
Conclusions
That's it. We looked at the best analogues of Rufus Linux; using each of these programs you can write your image to a USB flash drive. In most cases everything works quite well. For my purposes I use either dd or Unetbootin. What programs do you use to burn ISOs to a Linux flash drive? Write in the comments!
For dessert, a video on how to use one of the most popular programs - Unetbootin:
Rufus is a free program from Akeo that allows you to create bootable media (DVD, USB, memory cards, etc.) with Windows, Linux, Unix operating systems, as well as various assemblies from an ISO image. According to the official website Rufus, below is an incomplete list of ISO images that the program supports Rufus:
- Arch Linux
- Archbang
- BartPE/pebuilder
- CentOS
- Damn Small Linux
- Debian
- Fedora
- FreeDOS
- FreeNAS
- Gentoo
- GParted
- gNewSense
- Hirens Boot CD
- LiveXP
- Knoppix
- KolibriOS
- Kubuntu
- Linux Mint
- NT Password Registry Editor
- Parted Magic
- Partition Wizard
- Raspbian
- ReactOS
- Red Hat
- rEFInd
- Slackware
- Super Grub2 Disk
- Tails
- Trinity Rescue Kit
- Ubuntu
- Ultimate Boot CD
- Windows XP (SP2+)
- Windows Server 2003 R2
- Windows Vista
- Windows 7
- Windows 8
- Windows 8.1
- Windows 10
Supported languages: Russian, English, German, Spanish, French, Italian, Bulgarian, Polish, Latvian, Lithuanian, Turkish, Ukrainian, Croatian, Greek, Portuguese, Romanian, Vietnamese, Arabic, Chinese, Japanese, Korean, etc.
First you need to download the latest version of the program Rufus:
To create a bootable USB drive with different operating systems you need:
1. Utility Rufus
2. USB drive (the volume depends on the size of the ISO image, which will later be written to the USB drive)
3. ISO image of the operating system
The process of creating a bootable USB drive.
1. Download the utility Rufus
2. Download the iso image of the operating system, which is required for a bootable USB drive
3. Launch the program Rufus
4. In the program window that opens, in the drop-down list of the section Device you need to select the desired USB drive

Fig.1 Selecting USB storage device in the program Rufus
5. In section Partition layout and system interface type in the drop-down list you can select the desired mode for using USB media, either MBR for computers with BIOS or UEFI (the most popular option), or MBR for computers with UEFI, or GPT for computers with UEFI.

Rice. 2 Selecting a partition scheme and system interface in the program Rufus
6. In section File system You can select NTFS, FAT32, UDF or exFAT from the drop-down list.

Rice. 3 Selecting a file system for a USB drive in the program Rufus

Rice. 4 Selecting the cluster size for a USB drive in the program Rufus
8. To speed up the process of creating a bootable USB drive, you need to check whether the checkbox is checked Quick formatting.
9. Click on the icon with the image of the drive and select the ISO image of the operating system that you want to burn to the USB drive.

Rice. 5 Selecting an ISO image for a USB drive in the program Rufus
10. After selecting the ISO image, you can specify for convenience in the section New volume label name of the operating system that will be written to the USB drive and press the button Start.

Rice. 6 Create a volume label and start the boot creation process
USB drive in the program Rufus
11. After starting the process of creating a bootable USB drive, a window will open warning that all data on the disk will be destroyed. Press the button OK.

Fig.7 Window warning about the destruction of data on the disk in the Rufus program
12. Once you have finished creating the bootable USB drive, you can close the Rufus program. Before you can begin installing the operating system, you must first set the correct boot priority in the BIOS.
Found a typo? Highlight and press Ctrl + Enter