View topic. View topic Seduce profile powered by smf
Long time no love for seobayers so iam writing this tutorial for you guys:
One of the biggest mysteries about xrumer has been creating profiles and me myself being a noob , but a smart one:P, always try to find ways for creating thins easier. Recently i was doing a test and found a good way of generating profile links easily. Before we start i will post results:
Tools- Hrefer 3.3, Xrumer 7.5, Scrapebox, Adword tool for keyword, Keyword studio pro and a linklist merger
Linklist generated- 250k (unique domains)
Profiles generated- 60k (unique domains) - a lot in just 20 days.Step 1
Generate keywords which people actually try to rank for. This is the most crucial step in profile building. I saw a huge list being shared on another forum which had over 300k words. I say what is the use for searching keywords like "aaaaa", "abra ka dabra" etc. Who will rank for these? So i used common sense and generated keywords which people actually use for ranking.Usage -
1) Note down atleast 100 keywords from google search (not adwords) which are broad and have massive competition like credit card, insurance etc.2) One-by-one load these keywords into keyword studio pro (i used crack version:P) and generate similar keywords. Note that these words are better than scrapebox wonderwheel scraper.
3) Load all these keywords into scrapebox and generate keywords upto 3 levels. De-dup them etc. and save them. Then in the end make a huge list of all the keywords generated from original 100 words.
Step 2
Load them into hrefer but before you begin do this:1) Edit additive words and just use these:
"powered by smf"
"powered by vbulletin"
"powered by phpbb"
"powered by ip.board"Etc. etc. etc. but only forum software names. I did this so i don"t know which are most useful.
2) Edit search engine filter and place this:
Member.php?action=
profile.php?viewprofile=Etc. etc. basically all those filters which have view profile in their url.
The logic is to get maximum of those profiles which have been made for the purpose of visible backlinks. (Iam having trouble loggin into my dedi so will post the complete list later)
3) Start scraping and wait for it to complete.
Step 3- Another very important step.
Usually you all just load the links in xrumer and blast away but no you should analyze the database also to remove dead ones. So click on tools -> database analysis
1) Type the same "powered by" stuff into the box on left hand side.
2) Choose your linklist and select search content and 50 threads and go. This will remove all 404 forums and blogs etc.
Now we run xrumer with this linklist.
1) Load the database and setup your project.
2) Goto advanced options -> select register only, goto speed<--->success and move all the way to success and select recaptcha with 40-50 atempts.
3) Start and let it complete.
While the posting is done i usually move to the next keyword building step.
When all your profiles are created, load them into linklist merger and create a big file from it. Now remove dups and all and you have a good profile link package.
So the jist is - keywords which people search - only few additive words and filters - right settings etc.
You will notice that from your final linklist with medium success and recpatcha off and 20-25 atempts for captcha you will get approx 30k+ profiles. I get 60k with recaptcha and half-success
Happy profile creation....
In case anyone doesn't know, Simple Machines Forum - SMF for short - is, as stated on the official website, a free, professional-grade package that will allow you to organize your own online community in a few minutes. on this engine, you can look here. I myself set up my own forum on it (by the way, go to FreeForum.biz).
It doesn't matter how much or little spam appears on your forum. The important thing is that you spend your valuable time on moderation. Setting up a plugin that will do all the work for you takes a few minutes, and it will save you, in total, days and months, which will add up to the minutes you would have spent erasing messages and deleting users.
I will note that I tried to fight spammers on my own - I blocked access via IP and even subnets. It really worked, it filtered out a lot of garbage, but nevertheless, once every one or two days someone made it through. And it took quite a lot of time to replenish the database of banned IPs. I thought there must be a better way, and indeed there was!
1. Installation and configuration of Stop Spammer
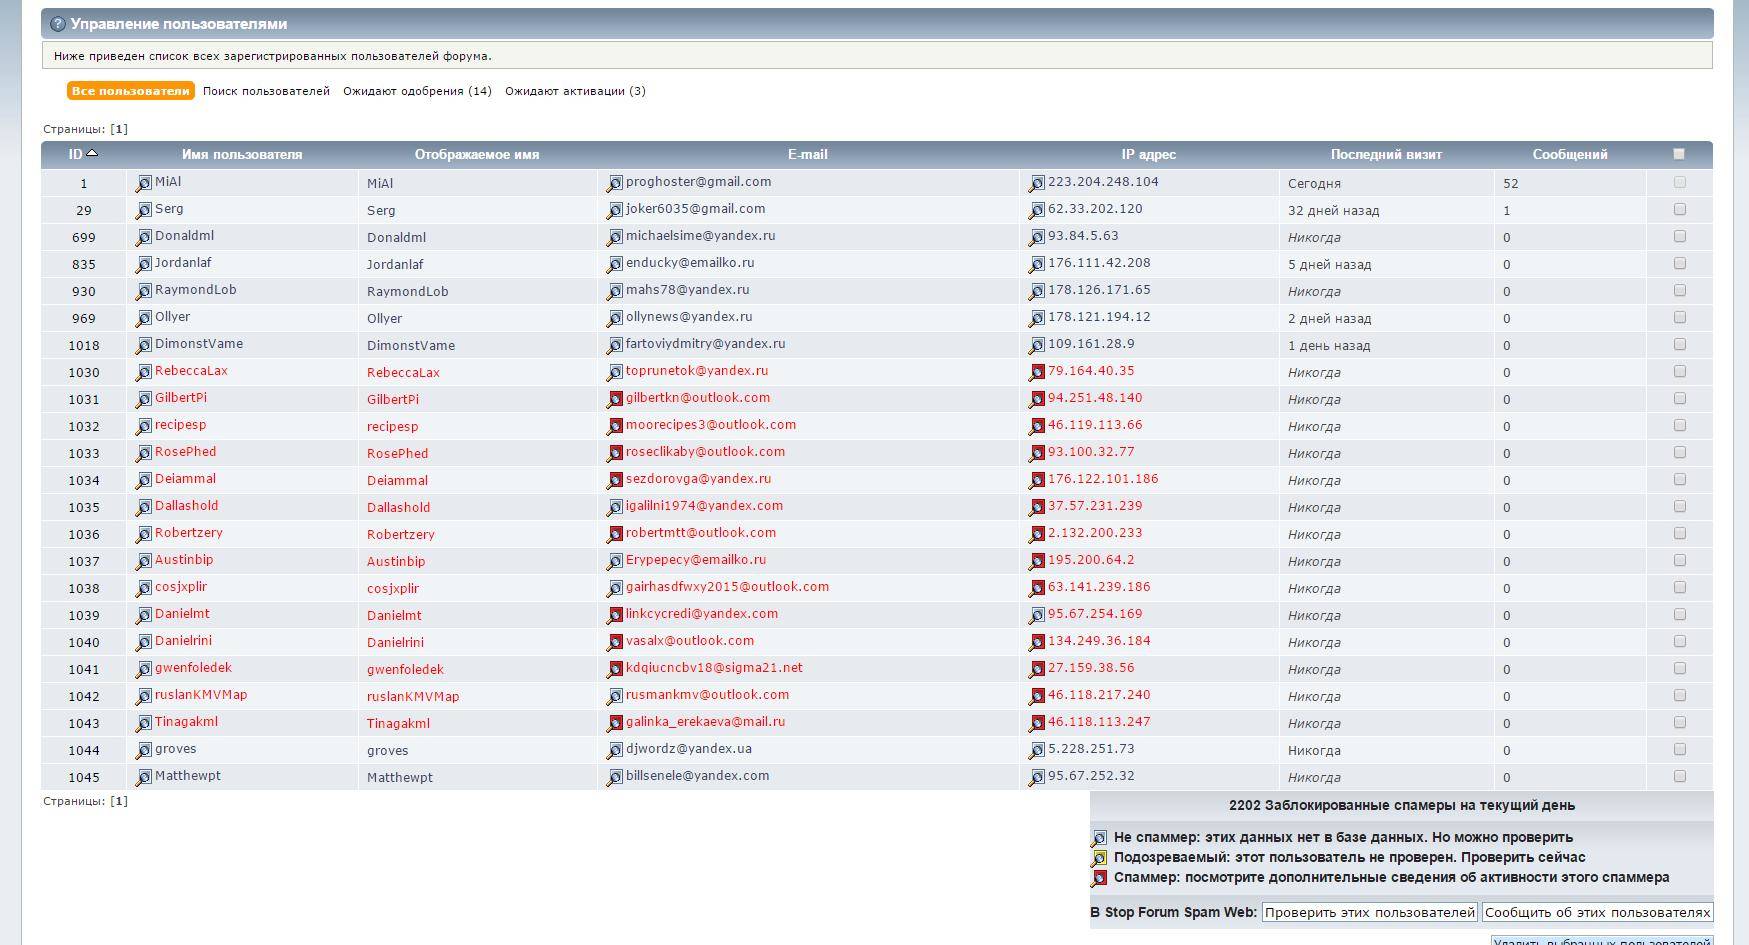
In two weeks of operation, this plugin blocked 2202 fake users. Each of them would leave at least one message. The spammers show no signs of slowing down and I would spend time cleaning up my forum every day.
Instead, every few days I go to the user management page and see something like this:
I move on to the “Awaiting approval” section (these are the spammers found who are deprived of the opportunity to leave messages until their accounts are approved by the administrator). I check the “Select all” checkbox and delete them with one click:
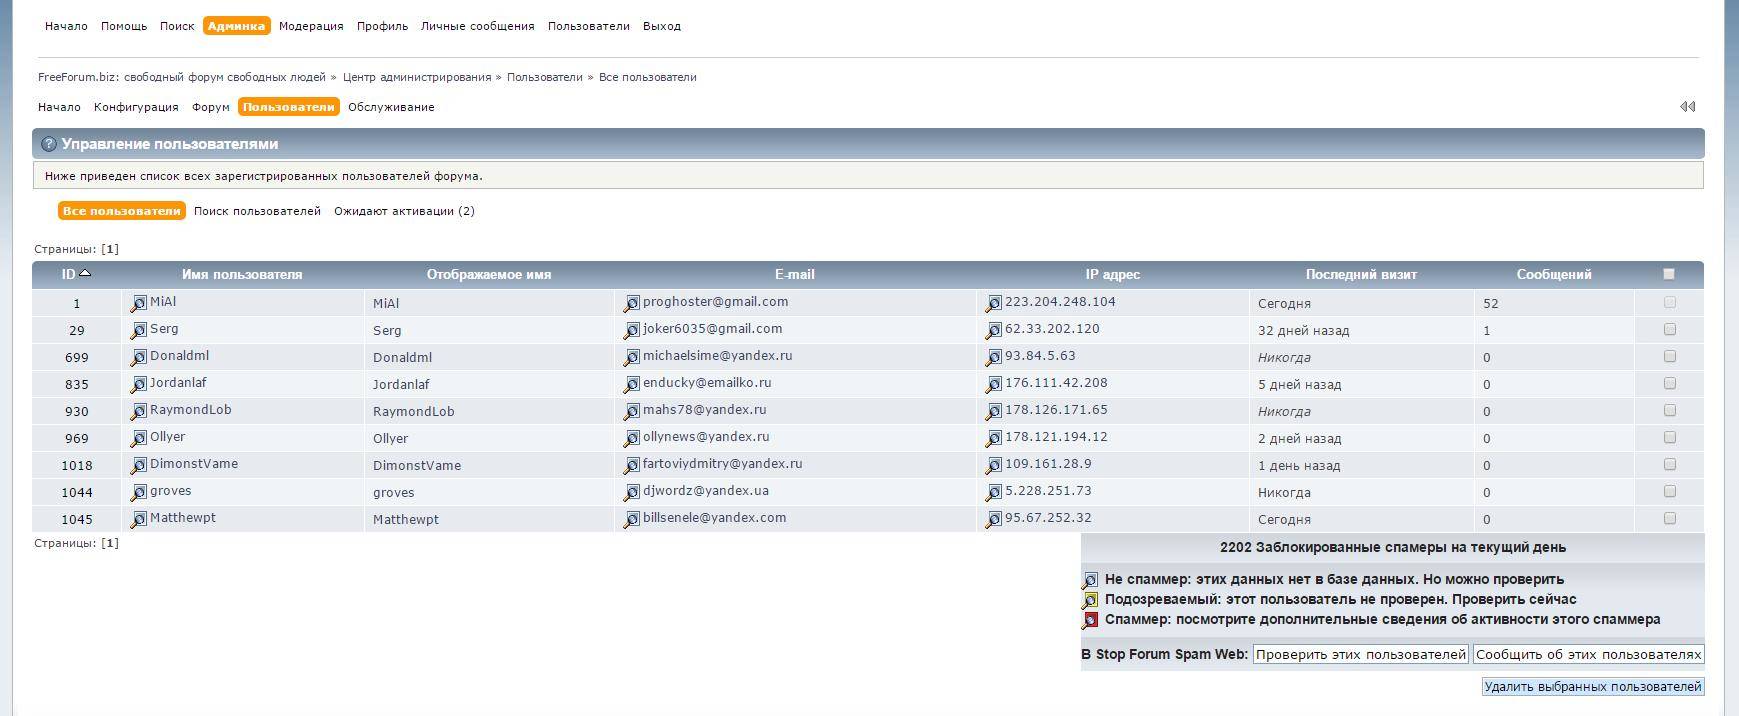
That's it, all spam accounts go into oblivion. Let's return to our list of users:
It can be seen that the list has thinned out noticeably, but who are the rest? We select everyone and send them for verification with one button:
One “red” one appears, we immediately delete it. If you have free time, you can do others. If you don’t have time, then don’t do anything with new users - most of them will “blush” during subsequent checks. If you have time, you can go to their profiles and look - if there is a link in the signature, they will immediately be banned, these are fake accounts of spammers who will never leave a single useful message.
I told you how to use this magical plugin, now I will tell you how to install it.
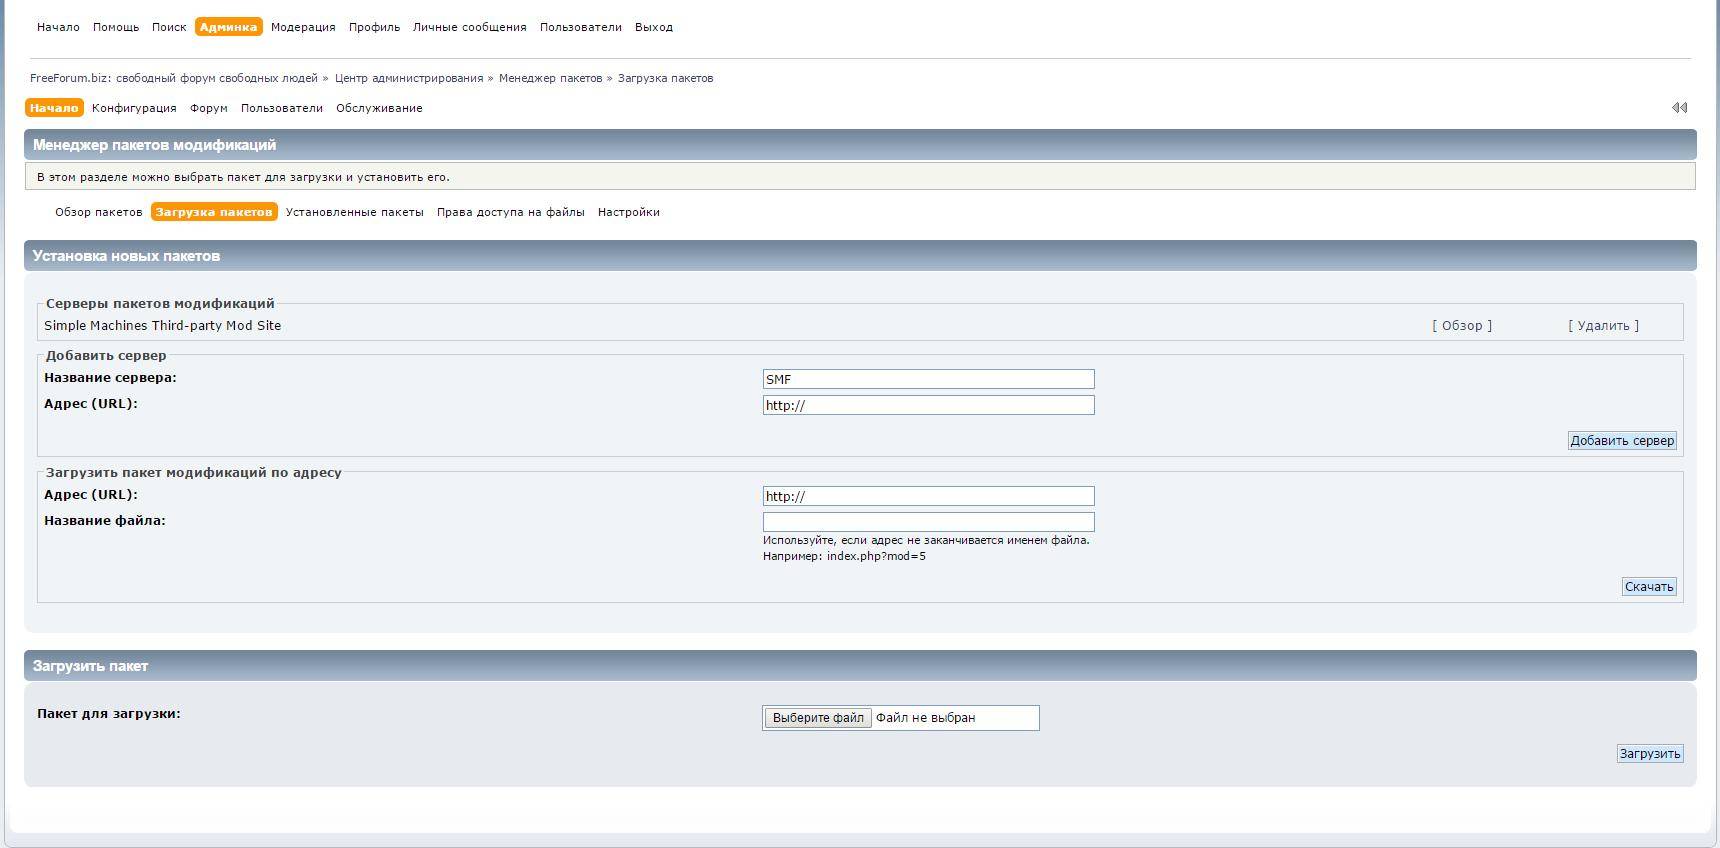
Download two files: language_full.zip (this is the language pack for translating the plugin) and StopSpammer_v2_3_9.zip (the number may be different, as versions are updated). Unpack the contents of the StopSpammer_v2_3_9.zip archive into some folder. Unpack the language_full.zip archive into the same folder and agree to replace the files. Now pack our folder into a zip archive.
In the admin panel, proceed to install packages. Opposite the “Download package” inscription there is a button for selecting a file on your computer. Select our new archive (where we replaced the language file), upload it to the forum and activate the package.
That's it!
Additional configuration of the plugin occurs in the admin panel: go to
Users → Registration → Settings
You can leave the default values there. There is also a field “Your API key”. Without this key, you will not be able to report new spammers (but the plugin will work and filter known spammers). If you want to get your own API key, go to www.stopforumspam.com to register, and then enter the key here. If you have not received the key yet, leave the field blank. Then the default key will be used.
2. Installation and configuration of Anti-Spam Links
Adherents of the SEO religion (you can read more about my attitude towards SEO-nists in another) have a firm conviction that by increasing the number of links to their site, they “promote” it (for some reason the idea of creating interesting and high-quality content does not appeal to anyone doesn't come to mind). He would be a sucker, but there would be ways to extract money from him. So, some “citizens” provide services for “running” sites through forums. They create a large number of accounts on different forums and insert backlinks there in signatures and other available fields. Despite the fact that even “SEO experimenters” have already experimentally proven that these links are of zero use, some warn that you can get a ban from search engines for this, Yandex, for example, simply ignores links on ALL forums and sites where anyone can leave links. Google also has similar algorithms - ignoring links in comments, etc. But the law is not written for suckers... Therefore, we, the owners of the forums, have to reckon with the facts that “cool SEO optimizers” order a “run” of their shitty creations for a thousand rubles.
The Stop Spammer plugin will filter out a lot. But we can help him! You can take the very interest of posting links on your forum out from under spammers. This is exactly what Anti-Spam Links are for. This plugin (specific numbers can be changed in the settings) does the following:
- those who, for example, have less than five messages, cannot leave links at all
- those who, for example, have less than 15 messages, cannot leave active links, http:// is removed from links and in general these links become nubolinks (newbielink)
- those with, for example, less than 50 posts can leave active links, but all links are given a nofollow attribute.
- Well, those who have more than 50 posts can insert the most common active links, which transfer the weight of the site to the page being linked to.
Believe me, would-be SEOs are very careful about the form in which their link ends up on the site. They'll quickly lose interest in your forum if they can't easily post their shitty links to their shitty sites there.
Yes, by the way, the above rules also work in fields such as signatures.
To install this plugin, go to its official page. Download the anti_spam_links_v1.0.1.zip archive (the number may be different). Again in the forum admin, go to install packages (as you did with the previous package) and install it. There is no language file for this package, so there is no need to unpack the archive or do anything with it.
To configure the plugin, go to the section
Configuration → Setting up mods… → Setting up modifications
If you wish, specify how many messages the user must have to upgrade his capabilities.
Conclusion
These two plugins will make your life, the forum owner, VERY much easier and will save a lot of time. However, from time to time spammers break through and, at least once a week, you need to “thin out” users and delete spam messages. Therefore, do not abandon your web resources!
Everyone knows that I simply cannot live without Joomla, but, in my opinion, there is no good forum for components. That's why I work with forum engines. One of the new ones that I just recently started using is Let's start a new SMF category with hopefully useful stuff. We start small, and as beginners it’s very useful.
First steps in search engine optimization Simple Machines Forum: removing copyright and external links
Let me make a reservation right away that I only work with smf 2 and this article will relate specifically to this version of the free forum engine.
And so, regular readers know how much I don’t like to put “10” external links to the official websites of engines, including forum ones. That is why, first of all, we remove the copyright and as many as 4, attention 4 external links of the form " SMF 2.0.2 | Simple Machines | SMF © 2011 | XHTML"! To do this, connect to the site via FTP forum/Themes/ name of your theme/ and edit the file index.template.php. Naturally, at the very bottom there is a code (about line 330) that displays external links that we don’t like so much. Therefore we delete: "
", theme_copyright(), " " And "", $txt["xhtml"], " ". It's all so simple and easy. In the coming publications, expect new materials on promoting and optimizing forums on SMF/By selecting a specific topic to view, users are taken to a page with a list of messages in that topic.
Each individual message usually looks like this:
Typically, along the top and bottom of each page there will be a small menu containing (depending on the forum settings) the following buttons:
- Answer- The most popular button with which users can leave new messages in a topic.
- Notify- Subscribe to receive notifications about new messages in this topic.
- Mark unread- You can mark the current topic as unread.
- Submit this topic- You can send a link to the current topic to your friend/acquaintance by indicating his e-mail.
- Seal- Create a printed version of the page with the content of the current topic, for viewing before printing.
Typically, the list of messages in a topic is displayed in vertical order: old messages at the top, new ones at the bottom. But each user can set a different, horizontal order in his profile. Then new messages will be placed at the top. Each message in the list is divided into two sections. The left section contains brief information about the author of the message, and the right section contains the message itself.
- Author Section
- Author of the message- Nickname of the user (or guest) who left this message.
- Signature above the avatar- Depending on the forum settings, users may have pre-created inscriptions above their avatars or can set them themselves. Typically, this signature serves to individually “mark” users.
- Main group- Most often, all users are in the Normal Users group, the name of which is not displayed. If the group is any other, its name will be displayed in this place. If the author of the message is a guest, a note about this will also be displayed here.
- Group based on number of messages- Depending on the number of messages left, users are divided into different groups (Newcomer, Guest, etc.). The name of this group may not be displayed if the user is a member of a special group or its display is disabled in the settings of the current theme.
- Emblem- Usually the number of images in the emblem is set depending on the rank of the group (for example, beginners have 1 star, advanced users have three, veterans have five), or they use different images for different groups.
- Number of messages- Displays the current number of messages of a specific user.
- Icons for contacting the author- Display of various icons that help in one way or another to contact the author of the message: link to profile, link to website, ICQ number, e-mail, sending a personal message.
- Post Section
- Message icon- Individual icon selected by the author when creating/sending a message.
- Message Subject- The title of the message usually matches the title of the topic, but at the request of the author of the message it can be changed to any other.
- Button panel- At the top of each message, in the right corner, a number of buttons are displayed that allow you to perform certain quick actions on the text of the message: quote, edit, delete, etc. (depending on the settings and installed mods). Most often, the “Quote” button is displayed; all other buttons are available only to the author of a specific message, as well as moderators and administrators.
- Date and time- The date and time the message was published is displayed directly below its subject. A warning about subsequent editing of the message will be displayed under its content and above the author's signature.
- Text- Contents of the message (if there are no messages, then why a forum?)
- Signature- If the user has specified his signature in his profile, it will be displayed here, under the text of the message.
- Report to moderator- You can quickly report each specific message to the moderators (for example, complain if swear words are used in the message).
- Recorded- A mark indicating that the IP address of the computer used by the user or guest when sending the message is saved in the logs (in the database). For administrators (and for those who are allowed to do so), the IP itself is displayed next to this mark.
While these are the most common message elements when viewing threads, users can hide some of them by editing their profiles.