Setting the operating system. Creating a system recovery disk and loading from it. Commands of general purpose
To configure and configure the Windows operating system, there is a special tool called "Control Panel". It contains funds to change the main parameters of the computer, such as: settings for screening and windows of applications, installation and removal of programs, control system management, settings of individual system components and many other.
It may seem that the change in the system settings is a lot of experienced users and a newcomer to do this completely unnecessary. But in practice, everything really looks different, since in many cases without the implementation of elementary settings, such as connecting to the network, just do not do.
In general, all Windows settings can be divided into four groups:
- Functional - Settings responsible for the normal operation of the entire system. Among them, you can select configuration of the Internet connection, configuring the correct mode of operation of the monitor and security system.
- Personalization - Changing the design of the system and its appearance under your personal needs and tastes.
- Tuning - Thin setting up Windows, designed to optimize its performance.
- Twiking - Change the hidden parameters of the system using special utilities (twisters).
The two last categories of settings are more designed for enthusiasts, since the tuning system in inexperienced users do not produce better, and the benefits of tweaking is generally doubtful, especially for Windows 7. But to make functional settings and personalization accounts for almost every user of the Windows system.
To quickly configure various Windows7 components, various ways can be used, but in general, all the main system settings are assembled in a special "control center" with the speaking name. Link to it can be found on the right side of the menu. Start or from above in the window A computer.


To quickly access this important tool, the control panel icon can be removed on the desktop. To do this, click on the menu. Start At paragraph Control Panel Right-click and put a tick opposite the "Display on the desktop" command.

True, all this is true for Windows 7 or Vista. In Windows XP, you can simply create the desired shortcut, having threw the panel icon from the Start menu to the desktop.
The control panel contains several dozen icons designed for the settings of various system components, but in Windows 7, for the convenience of users, the developers combined them into groups.

This section contains utilities for checking the status of your computer and solve possible problems, whether it fails when you start any application or suspicion of viral infection. Also, in this section, you can configure Windows Security and Update Settings, to view the information about the installed system and equipment, execute archiving and recovering data, select the power management plan, as well as change the computer control settings.
.png)
In general, the changes in this section should be approached with great care, since many of them can directly affect the operability of the operating system and its degree of protectedness to the effects of intruders.
Control Access to the global Internet and local networks, as well as changing the connection parameters to them. Here you can view the Properties of Internet Explorer and perform the necessary settings, such as changing the homepage.

In this section, you can view and adjust the parameters of the computer devices, including: mouse, printers, monitor, video card and sound fee. Here, the developers re-turned on the system's energy saving setting and for some reason change the autorun parameters of the optical disks.

With this item, you can delete or change the installed programs, as well as some components of the Windows system itself. Here you can choose which default programs will be used for specific tasks, and configure the display of gadgets on the desktop.

User Accounts and Family Security . It is configured to configure user accounts, adding them, change or delete, as well as the installation of parental control.

This section uses the Start menu and taskbar menu, the appearance of the desktop and window items, set the folder parameters, as well as other all kinds of the appearance of the system.

Setting date, time, time zone used in the language system and regional standards.

Section that allows you to set up a system for working with poor vision, hearing and limited motor capabilities.

If you carefully viewed all the groups of the control panel, then probably noticed that some teams occur several times completely in different sections, and the logical of the overall structure as a whole causes some doubts. For example, why in the "Equipment and Sound" group are the settings of the files, and is duplicated by the "Power" section? That is why, it is not always convenient to work with the categories, as you solve the developers from Microsoft to put one or another setting somehow I do not want.
In order to avoid all this confusion, you can enable another control panel display mode, in which all controls will be displayed simultaneously in one window.

In this case, the size of the icons can be both large and small. Changing the display mode is performed using the View menu located in the upper right corner of the computer settings window.
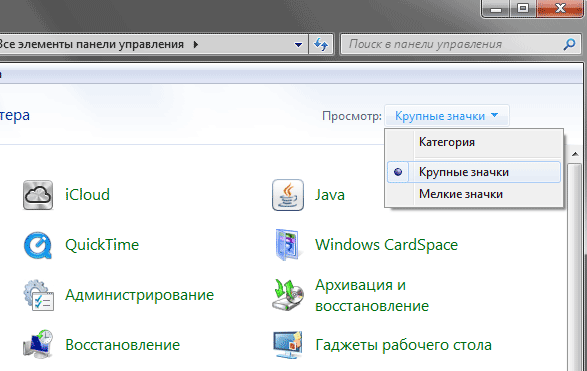
On the control panel, over time, in addition to standard icons, additional, allowing you to manage and configure some of the programs you set and devices. For example, in this image, we see the appearance of the ICloud cloud service icons, the Java platform and Quick Time program.
For more information about the various settings of Windows system, read in our following materials.
The operating system includes a variety of interface and parameter settings and provides various ways to perform it. This allows you to adapt the system to the user requirements.
In Windows, you are configured: Desktop, current date and time, keyboard, mouse, options in the [Start] menu (Main menu) and much more. Settings are called custom configuration and saved for each registered user. When subsequent booting OS requests the name (account) and user password. In the case of coincidence, the configuration of settings made earlier.
Setup tools are: system folder components Control Panel, The context menu of Windows objects, the controls of the operating system dialog boxes and its applications.
In a system folder Control Panel Collected Administrative utilities that provide one of the most convenient and not leading to the catastrophic consequences of the methods of setting up a system, software and hardware. The dialog box of this panel is activated by the command Start tuning panel management.
For details on assigning control panel applications, you should open the window. Control Paneland execute the command Type Table.
Consider the most frequently used settings.
All tasks associated with the setup of hardware are performed using the hardware wizard wizard , which is called by the launch utility Equipment installation. With it, you can install new hardware devices, to diagnose hardware conflicts, set the properties of devices, disconnect the devices.
Windows implements the ability to automate the installation process of new equipment by supporting the Plug-and-Play mechanism (install and use), which involves automatic recognition of the new device system and selection of the required driver (OS includes many built-in drivers for the most common devices of various manufacturers).
Installation and removal of software products and components of the operating system, Microsoft Office office package, as well as other package installed on the computer performs utility The installing and deleting of programms. With it, you can also create a boot disk that allows you to start the system in critical situations (when the operating system is destroyed on the computer).
Utility Language and standardsallows you to establish regional standards (display numbers, date, time, monetary units) and choose input languages.
Utility Properties of the Observer Allows you to perform individual output setting on the screen and connection parameters to the Internet.
Using the utility Date and timecustoms can set time zone, current date and time, as well as automatic summer time.
Utility Keyboard It serves to configure the keyboard language layout (Languages \u200b\u200bare usually installed English and Russian, but you can also add new, for example, German, Belarusian and others), displaying its indicator on the taskbar, as well as the speed of re-entering the symbol.
Using the utility Mouse You can change the view of the mouse pointers, to provide the convenience of the left-hander.
Utility Screen It is used to configure the background of the desktop, the color and font design of the window interface elements, the monitor parameters, the screensaver appearing on the screen during the period of temporary termination of the user.
With the help of the team Properties Windows object context menu It is possible to customize some of its parameters, for example, you can open a folder for shared access; restrict access to it by setting a list of users who have permission to work with its contents; Allow only reading files from the folder and others. A set of properties available for change is determined by the type of object.
The main features of the setup using the controls of the operating system dialog boxes are laid in the menu Viewand Service, for example, with the help of the command View Arrange icons By disk namein the My Computer window, the output of the list of disks in alphabetical order, and on the team Service Connect a network drivethe selected disk of any network computer is perceived by the system of this computer as one of its "native" discs. At the end of working with a network disk it must be disabled by the command Service Disable network drive.
Consider performing some settings using components. Control panels:time and dates, mice, numbers display formats (dates and time), screen, keyboard layouts .
1. Open the dialog box Date and time, view the settings of the time zone, the current month, date and time. If their parameters do not correspond to the truth, then specify new parameters and click the [Apply] button.
2. Configure the mouse settings to work left-handers: Open the dialog box MouseInstall the switch For Levshi. At the same time, the manipulator manipulator buttons are renamed: the left button is to call the context menu, and the right is the object selection or opening it (click or double click).
3. Change the mouse pointer view: in the mouse dialog box, select the tab. Pointers. To change the view of at once all pointers, select another scheme in the group Scheme. To change only one pointer, select it, click the [Overview] button, and then double-click the File icon, which contains the desired pointer.
4. Restore the initial mouse parameters.
5. Review and, if necessary, change the standards of numbers, cash values, dates and time: Open the dialog box Language and standards, tab Regional standards Select the Regional Standard to be used when selecting date, time, numbers and cash values.
6. Review and change the screensaver settings: Open the dialog box Screen, Select the tab Screensaver and in the list Screensaver - Its view, for example, a labyrinth, and click the [View] button. If you wish, you can install a screensaver password, change the computer idle time, resulting in installing the screensaver on the screen.
7. View and change the screen settings: Open the dialog box Screen, Select the tab Registration and in the list Scheme Choose, for example, the desert. In the window, all changes in the design of elements will dynamically affect. Then highlight in the list Element The object to which the selected design scheme will be applied, for example, window and press the [View] button.
8. Review and, if necessary, change the keyboard layout and display its indicator: Open the dialog box Keyboard, go to the tab Language, Determine the combination of hot keys that are used to switch (ALT + SHIFT or CTRL + SHIFT), find the checkbox Display Language Indicator on Panel Tasks and analyze its condition. Add the Belarusian language to the keyboard layout: Press the [Add] button, select from the list Language - Belorussky, press the [OK] button, then the [Apply] button.
The Windows Setup can be divided into two types:
1. Setting up the interface and control panel elements - any user can produce them.
2. Changes through hidden settings (REGEDIT and MSCONFIG) and "fine adjustment" performed using special programs (utilities) that allow you to change the settings of the system itself - to obtain a positive effect during this kind of settings it is necessary to have appropriate knowledge and skills.
The following settings include the following settings:
setting screen settings: Permissions, Color reproduction quality (color mode), Screen update frequency, image scale;
desktop Setup: Create folders and shortcuts, enable / disable the display of system folder icons and their appearance, cleaning the table from unused items, displaying the specified web page on the table;
setup Design: Select Color, Desktop Background, Screen Theme, Interface Style and Screensavers;
setting the taskbar and the "Start" menu;
setting up the "closed" folder (icon, type, drawing) and setting the folder window.
These settings are made by changing the corresponding properties of objects.
Control Panel- a kind of "control center" of the operating system, with which you can change the various Windows settings. The control panel elements are the main tool for various settings.
The control panel elements can be represented in the window in two types:
2. Classic view(as in previous versions of Windows) - all elements in one window and each element is indicated by a separate icon. If you specify the display of the display "Table", then a comment will be displayed for each item (Fig. 3.5).

Fig. 3.5. Classic view of the control panel
Using the control panel items, you can configure: System Date and Time; language and regional standards; Connections from the Internet and the parameters of the local network; sounds; speech; fonts; assigned tasks (task scheduler); Various devices (keyboard, modem, printers and faxes, scanners and cameras, mouse); energy-saving monitor functions; User accounts, etc. Using the appropriate items, you can install and delete programs and Windows components; Start the equipment installation wizard, which will check the system for unrecognized devices or components; Open Device Manager window to verify the correctness of the device and update drivers, etc.
3.4 Service Programs
Service programsexpand the capabilities of the system maintenance and ensure the convenience of the user. This category includes maintenance systems, software shells, as well as utility programs (service programs).
Maintenance systems- This is a set of software and hardware that perform control, testing and diagnostics and are used to check the functioning of the computer devices and detect faults in the process of its operation. They are a tool for specialists in the operation and repair of computer technical means.
Software shells of operating systems- These are programs that allow the user with different from the OS provided (more understandable and efficient) to carry out actions to managing computer resources.
Utilities programs (service programs)- These are programs that serve to perform auxiliary data processing operations when maintaining computers (diagnostics, hardware and software and software, optimization of the use of disk space, restoring information destroyed on a magnetic disk, protection against computer viruses, etc.).
Utilities can be distributed in three ways:
1. Delivered to the market as independent programs;
2. To enter into multifunctional packages of service utilities;
3. Included in the operating system (in the form of service programs).
As an example of a package of service programs, you can bring the package Norton Utilities for Windows(Symantec) containing a set of programs implementing many important and useful functions that are difficult or even impossible to implement using OS own funds.
We list some utilities of this kit, which most often have to face in practice:
Norton Utilities Integrator.- combines all programs from Norton Utilities, breaking them in "thematic groups";
Norton Windoctor- Optimizes the register (Windows parameters database), controls the correctness of all program shortcuts available in Windows and comply with the file extensions of viewing and editing files;
Norton Disk Doctor.- checks the hard disk for physical damage to the magnetic layer, monitors and eliminates various damage to the file system;
Norton Connection Doctor.- checks the modem installed in the computer and tests connections from the Internet;
Norton Unerase Wizard- restores deleted files;
Norton Speed \u200b\u200bDisk.- produces disk defragmentation;
Norton Optimize Wizard- optimizes the size of the register by removing "empty" and unnecessary records from it;
Norton Spase Wizard- produces disk cleaning;
Norton System Doctor.- checks the disk for viruses and errors, determines whether defragmentation is defiated, etc., and also scans Norton Utilities if the update is necessary;
Norton Rescue Disk- Allows you to create a system boot diskette with all the necessary system files and utilities to restore the system in case of failure.
Norton Wipeinfo.- deletes files without the possibility of their recovery;
Norton Recyle BIN- creates an improved secure basket for Windows;
Norton System Information- issues full information about the computer;
Windows XP includes a number of service programs, as an example of which the following can be brought.
Disk cleaning program- Clears the space on the hard disk. It checks the disk and displays a list of temporary files, files from the "cache" of the Internet, as well as unnecessary software files, the removal of which will not lead to negative consequences. You can select delete some or all of these files.
Disc Checking Program- Checks the hard disk for errors of the file system and the damaged sectors on the hard disk.
File System Errors- It is damage to the file structure and the system area of \u200b\u200bthe disks (boot records and file posting tables), which may occur due to incorrect shutdown of Windows or application programs, suddenly disconnecting the power of the computer, the actions of computer viruses, etc. To such errors include: cross references (In the clusters of clusters of multiple files, the same cluster appears); Lost clusters (clusters not marked as free, but at the same time not occupied by any file), errors in file names, etc. When setting the corresponding option, the disk check program corrects such errors.
Damage to the sectors on the hard disk is associated with mechanical damage to the surface of the disk, its low quality or aging of the magnetic coating. These defects can be caused by the influence of magnetic fields, leading to a violation of the information recording structure on the disk. When damaged sectors are detected, the corresponding clusters are declared defective (marked), and thus their use is blocked.
If the Windows session was completed incorrectly or disabled (disabled power), then with the subsequent enlarge of the computer, the disk check program is called automatically.
Disk defragmentation program- Performs the analysis of local disks with the subsequent search and merging of fragmented files and folders. After the defragmentation procedure, each file and folder occupy a single continuous space, as a result, access to them is effective. Combining individual parts of files and folders, the defragmentation program also combines into a single integer free space on the disk, which makes it less likely to fragmentation of new files.
Archiving program- creates an accurate copy of the contents of the hard disk (archive on the outer medium) at a certain point in time.
System Recovery Program- Allows you to restore the system at the time of creating the recovery point - the saved computer status. Recovery points are created automatically by the system itself as control and upon the occurrence of specific events (installation of programs, system update, etc.), or manually by the user.
The System Restore Program provides preservation of personal files without performing file recovery in the My Documents folder. In addition, this program does not restore data files with frequently used extensions (.doc, .xls, etc.). If the program has been set after creating a recovery point, then in the recovery process, this program will be deleted, and the data files created by the program remain. All successful recovery operations are reversible, they can be canceled. All unsuccessful update operations are automatically canceled by the program itself.
The number of saved recovery points depends on the activity of the computer, the size of the hard disk (or the size of the partition containing the Windows XP directory) and the number of space on the hard disk allocated for storing the information "System Recovery" program.
symbol table- Allows you to enter special characters that are missing on the keyboard (for example, a paragraph sign, a brand sign, mathematical symbols, etc.), or symbols from sets of other languages.
Assigned tasks- Runs task planning wizard to compile automatic task execution on your computer.
File and Parameter Transfer Wizard- Organizes the transfer of Windows system folders over the local network to another computer while saving all settings and parameters.
Command line- The shell in which the MS-DOS environment is emulated in Windows.
Delete "extra" programs from autoload
First of all, pay attention to the desktop area next to Cha yourself, where, after a year of work, it can accumulate at least de Syatka a variety of shortcuts, which are actually modules of various programs that constantly occupy part of RAM. A quick launch of programs that allegedly provide all of them can be organized much easier - for this there is a quick panel for a start-up, on which the labels of the necessary programs are placed. The label, in the face of the module, does not occupy any memory and allows you to run the program we are as fast.
The easiest way to remove from autoloading those programs that have shortcuts in the Windows directory | Main menu | Programs | Busload (for Windows 9x) or Documents and Settings | Username | Main menu |
Programs | Autoload (for Windows 2000 / XP). It is easy to simply move the label to another directory, for example in C: \\ Backup, and reboot the computer. The second way will make it easier to restore a program shortcut that you still need to upload when the operating system is started, for example, a 1C enterprise key emulator.
But, unfortunately, not all programs prescribe their name label but in this directory. It happens that the program does not even show the presence of your module in the memory of the computer, allegedly consider that the user does not need to know. With such programs you have to "tinker". But the races are watching everything in order.
Immediately it should be noted that all subsequent actions will carry out the SIA with the system registry, so take care in advance about the creation of its re-rivory copy. To do this, you need to run the program information about the system that is available in the menu. Start | Programs | Standard | Service, And select the Registry Check (for Windows 9 x) or the system recovery (for Windows XP). After that, in Windows 9 operating systems, it is recommended to manually copy, and even better for earlier unpack the archive with a backup of the registry in a specific cat log. This archive can be found in the C: \\ Windows \\ sysbckup \\ directory, while in mind that there is usually up to five such archives automatically created by the operating system. You will need the archive that is created by the last (focus on time and date of COP files). In the Windows XP operating system, you should create a rollback point, which will allow you to return the old settings instead of those that you entered during manual editing of the system registry.
The simplest option of disabling programs from autoload is the use of the msconfig utility that appeared as part of Windows starting with Windows 98. In Windows 95, you will have to use the manual editing of the system registry, since this utility is not there.
To activate this utility, select Start | Run and type the msconfig command. This will open the program Configuration of the system in which you can edit absolutely all files of the figuration files, while for different versions of Windows, the list of these files may be different. For example, in operating systems such as Windows 95/98, you will be asked to change the Autoexec files. BAT and CONFIG. SYS, while in Windows XP there will be no them, but you will be able to edit the boot file. INI, which is not mentioned in any of Windows 9 x version.
The advantage of the msconfig utility before manually editing the RA Resection is that you are removing the program from the startup temporarily, removing the check mark opposite the proofamma that you want to disable. At the same time, seeing its error, you can run the utility and again install a check mark, thereby resolving the launch of this program.
Note
A feature of Windows ME is that the msconfig utility. SYS shows not only the contents of all configuration files, but also a list of all loaded VXD drivers, which allows you to dynamically manage their download. In all other versions of Windows, it remains only manually to search for them in the registry, although there is a good opportunity to use a more advanced utility from ME, for which it is enough to copy it to a floppy disk on a computer installed Windows ME or get it out of the distribution.
You can monitor the "quality" of the removal of the profits from the startup, viewing the following sections of the system registry:
HKEY_LOCAL_MACHINE \\ SOFTWARE \\ Microsoft \\ Windows \\ CurrentVersion \\ HKEY_USERS \\ DEFAULT \\ SOPTWARE \\ Microsoft \\ Windows \\ Currentversion \\ HKEY_CURRENT_USER \\ Software \\ Microsoft \\ Windows \\ Currentversion \\
They have subsections with names RUN, RUNONCE, RUNONCEEX, RUN - SERVICES and RUNSERVICESONCE in which, in turn, the paths to the started files are prescribed. All subsections with the word ONCE in the title are intended to record the parameters that are created by various programs for Mami during installation, and after the reboot, they must, in theory, the automation is removed.
You should also pay attention to the contents of the WIN file. Ini, in particular the first partition in which the lines can be load \u003d or Run \u003d.
Very often, the following programs prescribe their modules in the auto primer:
- Computer Browser - updates the list of computers on the network. If your computer is not connected to a local network, this file from autoload can be deleted;
- DHCP Client - is responsible for the automatic definition of IP Press. If your computer is not connected to the local network and does not have a connected modem, you can turn off this program from the startup;
- Event Log - Profamma leads a service log, recording the events on this computer in it. If you are confident in the stability of the work of all equipment and all programs, it can be from the carriage of auto star;
- File Open - the program is designed to speed up the search for all files created by Microsoft Office. In most cases, it can be turned off from autoload;
- IPSec Policy Agent - TCP / IP Security Security Service. If a computer is not connected to the local network and does not have a connected MO Dema, the program can be safely removed from the startup;
- INTERNAT - keyboard layout indicator in Windows 9 x. Often gives failures with an indicator installed with Microsoft Office XP, which is called CTFMON;
- LOAD POWER PROFILE - The program manages power functions. If you do not use on your computer, the feed control function is used, then you can turn it off from the startup. Note that the program usually makes several references to the autoload;
- Messenger - accepts and sends messages sent by the administrator by the rank. If there is no network and administrator, then you can turn off;
- Microsoft Office Wrapper - the program is an accelerator of launching programs such as Word, Excel, etc. In principle, this program is not particularly needed in the autoload;
- Network Connections - Managing Objects in the Network and Dial - Up Connections directory, that is, all network connections. If there is no network, it becomes unnecessary;
- PChealth and StateEMGR are responsible for the recovery service and automatic update of Windows ME;
- Print Spooler - accelerates printing; If the printer is not, then it can be turned off;
- Protected Storage - serves to protect important data, keys of users. If your computer is not connected to the local network and does not have a connected modem, this service can be turned off;
- REMOTE REGISTRY SERVICE - allows remote manipulations with the registry. If you do not want to allow this or your computer is not connected to a local network or global Internet, the program can be from the key;
- Scan Registry - with each successful start of the operating system, checks the system registry for the presence of errors in it and creates a backup. The computer does not remain in the memory of the computer, so you can not kill it from autoload, although it is sometimes the reason for the flow of the registry;
- ScheduTuling Agent - Task Scheduler. If you do not use it, turn off, since it constantly takes some amount of RAM;
- Server - provides sharing to printers, folders and files, and also provides support for Remote Procedure Call. If you do not have any network card, nor a modem, you don't need it;
- System Event Notification - tracks system events. If you
We are confident that everything works fine for you, then you can turn off; - System Tray - the program forms some icons in the system about
Lasty panel tasks. For example, the volume control icon. If you not
use this area, it is best to disable this program; - Task Monitor - the program creates an application launch protocol, used in the future when optimizing their location on the disk during defragmentation. It constantly takes a certain amount of memory, with a small amount of which this program is better to turn off;
- Uninterruptible Power Supply - manages the operation of sources uninterrupted
Nutrition (UPS). If there are no such, then you can turn off; - Web Check Monitor - the program creates the EXPLORER installation file "a when you first start, it is not needed in everyday work.
Sometimes you can meet the Winstart file. Bat, which is used by some programs for automatic download.
The peculiarity of Windows NT operating systems is the presence of the number of running services that are activated independently of the Lania of the user and "clogging" thereby the RAM. Manage services can be obtained by entering the system with administrator rights. To do this, run the program Start | Setting | Control panel | Administer | Services. As a result, a list of all available services on your computer will appear. In this case, we are interested in the "Startup Type" attribute of each of the available services. To disable the launch of any services, first examine the additives tab, it will help you to hunt errors and conflicts. Each service has three launch options:
- Disabled - The specified service will not be run when loading the operating system, and at the same time it will not be able to run any program;
- Auto - The specified service automatically starts each time Windows starts;
- Manually - the specified service does not start automatically, but it can be activated by any executable program.
To change the attribute, it is enough to click on the right mouse button on the support service and select Properties. On the Run Type tab, select the desired item and click Apply to save the changes.
Despite the fact that Microsoft's marketers tear on their bras hair, assuring users that their next new operating system is simply super and does not have a single flaw and jamb and does not require absolutely no additional setting, they are few believe.
Moreover, the practice shows that Windows operating systems are like Russian cars: to go normally on it and to do not fail for a long time, you still need to tinker!
We will not remember the shoals of Windows 95, 98, ME, XP, Vista - they are already in the past, let's consider tuning for the Windows operating system 7. So, several tips:
1. How to increase the speed of the operating systemWindows 7. For multi-core processors
1. Open dialog menu Start -\u003e Perform (or press the key combination Win + R.);
2. Enter the command in the row msconfig and press OK.;;
4. Press Extra options;


5. Check the box opposite the value Number of processors;
6. Select the number of cores of your processor in the activated drop-down menu (default 1);
7. Set the value less than the actual number of the cores of your processor is not recommended, since the system can continue using the number of the nuclei and after the download is completed;
8. Press OK and restart the computer;
9. It is recommended to enable (set to value Enabled.) In the BIOS, the ACPI APIC Support feature is usually done by pressing the Delete key immediately after starting the computer). This feature is in the POWER tab.
2. Acceleration of Windows 7 Downloads - Automatic Login:
If you want to speed up the Windows 7 boot process, then you can configure automatic login. This feature is created for those situations when one person uses the computer. Configuring an automatic input, you will not need to enter the password every time your operating system is loaded.
To configure automatic login in Windows 7, you need to do the following:
1. Press on the Win + R keyboard (or Run item in the Start menu);
2. In the window that appears, enter control UserPasswords2. and press Input;
3. In the window User Accounts. On the tab Users. Select your account and remove a tick with " Users Must Enter A user Name and Password to Use This Computer";
4. Press Apply;
5. In the window that opens Automatically Log ON. There will be three fields - User Name., Password. and Confirm Password.;
6. Enter your password in the field Password. and Confirm Password.;
After rebooting the system, you will no longer need to enter your password, and the input to Windows will be automatically.
P.S. Sometimes a side effect of this setting is possible: After rebooting the quick launch panel - " Quick Launch."Not saved - after restarting it is not.
3. Unlocking 5 additional topics for Windows 7:
1. Go to the folder % Windir% \\ Globalization \\ MCT. Attention! This default folder is hidden, you must allow the display of hidden folders!
2. Consistently click on each topic:
% Windir% \\ Globalization \\ MCT \\ MCT-AU \\ Theme \\ Au.Theme
% Windir% \\ Globalization \\ MCT \\ MCT-CA \\ THEME \\ CA.Theme
% Windir% \\ Globalization \\ MCT \\ MCT-G B \\ Theme \\ Gb.Theme
% Windir% \\ Globalization \\ MCT \\ MCT-US \\ Theme \\ us.Theme% Windir% \\ Globalization \\ MCT \\ MCT-ZA \\ Theme \\ za.theme
4. A list of Windows programs started in the Run: Dialog
The execute dialog box is used in Windows to open a program, folder or document. It allows you to create a task to start with administrator rights. The most famous commands running in the execution window are CMD (Command Line) and Regedit (Registry Editor). Knowing the exact name of the command you can run any system application or Windows tooling.
Dialog menu Run running either Start -\u003e Performor by pressing the keyboard Win + R..
To execute the command, you need to enter its name and press ENTER.
| Russian name element | English name element | Team |
| FTP protocol (command line) | FTP Protocol (Command Prompt) | fTP. |
| IExpress Wizard (not translated) | IExpress Wizard | iExpress. |
| Internet Explorer. | Internet Explorer. | iExplore. |
| Paint. | Paint. | mspaint |
| Windows Firewall | Windows Firewall | firewall.cpl |
| WordPad. | WordPad. | write |
| ODBC data source administrator | ODBC Data Source Administrator | oDBCAD32. |
| Administration | Administrative Tools. | control Admintools. |
| Archiving and recovery | Backup and Restore. | sDCLT. |
| Notebook | Notepad. | notepad. |
| Turn Windows Features ON OR OFF | Optionalfeatures.exe. | |
| System Restore | System Restore. | rstrui. |
| Exit the system | Log Out of Windows | logoff |
| Date and time | Date and Time. | tIMEDATE.CPL |
| Disk Defragmenter | Disk Defragmenter. | dfrgui. |
| Authorization dispatcher | AUTHORIZATION MANAGER. | azman.msc. |
| Windows Task Manager | Windows Task Manager. | taskmgr. |
| Driver check manager | Driver Verifier Manager. | verifier |
| Device Manager | Device Manager. | devmgmt.msc. |
| Device Manager | Device Manager. | hdwwiz.cpl |
| Optional hours | Additional Clocks. | control TIMEDATE.CPL, 1 |
| Finishing Windows | Shuts Down Windows | shutdown / S. |
| Notes | Sticky Note. | Stikynot. |
| Windows Database Protection | Securing The Windows Account Database | sYSKEY |
| Sound | Sound. | mmsys.cpl |
| Sounds (sound circuit) | Sounds (Sound Theme) | cONTROL MMSYS.CPL, 2 |
| Sound recording | Sound Recorder. | soundRecorder. |
| Gaming devices | Game Controllers. | joy.cpl |
| Security Equipment Initialization for TPM | INITIALIZE THE TMP Security Hardware | Tpminit. |
| Calibration of colors screen | Display Color Calibration | dCCW. |
| Calculator | Calculator | calc. |
| Command line | Command Prompt. | cmd. |
| Windows components | Windows Features. | Optionalfeatures. |
| Management Console (MMC) | Microsoft Management Console. | mMC. |
| system configuration | SYSTEM CONFIGURATION. | msconfig |
| Local security policy | Local Security Policy | secpol.msc. |
| Local users and groups | Local Users and Groups | lusrmgr.msc. |
| Windows Download Wizard Windows | Windows Picture Acquisition Wizard | wiaacmgr. |
| Common resource creation wizard | CREATE A SHARED FOLDER WIZARD | shrpubw. |
| Device Driver Installation Wizard | Driver Package Installer | dpinst |
| Wizard installation of equipment | Add Hardware Wizard | hDWWIZ. |
| Mixer Volume | Sound Volume | sNDVOL |
| Resource monitor | Resource Monitor | resmon. |
| Configuring Programs and Default Access | SET PROGRAM ACCESS AND COMPUTER DEFAULTS | control AppWiz.cpl, 3 |
| Customizing Account Control | User Account Control Settings | Userabcountcontrolsettings |
| Scissors | Snipping tool | snippingtool |
| Common folders | Shared Folders. | fsmgmt.msc. |
| Cleaning a disc | Disk Cleanup Utility | cleanmgr. |
| Control Panel | Control Panel. | control |
| Fonts folder | Fonts Folder. | fonts. |
| Folder "Downloads" | "Downloads" folder | Downloads. |
| Folders settings | Folder Options. | control Folders. | Restart Windows | shutdown / R. |
| Transfer printers | Printer Migration. | PrintBrmui. |
| Feather and touch devices | Pen and Touch | Tabletpc.cpl |
| Personalization | Personalization | control Desktop. |
| Task Scheduler | Task Sheduler | control Schedtasks |
| Connect to a remote desktop | Remote Desktop Connection. | mSTSC. |
| Receiving programs | Get Programs. | control AppWiz.cpl, 1 |
| Disc Check | Check Disk Utility | chkdsk. |
| Check and restore system files | SYSTEM FILE CHECKER (SCAN AND REPAIR) | sFC / SCANNOW. |
| Signature checking file | File Signature Verification | sigverif |
| Conductor | Windows Explorer. | explorer. |
| Explorer: C: \\ | Windows Explorer: C: \\ | \ |
| Explorer: C: \\ users \\ your_ | Windows Explorer: C: \\ Users \\ Your_Name | . |
| Explorer: C: \\ Users \\ | Windows Explorer: C: \\ Users \\ | .. |
| Diskpart program | Disk Partition Manager. | diskpart. |
| Programs and components | Programms and Features. | appwiz.cpl |
| View events | Event Viewer. | eventvwr.msc. |
| Screen resolution | Screen Resolution. | desk.cpl |
| Editor of personal signs | Private Character Editor | eudcedit. |
| Local Group Policy Editor | Local Group Policy Editor | gpedit.msc. |
| Registry editor | Registry Editor | regedit. |
| Registry editor | Registry Editor | rEGEDT32. |
| Editor of Title Pages Faxes | FAX COVER SHEET EDITOR | fXscover |
| Resulting policy | Resultant Set of Policy | rsop.msc. |
| System Information | System Information | mSInfo32. |
| Properties of the system | System Properties. | sysdm.cpl |
| System Properties: Additional | System Properties: Advanced | SystemPropertiesAdvanced |
| System Properties: System Protection | System Properties: System Protection | SystemPropertiesProtection. |
| System Properties: Equipment | SYSTEM PROPERTIES: HARDWARE | SystemPropertieshardware. |
| System Properties: Remote Access | System Properties: Remote | SystemPropertiesRemote. |
| Properties: Initiator ISCSI | iSCSI Initiator Properties. | iscsicpl |
| Properties: Internet | Internet Properties. | inetcpl.cpl |
| Properties: Keyboard | Keyboard Properties. | cONTROL KEYBOARD. |
| Properties: Mouse | Mouse Properties. | control Mouse. |
| Properties: Mouse | Mouse Properties. | main.cpl |
| Properties: Mouse: Pointer Parameters | Mouse Properties: Pointer Options | cONTROL MAIN.CPL, 2 |
| Properties: Mouse: Pointers (Scheme) | Mouse Properties: Pointers | cONTROL MAIN.CPL, 1 |
| Certificates | Sertificates. | certmgr.msc. |
| Network connections | Network Connections | control NetConnections |
| Network connections | Network Connections | nCPA.cpl |
| System monitor | Performance Monitor | perfmon. |
| Indexing service | Indexing service. | ciadv.msc. |
| Component services | COMPONENT SERVICES. | dCOMCNFG. |
| Component services | COMPONENT SERVICES. | comexp.msc. |
| Program compatibility | Program compatibility | msdt.exe -id pcwdiagnostic |
| Create system recovery disk | CREATE A SYSTEM REPAIR DISK | recDisc. |
| Neighboring users | PEOPLE NEAR ME. | collab.cpl |
| Saving user names and passwords | Stored User Names and Passwords | credwiz. |
| DirectX diagnostic tool | Direct X TroubleShooter. | dxdiag |
| Technical Support Diagnostics Tool | Microsoft Support Diagnostic Tool | msdt. |
| Calibration tool Digitizer | Ditilizer Calibration Tool | tabcal. |
| Clearartype Text Tool | Cleartype Text Tuner. | cttune |
| XPS viewer | XPS Viewer. | xPSRCHVW. |
| Constitution of actions to reproduce actions | Problem Steps Recorder. | pSR. |
| symbol table | Character Map. | charmap. |
| Phone and modem | Phone and Modem. | telephon.cpl |
| Remote assistant Windows | Windows Remote Assistance | msra. |
| Disk management | Disk Management | diskmgmt.msc. |
| Computer Management | Computer Management. | cOMPMGMT.MSC. |
| Print management | PRINT MANAGEMENT. | printmanagement.msc. |
| Color management | Color Management. | colorCpl |
| Installing or deleting interface languages | Install OR Uninstall Display Languages | lpksetup. |
| Devices and printers | Devices and Printers. | control Printers. |
| user accounts | User Accounts. | NetPlwiz |
| Color and Appearance Window | Window Color and Appearance | control Color |
| Windows Mobility Center | Windows Mobility Center. | mblctr. |
| Support Center | Action Center. | wscui.cpl |
| Synchronization Center | Sync Center. | mobsync. |
| Center special features | EASE OF ACCESS CENTER | utilman. |
| Encryption file system (EFS) | Encryption File System | reKeywiz |
| Fonts (add or removal) | Fonts. | control Fonts. |
| Screen (text size) | DISPLAY (Size of Text) | dpiscaling |
| Screen keyboard | ON-SCREEN KEYBOARD | oSK. |
| Screen Lup | Magnifier | magnify |
| Screen speaker | Microsoft Narrator. | narrator |
| Power Supply | Power Options. | powerCfg.cpl |
| Power Supply: Advanced Parameters | POWER OPTIONS: Advanced Settings | control PowerCfg.cpl, 1 |
| WMI control element | Windows Management Infrastructure. | wmimgmt.msc. |
| language and regional standards | Region and Language. | intl.cpl |
| Language and regional standards: additionally | Region and Language: Administrative | control intl.cpl, 3 |
| Language and regional standards: Languages \u200b\u200band keyboards | Region and Language: Keyboards and Languages | control intl.cpl, 2 |
If any of the list items does not start, then most likely it means that it is uninstalled. Many of Windows components can be installed in Start -\u003e Control Panel -\u003e Programs and Components -\u003e Enable and Disable Windows Components.
5. Keyboard cuts:
In many articles you can see the text like: Win + R.. This word Win indicates the Windows logo key. This key is usually in the bottom line of the third left, and is also often duplicated on the right side of the keyboard.
Main teams / abbreviations:
Win + Up. - Expand the window
Win + Down. - restore / minimize the window
Win + Left. - Attach the window to the left edge of the screen
Win + Right - Attach the window to the right edge of the screen
WIN + SHIFT + LEFT - switch to the left monitor
WIN + SHIFT + RIGHT - switch to the right monitor
Win + Home. - minimize / restore all inactive windows
Win + Break (or Pause) - run the element system from the control panel (Properties when you right-click on the computer in the Start menu)
Win + Space. - Show Desk
Win + B. - transition to the area of \u200b\u200bnotifications (tray)
Win + D. - Collapse windows or restore all windows
Win + E. - run Explorer (Explorer)
Win + F. - Run the built-in Windows Search dialog
Win + Ctrl + F - Run the search on a computer from the domain
Win + F1. - Run the built-in Windows dialog: Help and support
Win + G. - Display gadgets over all windows
Win + L. - Locking the workstation (current user session)
Win + M. - minimize all windows
Win + P. - Display additional display options (expand the desktop on 2 monitor, etc.)
Win + R. - run the Run dialog box
Win + T. - Select the first element in the taskbar (re-pressing switches to the next item, Win + SHIFT + T - scrolls in reverse order)
Win + U. - Start a special feature center (Ease of Access Center)
Win + X. - run Mobility Center
Win + digit- Start the application from the taskbar (Win + 1 launches the first application on the left, Win + 2, second, and because)
Win + "+" - Enlarge scale
Win + "-" - Reduce scale
Ctrl + mouse wheel (up / down) on the desktop - Enlarge \\ Reduce the desktop icons.
In Explorer):
Alt + P. - show / hide the provision area
Task bar:
SHIFT + Click on icon - open a new application window
Ctrl + SHIFT + click on icon - open a new application window with admin privileges
SHIFT + right-clicking on the icon - Show application menu
SHIFT + Right-click on the icon group - show menu, restore everything / turn everything / close everything
Ctrl + click on the Iuckle group - Expand all group windows
6. Disabling (inclusion) of unused Windows 7 components:
In Windows 7, there are many additional features and components. You can view them and solve which of them you will use, and which are not. Unused components can be disabled and, thus, unload the use of computer resources by the system.
To view and disconnect (inclusion) of additional functions and components, follow these steps:
1. Open Control Panel;
2. Opennm Snap Programs and components;
3. Go on the link to the left " Enable or disable Windows components";
4) View all components and disconnect unnecessary by removing their checkboxes.
7. Disable the "Support Center" flag in the tray:
If during your work, the "Support Center" flag appeared in the tray, and you want to remove it, then do the following.
1. Click right-click on the taskbar and select item Properties;
2. Press the button Tune;
3. Jump by reference Enable or disable system icons;
4. Set the system icon value Support Center in " OFF"And press OK.
8. Changing the power button function on your computer housing:
By default, the shutdown button in Windows 7 is in a state " Completion of work" If you restart the computer several times a day, you probably would be more convenient to switch the shutdown button to the "" state. To do this, perform the right click on the Start button, select the menu item Properties and Switch " Power button action"To the state". Also you can choose the functions " Lock", "User change"And" Completion of the session".
P.S. Personally, for me, the default option is the most successful. Reboot on the car - well, no way.
9. Cancellation and change of association of file types with specific programs:
If you chose the wrong program in the dialog box " To open with"And installed the parameter" Use the selected program for all files of this type.", And also if the program has been deleted incorrectly, leaving the association to yourself with the file types supported by it. There are several ways to fix it.
Method 1: Try to associate the necessary files with the necessary programs using all the same "Open Using" dialog
Method 2: Control Panel \\ All Control Panel Elements \\ Default Programs \\ Set Mapping "Change Program"
Method 3: Search in the registry in the branch
10. Disconnect pop-up tips:
Disable pop-up tips You can use the Group Policy Editor.
1. Press the start, in the field To start searching Write gpedit.msc. and press OK;
2. Go to section User Configuration - Administrative Templates - Start Menu and Taskbar;
3. Open the parameter " Remove pop-up tips for the main menu items", choose point included and press OK;
11. Creating a system recovery disk and loading from it:
If you have a Windows 7 installation disk, create a recovery disk optional. If you don't have the installation disk, you need to create a recovery disk - it will be useful for you sooner or later. From the installation disk you can boot into Windows Re Recovery Wednesday
Creating a system recovery disk:
1. Insert a clean CD into the drive;
2. Open Start -\u003e Control Panel -\u003e Archiving and Restore (Backup and Restore);
4. Insert the recovery disk to the drive and reboot;
5. The BIOS must be set to load priority from the drive;
7. Select the system you want to restore.
8. Install the switch Use the recovery tools ... And click the button Further. You will see a window with recovery options.
12. Adding your icon to the list of accounts of accounts:
By default, account drawings are located in the following folder:
C: \\ ProgramData \\ Microsoft \\ User Account Pictures \\ Default Pictures
You can put your image into it and it will be displayed automatically when you select a change in the account of the account in the snap-in " user accounts". In this case, the drawing should be in format * .bmp and have size 128x128. pixels.
13. Removing from a folder forbidding icon in the form of a lock:
1. Press the right mouse button on the folder from which you want to remove the lock icon and choose Properties;
2. Go to the tab Safety;
3. Press the buttons Edit -\u003e Add -\u003e Advanced -\u003e Search;
4. In the search results, hold down the key Ctrl, Select the following names: Administrators, and click OK;
5. In the group or users to choose Administrators; and set the checkbox on Full access, then choose Past check; and also check the box on Full access;
6. Press OK;
7. When windows occur " Security Error Security"Press Proceed.
14. Reduce the size of the icon on the desktop:
How to reduce or increase the size of the icons on the desktop.
15. Improving the quality of color transfer by a monitor:
Windows 7 offers a new screen calibration wizard (Display Color Calibration Wizard), which will help you properly set color, brightness and contrast settings, and ClearType Tuner will make the text with sharp and contrast. To call the wizard click Startintroduce DCCW. and press ENTER. Next - everything is simple.
16. Enabling Flip3D - display windows at an angle:
1. Click right-click on the desktop, select Create -\u003e Label;
2. In the field " Specify the location of the object"Enter the following: Rundll32 DWMAPI # 105 and press Further;
3. Score your future name (for example, Flip3D) label and click Ready.
17. Using flags to highlight (select) files and folders:
In Windows 7, there is a convenient opportunity to marry for the selection of fool and folders using flags (checkboxes). It is more convenient than highlighting objects while holding CtrlBut this feature is disabled by default. To enable it, do the following:
1. Open the conductor and press once the key Alt. - So we initialize the display of the standard menu at the top of the conductor window, which is hidden by default;
2. Run Start -\u003e Control Panel -\u003e Folder Settings and go to the tab View;
3. Mark the parameter Use checkboxes for selecting elements and click OK;
Now to the left near each file and the folder appeared the opportunity to mark them by placing the checkbox, and in the headings of the sorting columns, you can check the check box to highlight all objects of the open folder.
18. AutomaticADSL Connecting the Internet when Windows startups in "Invisible Mode":
1. Open Control Panel \\ Network and Internet \\ Network connections \\ ADSL properties;
2. In the tab parameters Remove checkmarks: Display connection progress, request name and password;
3. Place the label in the startup folder ADSL.
19. Automatic VPN connection to the Internet when you start Windows:
1. Open the rear scheduler from the menu Start -\u003e Administration -\u003e Task Scheduler Or executing the command taskschd.msc. From the Start -\u003e Search menu;
2. Press Create a task;
3. Tab Name -\u003e Connection Name, Placement leave as it is.
4. Tab Triggers -\u003e Create -\u003e Start a task: When entering the system
Create actions tab
Action: Starting the program
Program or script: RASDIAL "Connection Name" User Password
Settings Tab-Create
Put the ticks:
Immediately run the task if the planned launch is missing
If you fail to restart after 1 min.
The number of attempts to restart 99.
Remove tick:
Stop the task performed longer
If you have an error 623 with a BAT file with a VPN connection via the BAT file.
Rename the name of the connection into English and everything should earn.
20. Restoration of missing sound in Internet browsers:
1. Check the volume in the Flash player itself;
2. Delete completely, and then set re-:
2.1. Adobe Flash Player. Removal: http://kb2.adobe.com/cps/141/tn_14157.html Installation: http://get.adobe.com/flashplayer/otherversions/
2.2. Codecks in the system (K-Lite Codeck Pack, Shark007 Windows 7 Codecs or other)
2.3. Browsers
2.4. Drivers sound card
3. In Internet Explorer, do you check if you have a checkbox in paragraph " Play sounds on web pages" Service -\u003e Explorer -\u003e Advanced -\u003eSection Multimedia;
4. Check if the Windows Audio service is set automatically.
Control Panel -\u003e Administration -\u003e Services -\u003e Double Click on Windows Audio -\u003e Start Type: Automatically;
5. Press Stop, later Run;
5. Run the registry editor Win + R -\u003e Regedit. Go to the branch: HKEY_LOCAL_MACHINE \\ SOFTWARE \\ Microsoft \\ Windows NT \\ Currentversion \\ DRIVERS32;
Check the value of the string (string) parameter wavemapper.. Its value must be msacm32.drv. If this parameter is not, then create it.
21. Remove the extra inscriptions on the desktop:
1. Open with Restorator. or PE Explorer. Files C: \\ Windows \\ System32 \\ RU-RU \\ User32.dll.mui and C: \\ Windows \\ System32 \\ EN-US \\ User32.dll.mui and in the string table remove the line with 715 by 718 inclusive and strings 737 and 738 In order for unnecessary inscriptions on the desktop there was not.
715% WSWindows% WS
716% WS Assembly% WS
717 trial copy.
718 only for tests.
737 Your copy of Windows is not genuine
738 Test mode
22. Move system folders and change their paths:
The transfer of system folders is best done immediately after installing Windows, before installing programs and drivers, because When installing drivers and, in particular programs, directories and shortcuts will be created in these most system folders.
If you use system folders to store files, then transferring user-friendly user folders to a non-system disk, help you save your files. In the event of a Windows failure, when reinstalled, the default system folders will be lost completely, with all files that are in them.
But if you specify your paths to system folders, then all their contents will remain entirely in previous versions of Windows to move any system folder or change its path, you needed to edit the value you need in one of the following registry branches:
HKEY_CURRENT_USER \\ SOFTWARE \\ Microsoft \\ Windows \\ Currentversion \\ Explorer \\ Shell Folders
HKEY_CURRENT_USER \\ SOFTWARE \\ Microsoft \\ Windows \\ Currentversion \\ Explorer \\ User Shell Folders
HKEY_LOCAL_MACHINE \\ SOFTWARE \\ Microsoft \\ Windows \\ Currentversion \\ Explorer \\ Shell Folders
HKEY_LOCAL_MACHINE \\ SOFTWARE \\ Microsoft \\ Windows \\ Currentversion \\ Explorer \\ User Shell Folders
Microsoft realizing that many users may want to move their system folders, simplified the users of this task, having robbed them from the need to edit the registry. To move system folders and changes to their paths, do the following:
1. Create a new folder, preferably with a similar variant name folder.
2. Open B. Windows Explorer.: Desktop \\ Your Profile (For example: Desktop \\ Administrator);
3. Click the right mouse button on the folder name that you are going to move (for example: My Documents) And choose Properties;
4. Open tab Location;
5. Press the button Move and specify the path to the new folder you created;
6. Next, the system will ask you: Move all files from the old location in a new one? (Recommended answer - Yes);
7. Agree with new parameters applying them and exit;
8. Restart the computer.
23. Quick adding your folder or program shortcut to computer folder:
1. Copy the shortcut you need to the folder C: \\ Users \\ user \\ APPDATA \\ Roaming \\ Microsoft \\ Windows \\ Network shortcuts
where Username - This is the name of your account (for example: Administrator).
24. Elimination of game blinking in OpenGL mode:
Rename files:
.. \\ Windows \\ System32 \\ Glu.dll - in glu32.dll
.. \\ Windows \\ System32 \\ OpenGL.dll - in OpenGL32.dll
25. Restart the computer to safe mode without using the keyboard:
In order to restart into a safe mode, sufficiently press the F8 key and select Safe Mode. And to return back to normal mode, just to restart the computer (without pressing F8) and the system will return to its standard state.
But on some motherboards, the F8 key is used to select a physical device from which the computer should start loading.
In this case, you must select the hard disk on which the operating system is installed. After pressing the ENTER key, you must immediately press the F8 key again until the Windows Options Selection menu appears on the screen. You must have time to do it pretty quickly, otherwise the usual boot of Windows will begin.
If there is no desire to play speed, there is a easier solution solution:
1. Open system configuration: Start -\u003e Run -\u003e Msconfig -\u003e OK or Win + R -\u003e Msconfig -\u003e OK;;
3. Put a tick opposite the value Safe mode In chapter Download options;
4. Press OK. and restart the computer.
5. To return back to Normal mode: Being in Safe mode Remove this tick and restart the computer.
26. Where in Windows 7 stored icons (icons):
If you want to use one of the icons (icons) of Windows 7, then most of them can be found in the following files:
C: \\ Windows \\ System32 \\ Shell32.dll
C: \\ Windows \\ System32 \\ imageres.dll
To extract the icons you need:
1. Open one of the proposed files using the program Restorator.;
2. In the panel Wood resources Open folder Icon;
3. Select any of the icons you like.
4. In the panel Wood resources Click right-click on this resource and choose Extract ...\u003e Extract as "Resens.ico name";
5. Select the folder for extracting and press Save;
You can also extract all the icons immediately for this:
6. In the panel Wood Resources Click right-click on the folder Icon and choose Extract ...\u003e Extract everything as the type "icon";
7. Select the folder for extracting and press OK.;
27. Delete the installed update:
If you have installed an update in Windows to add an additional function, and you did not like it, then you can safely remove it.
To delete any update, do the following:
1. Open Control Panel -\u003e Programs;
2. Click on the link View installed updates;
3. Press the right button on any update that you want to delete and click on the word that appears Delete;
4. If necessary, restart the computer.
28. Creating computer status management icons:
To quickly change the system status, you can create labels on the desktop allowing you to change it with one magging mouse.
To create shortcuts, perform the following steps:
1. Press the right mouse button on the desktop, select the menu item Create -\u003e Label;
2. In the field Specify the location of the object Enter the necessary command to create a shortcut and click OK.;
Computer Lock - rundll32.exe User32.dll, LockworkStation
Sign Out - Shutdown.exe / L.
Completion of work - Shutdown.exe -s -t 00
Sleep - rundll32.exe Powrprof.dll, SetSuspendstate Sleep
29. Delete data without recovery:
When you delete a file or folder, it does not complete the physical deletion of information, only the "table of contents" of the file system is cleared. Using the CIPHER utility, a partial solution of this problem is possible, since it is possible to clean the free space on the disk to rub it.
The location occupied by the folder will be overwritten by zeros, then units, and then - a set of random characters in each sector.
To complete data deletion:
1. Delete the necessary files or folders from your directory to be removed;
2. Start the command line with administrator rights;
2.1. Press the button Start;
2.2. In the search string, enter the command cmd.;
2.3. Click on the program found right-click and choose Run on the name of the administrator;
3. Enter the command line: cipher / W: Catalog;
catalog - path to any folder on the section to be cleaned. (For example: cipher / W: C: \\ temp) If you deleted a folder or file from the root of the disk, then you can specify a disk letter as a path. (For example: cipher / W: C: \\).
30. Deleting text under the label or file icon:
1. Click the right mouse button on the selected icon;
2. Click Rename;
3. Hold down the key Alt., type 2, 5 and 5 numbers on the numeric keypad in a row ( Alt + 255.) - This combination allows you to add an invisible symbol to a shortcut or file name;
4. If you want to rename several shortcuts, then when you rename the next one, you will need to click Alt and enter 255 twice. So for the third icon you will need to enter Alt + 255, Alt + 255, Alt + 255.
Thanks for this selection site w7seven.ru