Firmware for HTC Desire C. The best firmware for HTC Desire with Sense shell - Runnymede and RuHD Firmware for htc via computer
HTC, releasing multifunctional, stylish, reliable and practical gadgets, does not always care about long-term software support. In other words, a purchased new smartphone in practice may be left without operating system updates in a year. Based on this, it is not surprising that do-it-yourself Android firmware on HTC remains one of the most popular topics among owners of gadgets of the eminent brand. In this article, you will learn how you can flash HTC at home without much skill and time consuming.
The essence of the firmware
At the end of the process, you will see a green check mark in the program window, indicating that the bootloader has been successfully unlocked.
Longer way to unlock the bootloader
To implement this method of opening the bootloader, you will need to download and unpack the HTC Sync and Fastboot archives into one directory. After that, you go to the official HTC website to the "Bootloader" section and download the necessary additional software for the model of your gadget.
If your smartphone is not listed, select “All Other Supported Models”. Next, you will be prompted to register, after which you can proceed to unlock the bootloader. For this:

Installation of recovery and subsequent uploading of a new operating system
The standard HTC recovery will not please anyone. If you are aiming to change the firmware, take care of the new version of the recovery menu.
In practice, most custom recoveries give their users more functionality than standard software. Moreover, custom options greatly simplify work not only with official builds of the operating system, but also custom options that require separate installation instructions.
Smartphone firmware via Flashtool
In order not to bother with the firmware for a long time and quickly install fresh software on your smartphone, pay attention to the Flashtool program.
A distinctive feature of the program is its intuitive interface and almost complete absence of the need for additional measures to prepare the gadget for the installation of new firmware.
Installing firmware via SD card
A popular way to update software is to flash firmware via an external SD card. This method of installing fresh software is perfect even for those users whose gadgets have stopped turning on after a serious failure.
Moreover, this method involves taking into account some of the subtleties. These include the need to charge the gadget to at least 50%, as well as obtaining open access to the installation from external sources.
Firmware via ADB Run
Another excellent way to flash an HTC smartphone is to use the ADB Run program.
To flash the device with this utility, the user does not need to waste time learning any commands. It is enough to use the intuitive interface, download the firmware and enable USB debugging of the device.
Risks associated with reinstalling firmware
As you come to grips with the process of manually reinstalling or updating software, be prepared to face a number of serious errors that can adversely affect the performance of your gadget. In case of incorrect installation of fresh firmware or irresponsible choice of the installation archive during operation, failures may occur even in standard utilities.
Moreover, users who make the firmware on their own quite often encounter the "zakirpichivaniye" of the gadget, which requires colossal time expenditures to restore normal operating characteristics. To save yourself from serious problems, use the recommendations of professionals and download additional software from trusted sources.
Restore firmware on Android
Facing braking, malfunctioning, freezing and fast battery drain? Have you noticed that the gadget no longer works as fast as it did on the day of purchase? Try to restore it to its original characteristics by resetting user data.
The implementation of normal operating conditions for a gadget is not always associated with a firmware update. It is often enough for the user to reset the device to return the required performance indicators.
Flashing HTC HD2 smartphone on Android
The HD2 is a cult gadget that, unfortunately, was produced by HTC exclusively with the Windows Mobile operating system. It has solid hardware performance, which makes its flashing on Android more than relevant.
Moreover, the procedure for changing the software takes relatively little time. It is enough to acquire the necessary archive for installation and use the instructions.
Do everything carefully!
Only you are responsible for all actions!
The battery holds a full day with WiFi, 3G turned on.
The first unofficial firmware that simply surprised with the quality.
Official firmware
Updating Recovery:
2. Key down sound + Power
3. Bootloader will boot
4. The system will find the file and suggest an update. Agree
5. At the end of the Power to reboot
Install the Kernel with S-OFF:
2. Key down sound + Power3. Bootloader will boot
5. Install from sdcard
1. Download the firmware HTC_Europe_3.33.401.153 (HBOOT 1.29.0000)
2. Copy it to the sd card. Rename to PG58IMG.zip
3. Key down sound + Power
5. Upon completion, reboot
Unofficial firmware firmware
Updating Recovery:1. Download 4EXT Recovery PG58IMG.zip
2. Key down sound + Power
3. Bootloader will boot
4. The system will find the file and suggest an update. Agree
5. At the end of the Power to reboot
Install the Kernel with S-OFF:
(for without S-OFF)
1. We need to download the kernel. Can
2. Key down sound + Power
3. Bootloader will boot
4. Choose Recovery. The new 4EXT Recovery Touch will boot
5. Install from sdcard
6. Select the Kernel file on the map
Installing the official firmware:
1. Download the unofficial firmware
2. Copy it to the sd card
3. Key down sound + Power
4. In Recovery, select the installation from the sd card
5. Find the file on the map and install
From experience - I have not met any more reliable than the official firmware.
Many users specifically install firmware on their HTC smartphones without a proprietary shell - Sense in order to free up more memory, get rid of brakes, and install other launchers. But there are those who like HTC Sense and they can be understood, because the shell from HTC is rightfully considered the best interface from the manufacturer of Android devices. In this post we'll look at the best way to get custom firmware on your HTC Desire with the latest version of HTC Sense, which is used on top-end HTC Sensation smartphones (Original, XL, XE) - Runnymede and RuHD.
Runnymede AIO Firmware

It is the most popular custom firmware with Sense skin for HTC Desire. Thanks to the huge community on xda and straight-handed programmers, the firmware really amazes with the beauty of Sens 3.5 and the speed of work.
Peculiarities Runnymede for Desire:
- The firmware is based on the official firmware HTC Sensation XL 1.22.461.2 : Android 2.3.5 with sheath HTC Sense 3.5
- Full version of Sense 3.5 including everything 3D widgets and effects.
- RCMix3D Tweaks: special menu for lockscreen settings, statusbar, processor and system tweaks and many other system settings.
- Built-in App2SD for transferring any applications to the card
- Deodexed & zipaligned
- Init.d support
- Fully optimized system for best performance with all Sense 3.5 effects
- Multilingual
- Ability to customize trackpad unlock and wake-ups.
- Superuser 3.0.7
- The ability to fine-tune the power supply and processor frequency (Daemon controller, IncrediControl)
- Graphic touch installer
- Beats Audio
Firmware presentation video Runnymede for HTC Desire
Requirements Runnymede for HTC Desire

Installation Runnymede for HTC Desire
- Make sure that your Desire meets all the requirements described above, all of them are required for Runnymede to work correctly (partition table, s-off, ext partition), if you are installing custom firmware for the first time and are not confident in your abilities, you.
- Runnymede -
- Install .zip from Sd card in recovery)
- The graphical installer will load, follow the instructions on the screen
RuHD firmware
RuHD firmware for HTC Desire is essentially a domestic modification or version of Runnymede, some goodies have been added, something has been removed, tweaks and scripts from domestic craftsmen have been added.
Features of RuHD for Desire: 
- Android 2.3.5 and HTC Sense 3.5
- Beat bass & Xloud
- Works on WiFi N networks
- Integration with HTCSense.com
- All languages except English and Russian have been removed, wherever possible the Russian translation has been improved.
- Installation completely in / system (free memory - 15mb), does not require ext partition
- The firmware includes su, busybox, terminfo, passwd and group
- hosts are configured to clipping ads (no need to install third-party AdFree applications, etc.)
- APP2SD +- the ability to transfer applications to a memory card (you need an ext partition!)
- Optimized loading, sqlite defragmentation at startup, zipallign
- Availability of processor profiles
- Support OTA updates and installing firmware add-ons for one branch
- Additional RuHD settings menu - system tweaks, processor control, advanced interface customization (analogous to the RCMix3D Tweaks menu in Runnymede)
RuHD requirements for Desire:
- Desirable, but required: S-OFF, ext-partition on the map
- The latest version of the radio module (available on the firmware website, you can flash it after installing the firmware)
 Installing RuHD for Desire:
- Make sure that your Desire meets all the requirements described above, all of them are required for RuHD to work correctly, if you are installing custom firmware for the first time and are not confident in your abilities, you.
- Back up your data (for example with)
- If you are switching from another firmware, then before starting you need to make a full wipe! (full wipe - data \ factory reset in recovery)
- If you want to update the version RuHD - clean cache and dalvik cache, / system and / boot through recovery
- Download the firmware from the links above, put the zip archive in the root of the card and flash from the recovery ( Install .zip from Sd card in recovery)
- Follow the instructions on the screen
Conclusion
Both firmwares are very high quality and stable, great for everyday use. The main and perhaps the only drawback of both firmwares is excessive power consumption, but of course this is a fee for all the Sense 3.5 chips, compared to other custom firmware for Desire without Sense (for example), the battery lasts 10-15% less. But on the other hand, the speed of work of both firmwares is at a height, the developers really managed to achieve almost perfect smoothness and speed of work.

The best firmware for HTC Desire with Sense shell - Runnymede and RuHD:
rating 80 of 80 based on 80 ratings.
Only 80 reviews.
The HTC Desire communicator appeared in the vastness of Russia. And along with it, many different firmware appeared, both native and alternative. Also, "gray" devices, which are tied to any operator, began to be imported into the country. Concerning firmwareHtcHtcDesire raises many questions for many.
I would like to note right away that if we compare the procedure related to how to flash an Acer neoTouch or another device on WinMo, in our case there are significant differences. And they start with the fact that we are dealing with a device built on Google Android.
So let's start. If you have a device fully certified for Russia in your hands, then you have two ways. Flash using Wi-Fi, through the "Phone settings" menu, then "About phone", then "Phone update". The device will connect to the update server and download the firmware. The main thing is that the Wi-Fi connection is free. Alternatively, you can download the corresponding executable file from the company's website, run it on a Windows computer and follow the instructions in full. There are no problems here, everything is similar to the procedures for standard WinMo firmware. But now, if you need to flash a non-standard firmware ?! You need to do the following.
Non-standard firmware HTC Desire - instructions
In order to firmwareHtcHtcDesire started, you need to determine the version of the bootloader. For this purpose, we simultaneously press two buttons: "Back" and "Shutdown", the boot menu appears on the screen, in which in the second line we are interested in information of the form: HBOOT - 0.xx.0000, where xx is the bootloader version. For version 0.75 you need to download this kit, and for 0.80 - this one.
Then we start the process itself. We write the file "update.zip" to the flash card. We will also interfere with the firmware there. Unpack the required kit there, depending on the version of the bootloader. We launch the console in this folder. Turn off the communicator and turn it on in Fastboot mode (for this, hold down "Back" and "Shutdown"). You will see FastBoot enclosed in a red square. We connect the USB cable to the communicator. In the terminal, depending on the system, enter: for Windows step1-windows.bat, for MAC - ./step1-mac.sh, for Linux - ./step1-linux.sh.
An error message appears, do not pay attention. We are waiting for the first step.
As soon as this happened, we translate HTC Desire into Recovery mode. To do this, go to BootLoader, and from there to Recovery. For this purpose, use "Up", "Down" and "Off". Press "+ Volume" and "Shutdown" and switch to the blue Recovery mode. In this menu, select the Apply sdcard: update.zip item and go to a new window. By the way, now the USB cable can be disconnected. Click on Wipe Data and confirm the deletion of the data. When finished, select install.zip from SDCard and specify our zip file. Confirm by clicking on the trackball. FirmwareHtcHtcDesire started. At the end, we reboot the device.
For those who want to make a copy of the data, you need to select the nandroid - backup item before deleting the data, and then select restore - nandroid before the final reboot.
As you can see, if desired, this procedure is available to anyone. But still, if you are not confident in your abilities, I would not recommend carrying out this procedure yourself, but contacting specialists.
And in conclusion, I would like to note that, firmwareHtcHtcDesire carried out in this way will allow you to install any update, firmware, radio module, etc. on the device.
Yes, a little off topic, but still the other day I updated my, already quite old, smartphone and I have experience. As they say, the same firmware is something in common with satellite receivers.
I hope by this post I will help someone and reduce the time spent, since there is a lot of information, but in most of it it is very scattered. Further myself the process of flashing the phone htc desire a8181 on android version 4 or higher.
To start. Many people write that you need to unlock the bootloader - I never succeeded, not with the program HTC Bootloader Unlock, nor by the standard method through the office. htc website.
Instructions for flashing the phone htc desire for android 4+
As it turned out, I had the last official update with android version 2.3. Accordingly, S-ON - protection of software change. Which must be removed first.
But before you do anything, you need to install the drivers for your device on your computer twice.
This should be done in semi-automatic mode, each time pointing to the folder with the drivers.
The first HTC + Drivers are needed when the phone is working normally, and the second Android USB Driver- when working with a bootloader and in recovery mode.
According to the instructions. Personally, I unloaded the archives to the root of the C drive and installed them from there, or rather indicated where they were.

So the drivers are installed and the phone is visible in the computer - let's move on.

As already mentioned - you need to remove S-ON to become S-OFF. You can view the status like this. Turn off the phone - take out the battery and press the volume down + turn on.

At the very top you can see.
How to remove S-OFF HTC?
More precisely, as I did. Go to the site http://rev.alpharev.nl/ - download the application for Windows in the same place. We fill in the data here. We take the serial number in our phone - we look in the settings or look under the battery.

We enter respecting the register. We generate and receive the code which we enter in the running application from there. The phone must be connected with a cable.
After that, you should get S-OFF and the inscription in pink.

Further action - we sew a recovery for an alternative one. We need an archive Android- which we unzip to the root of the C drive.
There is Recovery Flash.bat and recovery.img (recovery-clockwork-touch-5.8.0.2-bravo.img). When you start the first one, the second one should be stitched. I chose this version of the recovery, since it seemed to me convenient, it worked adequately and the control is familiar - with a finger. You can look for an alternative and just rename it to recovery.img and sew the same way.
Next, you need to get super user rights. The program worked for me Kingo ROOT from under Windows when the phone is normally turned on via a cable.
All this allowed me to flash my phone with custom firmware. Of course, the first one that came across to me did not fit, and the second was also poorly installed. In short, I stopped at this CM10.1_VJ_4.2.2_V6.2_Sense_Data ++. Zip. With an increase in space for programs on an external flash drive.
Do not think that everything is only in the firmware - that is, installing the software. It still needs to be configured. So this is almost a bare system.
The instruction at the address helped me a lot.
http://w3bsit3-dns.com/forum/index.php?showtopic=366523&st=7220#entry39335246
But you shouldn't trust her completely. See for yourself what you need more.
I did not delete Google services and updates - I just turned it off and this immediately gave a lot of space for the necessary programs.
It seemed to me necessary to install LowSoundFixer_v1.0.8.apk(increases volume - firmware bug) and SD + Maid + Pro + v3.1.4.6_arm-zipalign(cleans cache and junk on the phone). The rest is not.
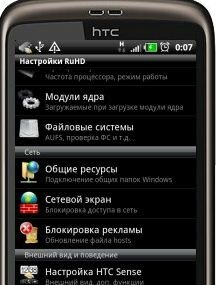
pic phone screen
Conclusion - the phone works fine and is configured for modern android. Now you can install the necessary applications that did not work on the old version, besides there is a lot of space for games and programs. You definitely need to sew.
Video firmware htc desire a8181 android 4