Installing Wai Fi Router Asus House. Wi-Fi Router ASUS RT-N12: Configure Connection to Computer. Turn on Wi-Fi ASUS Laptop Adapter
Setting the ASUS router is a fairly simple process that does not cause difficulties. However, in order to avoid problems, adhere to a certain algorithm still needed. This instruction Universal for all routers of this manufacturer.
Knowing how to connect and configure this device gives the user many features. He will not only use the router, but also to enter all the necessary information. This can be a change of personal data, configuring the Internet, the ability to change the settings.
Connection and setup occur by a simple scheme:
- The user connects the router, after which it comes into the settings.
- ASUS provides a quick setup with special features.
- If it is impossible to configure the wizard, you can contact the WAN provider.
- Entering personal data, setting a password and changing the name if necessary.
- Password change.

To configure the router, you will need additional information. The user needs to know which type of connection provider uses. In the event that it uses PPTP or L2TP, information will be needed on personal data, about. To get all the necessary data, it is enough to contact the provider.
How to quickly connect and set up

Important! There are cases when the network is called differently. Sometimes it is protected by a password. This is an indicator that another user has attempted to set up ASUSS. Therefore, it is recommended to reset all settings before starting actions. To do this, click the button that is behind the device, and do not let it be released for 10-15 seconds. After this time, the indicators will go out, the router will turn on again.
Go to the control panel
After a successful connection, the user needs to open the browser to which it usually uses.
- In the address bar you need to write the following: 192.168.1.1. If everything is done correctly, the settings will immediately open. The "Welcome to ASUS" window will appear. At the bottom of the screen there will be a button "Go".

- After clicking, the proposal will go to write a password that will help protect the device settings. Experts advise carefully treat the reliability of entering data, the password must be difficult to hack. All the necessary data is better to record on a sheet of paper so that there are no problems in the future. The windows will pop up the tips "weak", "reliable", "very reliable." It is recommended to combine capital and uppercase letters in a combination with numbers in the password.

- By clicking "Next", the Wireless Network Settings window will appear. Be sure to specify the unique network name, you can also use the SSID (wireless network identifier). It is important to fill in the field "Network Key" in which to specify reliable password To connect. It should not duplicate the password specified for the router. This data will be needed to identify the wireless network of the user, they are also recommended to burn on a sheet of paper.

- For some time you have to wait, the router must reboot. Now a window will appear with the name that was previously indicated. You need to click on the "Connection" button and enter the password. It is recommended to put a check mark near "connect automatically".

- As soon as the connection occurs, you need to return to "Fast Internet Setup", the Routher Settings item. There will be reflected all the necessary information on connecting. The user must click "Next".

- The Sign In to the System window appears. You need to specify the data that was previously spelled out in the settings. By clicking the "Login to System" button, the process of connecting and configuring the router is successfully completed.

On a note! Often, the whole process occurs without failures when the provider uses an automatic IP address. The device all configures itself. But L2TP, PPPoE and PPTP imply a longer connection process. There is nothing complicated in actions, but the user will need to enter a number of data manually.
Routher Setup with other types of connection
In this case, after checking the connection, the "Select Wan Connection Type provided by the Internet Service Provider" will appear. This indicator will need to be selected manually:
- Ppure;
- PRTR;
- L2TP.

On this tab, you can familiarize yourself with the basic settings, the settings of the WAN IP address, DNS WAN and, if necessary, change them. At this stage, the connection and adjustment of the ASUS router ends.
Important settings
These tasks are easy to execute, but this is no less important. To change the name of the wireless network, you need:

Important! As soon as the user changes the password or name, it will be needed to connect its devices to Wi-Fi. If you occur problems, it is recommended to remove the network and do all the actions on the connection re-on.
An important point is to protect the router settings. If you need to enter a new password or replace the old need:

Now only these data will be used to log in.
Video - Setting up the router (router) ASUS RT-N12 +
ASUS routers have long and firmly entered the life of home users and mobile Internet. Their functionality and the possibility of rich and diverse - about 10 years ago, no one dreamed about such a thing.
Description of the router ASUS RT-N12
The ASUS RT-N12 router is another solution for cable Internet And the LAN with standard speeds, long and for a long time included in the life of users.
The router has 4 Ethernet port to connect internal network subscribers, connector for connecting the provider cable, the power adapter socket and the reset button
There are no USB ports on the router. The reset button combines the WPS function - connection with new gadgets on request (without entering the WPA-2 password). Short pressing gives devices WPA-2 key to connect, long - recesses the router.
The ASUS RT-N12 router disperses the Internet on Wi-Fi and on PC on LAN
Table: Characteristics of the router ASUS RT-N12
| Parameter | Meaning (tolerance) |
| CPU | Broadcom SMM53572. |
| RAM | 16 MB |
| Flash disc | 4 MB |
| Standard and Range Wi-Fi | 2.4 GHz, 802.11BGN Mixed Mimo (up to 300 Mbps) |
| Number and parameters of Wi-Fi antenna | 2 (unknown, gain 5 dB) |
| Wi-Fi network protection | from open networks to WPA-2 |
| Number and purpose of Ethernet ports | 4 LAN, one wan port |
| Ethernet Standard and Speed | up to 100 Mbps (100-Base-TX) |
| Communication protocols | dynamic DNS, IPv6, UPNP, PPTP, L2TP, PPPOE, DMZ, IPsec, Static IP, QoS |
| Traffic protection | NAT, Encryption VPN, WPS, SPI |
| Server functions | DHCP server, LAN router |
Additional functionality (for example, Firewall, adjustment of the bandwidth to each gadget or PC) is implemented only with the help of "Custom" firmware OpenWRT or firmware from other compatible models or even modified firmware Other brands (Huawei, ZTE, D-LINK, etc.).
Video: Overview Wi-Fi Router ASUS RT-N12
Installation and physical connection ASUS RT-N12
Prepare a seat on the wall near the nearest socket to hang the router itself. Condition LAN cables (if you connect working computers based on cable). The router should not be in a closed, dust and dusty place (for example, behind a fridge or cabinet in the corner).
WAN interface does not distribute the Internet - it only establishes a connection with the provider
The provider cable can be connected to any of the LAN-nockets, appropriately changing the router settings. What you can not tell about the connection of one of the computers or the LAN-Hub / Switch device or the LAN-HUB / SWITCH device with a PC group - this is not possible.
Setting ASUS RT-N12
The router setting can be both fast (using the ASUS software wizard) and the phased (with transitions from the main menu at each step).
The ASUS web interface is one and universal for all models of routers of the ASUS RT-NXXXX line - in the instructions there are screenshots of the settings of various models that will be the same for RT-N12.
Change login and password from the router
Before configuring the basic parameters, make sure that the authorization data that is worth the default and is even new to the newcomers, none of your neighbors took advantage.

Enter the desired IP (you can specify any, for example, 192.168.220.161, although it is recommended to use the first subnet address) and click the Apply button. The router will restart with the new IP, after which you need to log in again to continue the setting.
Setting L2TP connection
If your provider uses the L2TP protocol, do the following.

Internet connection on the L2TP protocol is executed.
Connect ASUS RT-N12 by PPPoE
If the provider connects clients through the PPPoE protocol, then do the following.

After restarting the router will enter the network using the PPPoE connection.
Video: Setting up ASUS RT-N12PV to work with PPPoE
PPTP setup for ASUS RT-N12
If your provider encrypts PPTP traffic, do the following.

The router will restart and install a PPTP connection with the provider.
Static IP Settings for ASUS RT-N12
Using static IP Address Allows you to sometimes do without entering a login and password - the connection is "tied" to this address and the router MAC address.

The router will restart and connect using specific IP settings will be installed.
Setting up Wi-Fi in access point mode on ASUS RT-N12
Access point (AP MODE) turns off all unnecessary settings. Historically, this is the first - and the simplest - the distribution mode of the Internet on PCs and gadgets.
- Give the "Advanced Settings - Administration - Operating Mode" and select Access Point Mode.
Install the program switch to AP MODE
- If you do not need to change the settings of the LAN, skip them by clicking "Next". In case of problems with the Internet, you can come back here and enter IP public DNS gateways from Google or Yandex.
Enter addresses of any public dNS serversif there are Internet problems
- Assign a Wi-Fi network name and password for it.
Comeume your wireless network name and enter the password for access to it, and then save the settings by clicking on the confirmation button.
- Click the "Apply" button, the router will restart.
After starting, ASUS RT-N12 will be released with the specified settings.
DHCP settings ASUS RT-N12
The DHCP server automatically displays the IP addresses connected to the router gadgets, PC and other routers operating in the repeater / client mode.

Connect now to the router from any gadget or PC, which is configured to auto-apply IP addresses. IP. specific device will be set from the selected numbering range, for example, 192.168.1.123. The next time you connect the last number in the IP address will change within the specified restrictions.
Setup IPTV on ASUS RT-N12
The IPTV setting is mainly reduced to the purpose of one of the LAN ports for the needs of the protocols and their add-ons for the IP-TV service, which is now "in the appendage" on the tariffs of the fiber optic internet in all providers.

Connect by LAN cable iPTV prefix, Turn on the monitor and wait for the list of channels of IP television. If the selected channel works, it means that the router distributes traffic to the prefix along this port LAN.
If all LAN ports on the router are busy, using splitter or the LAN-HUB / SWITCH device will not allow you to connect the IPTV console in "multiplicated" by this method of the LAN jack, since the port is selected for the console port all PCs / laptops connected to it will be cut off from the Internet.
Repeater mode on the ASUS RT-N12 router
Practical interest is a radioation (increasing coverage area) Wi-Fi network from the nearest recreation park, café, cinema or entertainment center, located in direct visibility from the user. The "repeatable" client may be a neighbor who gave you a password from its network, or a different volunteer who did not want to turn on the WPA-2 router protection.
If a wi-Fi signal From public space, it still does not "finish" to the apartment of the experimenter, it will take dismantling of one of the non-reinforcement antennas of the router and installing the segment in its place coaxial cable With an external radio. Then it is bought (or made independently) the strong-directional antenna, for example, the "eight" with a flat reflector (on the manner of the decimeter TV channels, but calculated under the band 2,4 or 5 GHz), the "wave canal", the logoeriodic, "plate" with the irradiator ( On the satellite manner with a small diameter of the mirror) or the standard industrial "multi-range" for Wi-Fi / 4G / Bluetooth networks (in the interval of 2.4-2.7 GHz). In general, the field for experiments with a router in repeater mode is even debugging.
So, closer to business.
- Go to the wizard of the quick Internet configuration and turn on the repeater mode, then click Next.
Turn on the repeater mode on the router
- Select a router whose network want to expand.
Select a router with a network known to you
- Enter the WPA-2 key (if the network is protected). This and next steps can be skipped if the network is open.
Enter your own SSID and password for the network being created.
- Wait until your router connects to a given network.
Wait while connecting to another Wi-Fi network
The router will inform about a well-configured network. You can use the Internet and shared LAN resources from the router donor.
Video: Router, access point and repeater in one ASUS RT-N12 device
Reset Routher Settings
The reset is needed when you have confused the configuration of the provider, and there is no help to help (there is no Internet in this place, there are no people who could help with the settings).

All your personal settings will be lost.
More often in this submenu, save successful settings using the Save button. This will help you save time when there are problems with current parameters. Especially when you have several providers on the line using different protocols and specific settings, several different modes Wi-Fi works (Router works in the car), etc.
The restart button is located on the main page of the ASUS RT router web interface.
The restart button in the web interface is not necessary.
Confirm (if required) Restarting the router. It helps to solve the issue, for example, with the "hanging" of incoming Internet traffic, if the router is directly connected to the cable from the provider.
Updating ASUS RT-N12 Routher Firmware
Download from Asus.com Update firmware for ASUS RT-N12.
You can use the firmware from another related model of the ASUS-RT family of the ASUS-RT family, but no one guarantees the preservation of the performance of the device.
Make the following.

After installing the update, ASUS RT-N12 will restart.
Router flashing reces its settings - Before upgrading to save them with the already familiar command "Administration - Save Settings" command.
Video: Update the ASUS RT-N12 Routher Firmware
After purchasing ASUS RT N12, you have a question: how to set up a WiFi local network. To answer, you need to understand the features of the connection through this router. This is what we now will go.
So, first of all, we will deal with the connectors on the back of the equipment and correctly connect the cable. On the rear router there are 5 special ports: 1 of them are designed for WAN to which the main cable of the provider is connected, and the remaining 4 for LAN cables.
After connecting all cables, it is better to perform further configuration with personal computerhaving direct connection to equipment. Next, go to the most configuration of the router.
IMPORTANT! To connect a stationary computer or laptop, the LAN cable is used, one end of which is connected to any LAN port on the router, and the second to the corresponding port on network card Your personal computer or laptop.
This recommendation will seem funny and obvious to someone, but still check the connection of the router to the outlet. And also make sure that the Internet connection works, and there are no problems with the provider. In addition, check that only the connection on the local network is active.
Initial setting of router
We have already connected all cables, checked internet connections And turned on the router in the outlet. Now we need to learn how to configure ROTE. And this is done as follows:

IMPORTANT! "Admin" we write in the event that the factory settings have not changed.
- If you first customize the equipment, and logged in the first time, the automatic configuration will start. With automatic configuration, you only need to press the "Next" button and enter the necessary data.
- Then the router will define the type of Internet connection. If it is successfully determined, enter a password and username that you usually use to access the Internet.
- Now you need to enter the individual name Wi-Fi wireless network and come up with a password for it.
If you cannot configure the equipment and establish the correct operation using automatic settingsAlso, the connection type was not determined automatically, it is necessary to make settings manually.
Setting the local network of various providers using a router
Internet settings from Beeline, Rostelecom and Dom.ru differ among themselves. Next, consider the procedure for setting for each provider.
To begin with, we analyze the ASUS RT-N12 setting for the Beeline network: on the head page of the router settings (we went to it via the address bar of the browser using the IP address of the router) We click the "Internet" section. We offer a window where you fill out some lines, as shown in the illustration below. The main thing to select L2TP in the connection type and tp.internet.beeline.ru in paragraph VPN Server. We put ticks in two places, as in the picture.

After that, we save the entered data by pressing "OK". If all items are noted correctly, after 20-30 the connection to the Beeline network will be broken. Next later, a few seconds the connection will be restored, and you can work with various sites and other Internet resources. The Wi-Fi network will also be correctly displayed and operating on all devices: smartphones, tablets, and so on.
If you use Rostelecom's services, or Dom.ru, tighten the router in the same way, but only on the main page of the router settings in the Internet section, specify other data: in the connection type item, specify PPPoE, and not L2TP, as before. We also enter your unique login and password. The remaining items remain unchanged. The illustration below shows how the filled section looks like.

Setting up a Wi-Fi Wi-Fi network using the ASUS RT-N12 router
Open menu and select "Wireless Network". Next, fill in a number of items:
- The first item is an SSID, or the name of the wireless network. Your network name will be displayed in the Wi-Fi search list on all devices in the network area. The name is prescribed by English letters.
- In the "Authentication" paragraph, choose WPA2-Personal.
- Next, enter the password in the WPA Preview Point. The password must consist of a minimum of 8 digits.
- Save settings.
The figure below shows how the "Wireless Network" section looks like.

Setting up a local network via ASUS RT N12
So, we have dealt with the connection and configuration of the ASUS RT N12 router. Now let's look at how to configure the WiFi local network via ASUS RT N12.
We go to the "Local Network" section.
We change the address of the router, which was set by default, do it in the "IP address of the LAN".
Enter the IP address of your local network and click "Apply". After that, the equipment will work for your local network.
It is difficult to imagine a modern home or office without connecting to the World Wide Web.
We prepared detailed instructions The ASUS RT N10P router settings will help independently connect to the Internet; We will look at how to properly connect the device with cables, enter the settings depending on your provider or operating system, Configure WiFi.
Turning on router
This device includes: router itself, power adapter, cable for connecting to a computer.
This is enough to start connecting, and then setting up the device.

Perform the following actions in order:
- we connect the power adapter to the device and in the socket 220V;
- internet user insert into LAN 1 on our device, and the second end is inserted into the port of the computer (if there was a provider wire there before, it should be removed);
- the Internet provider cable is connected to the WAN jack on the device;
- enable by pressing a button.

The router begins to load a firmware. The model of the same device with the firmware V2 by setting will not differ, the difference is only in the size of the storage of firmware.
After turning on the device to the power grid, it is recommended to do full reset Settings.
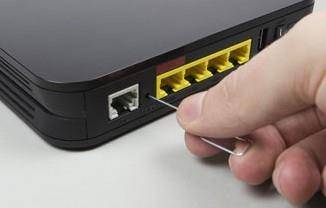
This is done by pressing and holding 12-15 seconds by some thin object (handle, clipping) on \u200b\u200bthe back of the button in the reset hole.
Preparation for configuration
You need to understand that now on the way to the Internet, your computer has another mediator - your router. A number of tasks to ensure communication he takes over. Next, you need to make sure that configuring the Internet protocols on the computer is set to automatically obtaining the ip-address.
After connecting the computer to the router, network address He will be assigned a provider, the router himself. It forms his own network and assigns the address in it. You should also make sure that the computer will automatically receive the DNS server settings - this is a server that interprets the site names you enter to the "language of communication" of the servers.

Often it is this setting that is performed on the network on the network affects the fact that they do not leave the pages on your monitor screen.
We find in the settings of your operating system:
- lAN connection;
- open properties;
- next, go to the Internet protocols and note that the ip-address and address of the address server (DNS) will be obtained automatically.
How to go to the ASUS RT N10P settings
On the computer launch the Internet browser. In the field for entering Internet addresses, enter four groups of numbers through the point - this is the network address of the configurable device. This model usually uses the address 192.168.1.1. After the last unit, the point is not put.
The screen should display the login and password field. By default, the manufacturer specifies the username and password - admin. I confirm the entry. If you do not open the login and password field, you can clarify the address of your device on the body of the product.
Connection
After we figured out how to access the router settings through the Web interface, we can connect to the provider server. Settings different operators The Internet may differ, so below we will look at the most common of them.
Setup for Beeline (Beeline)
We go into any browser, enter the router's network address in the address bar and turn out in the network map window. Further, in the additional settings select the Internet.

Indicate the parameters:
- wAN connection type - L2TP;
- get the IP address - automatically, yes;
- connect to DNS - automatically, yes;
- login (account number you pay for) and password (the same you need to enter your office on the provider's website);
- VPN server - tp.internet.beeline.ru;
- i confirm.
Setting for Rostelecom
Also, as in the previous case, we get into the settings. Next, click WAN.
Enter required functions For connecting, the main among which will be:
- connection type - PPPoE;
- automatic receipt of the IP address;
- DNS need to be set, also automatically.
We enter the login and password (they can be viewed in the contract). In the absence of a contract, it is necessary to call the provider technical support, you will be able to help restore the data. The remaining parameters should not be changed.
Configuring the connection to the provider server, you can do configuration. WiFi Asus. RT N10P and secure access parameters.
You must go to the Wireless Network item and specify the following settings:
- count SSID fill in the network name. This name will be broadcast and you will choose it to connect to WiFi;
- in the column, the authentication method specify the safest type of protection for the WPA2-PERSONAL network;
- in the Preview key, enter the network password. It indicates English letters and numbers, the characters should be more eight.
How to reset the settings
If the router works with interruptions and its reconfiguration does not bring results, then we reset them and enter the settings again. On the rear panel of the device in a small hole, you need to click on the RESET button and hold for 12-15 seconds. As a result, the power indicators will be illuminated on the device. This means that the settings are changed to the source.
Settings are reset in the router control panel. We go to the Advanced Settings section, click Administration, Settings Management, Factory Settings and choose - Restore.
How to put a password
In the Administration item, the system changes data data to the device menu. After entering the password it should be remembered or recorded. Remember, Wi Fi password and a password for accessing the menu are different passwords.
If you forgot password WiFi. It can always be changed in the device menu, and if you forget the data to access the device menu - you will have to drop the settings for factory and configure everything again.
Set up IPTV.
If the provider supports the transfer of television channels over the Internet, you can access them through your router. Re-use the web interface and open the router settings. We will be interested in additional settings, LAN and route.
We check the multicast routing (should stand - yes). In the IPTV UDP Multicast To Http Proxy Port Count, you can enter a value - 1234 (this is useful when you need to facilitate the work WiFi network, having freeing it from multicast packages). All, channels are configured for wired TV consoles.
To provide access to television channels wireless clients It will be necessary to enter additional settings, wireless network, professionally and set the multicast routing rate on the indicator - 24. Please watch TV on your tablet or laptop.
Finally, you will submit our wireless network from multicast packages. HTTP packets will be broadcast instead. In the previous settings, we have already set a value of 1234. Open the list of channels is the format file.M3U. To do this, use any text editor.
Video: ASUS RT N10P Routher Setup
UDP: //@239.23.0.200: 1234 / - This is how the recording of each television channel is first. And we need to change each entry, submitting it in this form: http://192.168.1.1:1234/udp/239.23.0.200:1234/. Eight digits - 192.168.1.1 is the address of the router. If your device has a different address, they need to be changed to yours.
1234 is the previously installed proxy port (set your values \u200b\u200bif they differ from the above). We edit the list of channels, save and use it in a player to view IPTV. Setup IPTV. Completed.
If you have PPTP
To connect K. PPTP provider, you need to specify network settingswhich are issued by the provider. Just as in the case of connecting PPPOE, Enter the username and password. The PPTP server can use encryption or select the AUTO parameter.
Another mandatory parameter for connecting: You must specify the IP address of the PPTP server provider.
To see the PPTP connection status, you must go to the network Map option.
We update the firmware
To update the firmware you need to go to the ASUS page on the Internet and find our device by specifying its model. Then choose the view of your operating system and download the desired file.: http://www.asus.com/ru/networking/rtn10p/helpdesk_download/.
After that, in additional settings you need to open the Administration option and run the firmware update. To do this, it is selected through the conductor previously downloaded file and the button is pressed - send.
Question answer:
Can the ASUS RT N10P router with a USB drive work?
Answer: No, in contrast to the ASUS RT N10U model, it is not equipped with a corresponding connector.
Can it work with a 3G modem?
Answer: Can not, not equipped with a USB port.
How to make a point of access point?
Answer: The modem settings allow it to be used in several work modes for compliance with various requirements. Launch Fast setup Internet, then setting up the Internet, you can select the access point mode (AP).
How to connect printer?
Answer: If the printer is equipped with a WiFi module, you can connect it to your router wireless network using the WPS button.
This router meets all modern requirements: a convenient menu to configure the ASUS RT N10P router, security, a wide range of settings. You can broadcast up to four networks with different levels. The device is ready to work, you can go online both by WiFi and wired connected, Print Documents without connecting wires to laptop and so on.
>The first thing is to face most of the services of services that the Internet provider provides the connection is setting up a home or office network. And if to solve this task in the office, as a rule, there is a specialist, then the network will have to install the network itself. In this article, let's talk about the ASUS RT-N10 setting.
We have been selected asus router as an example of how to make it as fast as possible
How to connect ASUS RT-N10
There is a large selection of communication devices in the market designed to organize wireless access in large and small rooms. ASUS products confidently occupies a leading niche and many choose wireless routers of this brand not only because of affordability, but also due to the reliability, ease of configuration and highly advanced functional.
One of the important advantages of the Asus RT-N10 router selected for writing, its convenient settings menu and the set of information on the network by third-party firmware for this device.
Before further setting up asus RT-N10, it must be properly connected to the computer.
After examining the device, on the back of its panel you can find a number of connectors and switchesConnecting to a computer occurs by connecting the "WAN" connector, located immediately near the input to power and the computer's network card connector by means of a cable with the RJ-45 connector.
If you look from left to right, the rest of the ports and the settings buttons perform features:
- connector connector external antenna. Its position can be changed to achieve optimal signal quality;
- "SETUP" button activating the simplified setup procedure and connect other devices without entering the password;
- the reset button of all device settings to factory parameters;
- 4 RJ-45 ports for connected devices;
- connector "WAN" for connecting to a computer;
- connector for connecting the power supply.
It can occur on a wireless channel. There is no need to connect it to the cable to the computer, but it is enough to turn on and set on the computer to search for wireless networks. After the network is found, you need to connect to it and then you can enter the device control menu.
Log in to the ASUS RT-N10 menu and connecting connections
After router Asus. The RT-N10 will be connected and enabled, you must go to the web interface for the further procedure for changing the program parameters. To do this, perform the following steps.
- In any browser used, we enter a request "192.168.1.1" in the string. This is the address of the control page of the device parameters where the administration options are located, the firmware change and so on.
- The router will ask you to enter the entry data in the pop-up dialog box. Password and login in this case (if the router is new or previously completed its parameters) the same - "admin".
- "Network Map" - here are displayed general settings current network, quantity and list of connected devices, its name and addresses;
- "Fast Internet Setup" - an option that allows you to quickly configure the ASUS RT-N10 router to work in several touch without changing the additional parameters;
- "EZQOS bandwidth control" - here are the parameters that are required to activate individual protocols of the work that requires the ASUS router;
- "Advanced Settings" - the firmware, administration parameters and other options are hidden;
- Below is the entire list of control menu - wireless network, Local Area, WAN, Firewall, Administration, System Journal.
The first thing you need to do is configuring the Wi-Fi router ASUS, it is changed by the factory password for invented independently.
Very often, this step is missing and then strangers will be able to quite just connect to the network and use it for their own purposes. About confidentiality of data and safety important information In this case, do not forget.
Configuring Beeline L2TP Connection on ASUS RT-N10
To connect to the Beeline Provider, on the example of the above router, several steps must be performed. The given instruction implies that the connection to the operator is available and the user has all the data for this.
- Connect the ASUS router to the computer (cable or wireless protocol).
- First you need to enter the ASUS router settings. Go to 192.168.1.1. and enter the input data (password and default login or one that has been changed earlier).
- On the Control menu page, go to the "WAN" tab.
- Next, enter the host and server name as shown in Figure 3 below.
- Wan Connection Type Set in L2TP mode.
- We mark the automatic receipt of the WAN address.
- The DNS setting comes down to the mark that it should be automatically assigned it.
- In the fields with the name of the user and password, we enter accordingly the data that was obtained from the provider to connect.
At this, the ASUS router configure is almost complete. In the IPTV item of the same page, you should specify a television prefix to which port is connected if it is used. Information which port indicate, in this case, provides the provider itself.
Configuring Rostelecom PPPoE to ASUS RT-N10
In the case of the Rostelecom service provider, the change management occurs similarly to the difference only in the connection parameters themselves. Different parameters are induced below
- Open the router settings by passing at 192.168.1.1.
- In a connection type point, you must select PPPOE.
- The "L2TP server" item is left blank.
- In the "Host name" point, we indicate Rostelekom.
- The name and username of the user according to the data obtained from the operator.
- DNS server Rostelecom is configured automatically to mark the corresponding item.
Configuring Rostelecom Connection to ASUS RT-N10 At this stage also ends and then the user can change other parameters or administer the router at its discretion.
Setting up Wi-Fi on ASUS RT-N10 router
If desired, the user can configure the Wi-Fi ASUS router using additional settings For use as a firewall. To do this, go to the section of the same name main page Control and set the necessary limit parameters and traffic control.
If you decide to independently configure the ASUS router, then you should not change the options of the device, names or destination of which You are unknown. This can lead to significant failures in its work or to subjected to information and data transmitted on the network, threats from the outside.
View video
Now you know how the ASUS RT-N10 is set.