What is included in reinstalling Windows. Reinstalling Windows. How not to lose your license
Hello reader! "Seven" is still popular. It is understandable. Stable, compact, not so voracious in terms of consuming computer resources. For many native and familiar. Updates are not as big as the "tens". "Seven" is still more "convenient" for office computers, many software products that are mandatory for use in organizations are "sharpened" for it.
Reinstalling Windows 7 doesn't take much effort. Everything is simple. But, you can reinstall in different ways, and for different purposes. You can reinstall from scratch on a new computer. You can reinstall the old one, but keep the data and save your time and nerves. You can install from a disk, you can install from a flash drive ..
Today we offer a large article about all this. You will even learn how you can install the Windows 7 operating system directly on Windows XP, with all data saved, and how to reinstall Windows from home base to any other. In general, read, evaluate, adopt. So..
Which assembly of Windows 7 is better to reinstall / install - official or not?
I have such a set of 32 and 64 bit discs, which was released for the CIS countries and Georgia, 2010. This is a licensed version, clean. Without any add-ons, drivers. Not "author's assembly". I recommend installing Windows7 (regardless of the method) from such official releases - “clean”, not “optimized”.
The fact is that if you are not lucky with the "assembly", at first there will be problems installing updates. And they will have to be solved. Think for yourself. Official releases for Windows 7 in stores have been sold for a long time. Even if you want to buy a licensed Windows7 disk now, you most likely will not find it in the store.
It may be possible to download a disc from the Microsoft website, paying in advance. I haven’t tried it for a long time, I don’t know how they are now with the “seven”. And now, putting the "seven", you will find that this issue is, for example, 2009 or 2011. What year is it now? One way or another, you will have to download and install all the updates that have been released since then. And well, if there are no problems.
When I tried to install various "author's" builds, I often had problems installing updates. And it's not about the license. And with official assemblies I have never had such problems. Especially to show the installation process completely from beginning to end - I will share the disks with you. Download official (32x) disc and official (64x) discs. Home base version, but that's okay, it can be "reinstalled" to "maximum" after (see below).
How to reinstall windows 7 from disk without saving data?
Let's define the rank. If the RAM on your device is less than 4 gigabytes and the hardware is ancient and weak, download the 32-bit version. If the RAM is 4 GB or more, download the 64-bit version.
We also need a blank DVD disc to burn our distribution. And a program for burning and working with disc images. Open the UltraIso () program.

Insert a blank dvd disc into the drive, click "Burn Disc Image".

We are waiting for some time until the recording is completed and - cheers, here is our windows7 disk prepared.


Now let's get started with the installation. The recorded disc is inserted into the drive. We restart the computer. You can boot from a CD through the BIOS, and if the computer is modern, try to call the boot menu using the F9 or F12 keys. To call the BIOS when the computer is restarted, press F2 or the Del key. We get into the BIOS menu

then we go here:

Select our DVD drive from the list:

and press F10.

Click "yes", this is how we save the settings. The device is rebooting. And now we see how the system boots from our disk. Press any key on the keyboard.

The system first copies the initial installation files to your computer. We are waiting for the end of the process.


Helps recover Windows from a crash using a standard set of tools. But, today we have installation, so click "Install." To get acquainted with the terms of the license, we are offered a window with the corresponding text:

It follows from it that by placing a copy of Windows from this disk, you are not yet committing illegal acts. Therefore, check the box and click "Next"

Select the installation type "Full installation". Next is the most important and crucial moment. You need to select a partition to install. It depends on what results we want to achieve, and the main thing is not to make a mistake :). You can accidentally “bang” the wrong partition .. Now we are doing the installation from scratch, so select the partition where the “System” type is indicated and click “Disk Settings”.

Select the partition where the type "System" is indicated and click "Disk Settings".

If we just want to install from scratch, then click "Format". Select the formatted system partition, click Next.
This installation can be done when the disk is new, or vice versa, it has a lot of errors. Viruses are also removed. True, you need to remember that all data and information will also be deleted. Actually, now the installation process has begun.

We wait until green checkmarks appear in front of each "Item" and until the computer restarts. Here is the "first use" box
Again, we wait a bit before rebooting. Here the system asks you to enter the Computer name and username. Enter and click "Next":

Let's remove the activation checkbox for now. We press "Next".

In the next window, select "Use recommended settings".

This means that your computer's network settings will be set to default. And the updates will be installed automatically. In the next window, if necessary, set the desired date and time on the computer.

In general, the reinstallation from the disk itself ends here. As a result, we got the following familiar window:

To consolidate the material, you can watch the whole process on the video:
Now you need:
- Install drivers from the motherboard from the disk;
- You can upgrade the version.
- Then install all updates by connecting your computer to the Internet.
How to reinstall windows 7 from flash drive via bios
Everyone knows that Windows 7 was sold on discs. This disk is also called boot disk. But, for a long time there are devices, such as ultrabooks, or netbooks, in which there is no drive for reading CDs. In this case, there is nowhere to go - you need to make a bootable USB flash drive with Windows7 and install from it. In addition, installation from a flash drive is much faster, since the data transfer speed is much higher.
In order to install Windows from a USB flash drive, you first need to prepare it, burn the disk image that we downloaded in the previous part of the article to the USB flash drive. Use a 4 GB flash drive.

We'll make the flash drive become a boot drive, then tell the computer that it's a hard drive and we need to boot from it. So let's do it. Simply copying the image to a USB flash drive will not do anything. Therefore, open the UltraIso program:

File - Open - open the folder where the Windows 7 disk image is located:

…..and then open the image with the mouse:

Then we insert the USB flash drive into the slot and go to Boot - burn the image of the hard disk:

In the window, select our USB flash drive (look, do not confuse if you have other drives inserted into the USB connector), check the settings no matter how the picture appears, click "write":

We are waiting for the end of the recording. Usually two to four minutes. Flash drive with Windows 7 is ready.

We insert it into the socket, and restart the computer. You need to go into the BIOS, for this we press the Del key

In the settings, select the boot menu (Boot) and in the boot settings, select our USB flash drive. Press F10 and when you exit, save the settings by pressing the "yes" key:

You can also try to boot from a USB flash drive without going into BIOS. On modern computers and laptops, when loading, by pressing the F9 or F12 key, you can call up the boot menu and then by moving the cursor select our flash drive in this way:

The installation has begun, the whole process is repeated as in the previous chapter.
After that, we prepare the system for work - we install the drivers, if necessary, we increase the version, then we install the updates.
How to reinstall windows 7 with saving all the data on the computer?
Regardless of whether we install Windows 7 from a disk or a flash drive, we can save the previous installation, and not only. All information will remain on the hard drive. We repeat the steps described in the previous chapter. But, at the stage of selecting a partition on the hard disk, select a partition with the "System" type. And just click the "Next" button. The installer will warn you that an operating system may already be on the disk:

We agree, click "OK". All system folders from the previous installation (including your documents located in standard locations) will be moved to the Windows.old folder. And you will definitely be able to find them there later.
Other folders and files (except for installed programs) will not be deleted. It remains only to reinstall the drivers, updates and programs. But, this is not the only way that you can reinstall the system without losing data. Let's continue this topic by moving on to the next chapter.
How to reinstall windows 7 without disk and flash drive?
Unbelievable, but it is a fact. 🙂 🙂 . You can friends, you can reinstall. Have you downloaded a distribution kit from the Internet with a “clean” windows7? This is a disk or flash drive .. True, virtual. I will say more reader, sometimes this installation option is the only option. When the system crashes and you need to work, this method restores system files and removes old, damaged ones, replacing them. True, there is a nuance, without taking into account which the number will not work.
The edition of the distribution kit downloaded from the Internet must match the edition currently installed on your windows 7 computer. For example, if you have "Home Extended" 32-bit, then the resulting distribution kit should be the same.
We go to the folder with the downloaded distribution kit. We find it and right-click on it, select "Extract":
 After waiting a minute or two, we get a folder with the same name as the disk image file. It contains our windows installation. Having opened it, click on the setup file:

By the way, this file can be run both from a disk and from a flash drive with windows 7 (if any). If you perform these manipulations from a laptop, connect the mains power to it.
We received a blue window of the installation wizard. You don't need to restart your computer 🙂 🙂 🙂 Click

The system starts the installation:

A window appeared asking you to download and install updates from the Internet. If the system is buggy, I choose to install without updates, it saves time.


The next window is the installation type. Full will not work now. We select the “Update” installation type, we, as it were, “update” the system.

Started a new installation. Looking forward to its completion. And reboot, after which the system will transfer files and programs.

After the reboot, the system will prompt you to activate windows, set the date and time. You will need to install system updates after connecting to the internet. Reinstallation with saving data can be considered complete. But, and this is not all ways, friends. While watching the video
Let's move on to the next interesting section of the article.
How to reinstall windows 7 on xp (Windows XP) without a disk and save the data?
Yes, friends, I'll tell you how. Of course, many may say that this is not possible, they say they tried. Indeed, the good old XP is so old ... Official sources say that it is impossible to upgrade it to the seven directly. But it is not always the case. It is necessary to update, XP no longer meets the requirements of the time, it works slowly and is buggy. In many offices, the old XP is still “working” ... At work, I updated all the old computers in this way.
Almost everyone has Windows XP - 32-bit edition. You cannot reinstall a 64-bit system to a 32-bit one. Therefore, download the 32-bit distribution! To switch to 64-bit, you need to re-install clean 64, and only then you can transfer only files, for example, from an archive.
To save all the data, desktop settings, as well as the necessary installed programs, you first need to download the file and settings transfer tool for windows 7. After downloading, install it on Windows XP by clicking on the installer. Open - Start - All Programs - Accessories - System Tools -Means for transferring files and settings.

Master opened.


This is the original computer.

The system first automatically selects all your files according to standard locations.

In this window, it is proposed to automatically save all personal files. And shared files. In general, we don’t touch anything, in personal ones, you can click on “Settings”, choose what else we want to save. The fact is that your important documents do not have to be in the “My Documents” folder, right?


We mark folders and files only on the system partition. It is not necessary to mark data on other volumes. We will install Windows on the system partition (the Windows folder is on it). Data on other partitions is not affected.

You need to select a partition on the computer on which this file will fit. And select the contents of the partition on which we put Windows. Otherwise, there may not be enough space.

The largest file that I got was more than 80GB. But usually it comes out from 2 to 8 GB. Click "Save" and wait 10 minutes for the save to complete.
The data has been saved. Now we are trying to install windows7. Without restarting the computer, we repeat the steps of the previous chapter:
After the installation is complete, transfer the data to the "new computer".
We go again Start all standard utility programs - the wizard for transferring files and settings. As before, we reach

We agree that this computer is new :). We follow the path where our transfer file lies and open it:

Before moving on, let's check which account the data will be transferred to. This usually happens automatically. But, if you have more than one account when the installation was done, sometimes there are problems with the transfer. Select "Advanced Options"

And we compare the necessary accounts.

We are waiting for the end of the transfer. And we reboot. If you have a very old Windows XP, installed somewhere in 2003, you may need to install it standardly through the BIOS - from a disk or USB flash drive. It's okay if you copied your data to the transfer file beforehand. And then you can restore everything from this file. And the results are different.
Reinstalled Windows 7 Home Basic. Very basic 🙂 You can’t even change the desktop theme, an inquisitive reader will say. And it does not matter, I will answer. You can upgrade the edition. This is the same kind of reinstallation - without a disk, without anything at all there would be an Internet. Read on and do it.
How to reinstall windows 7 from "home base" to "maximum" (or any other)?
If you downloaded the distribution from the links in this article, then you need to upgrade the version. After all, the base is the simplest in terms of design and functions of the “seven”. Yes, and it is difficult with clean distribution kits for seven people now on the Internet, it takes a long time to search and download. Which one you get is not known. They write one thing, insert a disc, and there is another edition. Updating the edition to the right one can be much easier than searching for a long time.
Updating to the desired edition occurs "from the bottom" "up", from less functional to more functional. The reverse process does not work. I did it, and it's true, but glitches, glitches ... It's not worth it.
Everything is just outrageous. You don't even need to be connected to the internet. Indeed, on our “new” computer now there are no drivers for the network card ... We go to Start - computer - Right-click properties:


Windows Anitime Upgrade Welcome Form


Home Extended/Home Premium:
6RBBT-F8VPQ-QCPVQ-KHRB8-RMV82
Professional/Professional
VTDC3-WM7HP-XMPMX-K4YQ2-WYGJ8
6RQ9V-6GCG4-8WV2H-966GF-DQ4DW
32KD2-K9CTF-M3DJT-4J3WC-733WD
Maximum/Ultimate
FJGCP-4DFJD-GJY49-VJBQ7-HYRR2
342DG-6YJR8-X92GV-V7DCV-P4K27
The key check will start:


The process has begun.

The system will reboot during the update. The process itself is quite fast, 10-15 minutes. But everything will depend on your Internet connection, which, if any, will simultaneously download another 120 updates for a new installation and install them. After that we get the following window:

For those who like to listen and watch here is a video on this topic
Phew... Finally, we got Windows 7 Home Premium ready. This is what I have today. You can reinstall to any edition. The higher the edition, the more features :). This is my big article today. I hope it's useful. Write to whom you helped, if it doesn’t work, write the same .. See you on the blog !!
In this article, you will learn how to reinstall Windows 7 yourself. The material is designed for users who will install Windows on a computer or laptop for the first time. No matter how scary it may sound, reinstalling Windows is very simple. In the days of Windows 95 and 98, to an inexperienced person, the procedure for reinstalling the operating system could seem like a mystical rite. The person who was invited to do this was necessarily called a programmer, and was considered a guru in the computer field.
For their part, such gurus, inflating their own worth, in every possible way intimidated their clients with terrible computer terms and stories about viruses and burned-out computers. In this guide, you will see that this is not at all the case and that installing or reinstalling Windows on your laptop or computer is very simple and accessible to almost anyone who knows how to use a computer mouse.
I'll make a small disclaimer. This article will show you how to install Windows 7 yourself using a DVD. If your computer or laptop does not have a DVD drive, then you will need to install Windows from a USB flash drive or memory card, I will talk about this in another lesson.
Before you start reinstalling Windows, read the entire article to the end, and if you have a printer, then print it.
Reinstalling Windows 7 consists of several steps:
- Preparing a computer for installing Windows 7;
- Preparing an installation disk with Windows 7;
- Setting up the BIOS of the computer to boot from a DVD;
- Installing Windows 7;
Now let's go through all the steps in detail.
1. Preparing to install Windows 7
Before reinstalling Windows, you need to do a little preparation.
First you need to copy all the valuable information from the C drive. Of course, you know better, but still I’ll tell you where to look. There are not so many places where your useful information can be located on the "C:" drive, usually it's the desktop and "My Documents". It is also worth looking into the root of the "C:" drive, sometimes people in a hurry or simply out of ignorance save files there. Copy all the files you need to another drive (for example, “D:”), a DVD disc, or a flash drive.
For the future, keep in mind that it is best to store information not on the same disk partition on which the system is installed, and, of course, create backups.
If you just purchased a computer or are sure that there is no valuable information in it, then naturally you can not bother
Another point that should be considered before installing Windows is the drivers for the network card. If after installation it turns out that your Windows distribution did not have drivers for your network card, or for some reason they were not installed correctly, then you will find yourself without drivers and without the Internet. Therefore, download the latest drivers in advance, at least for the network card.
2. Preparing the installation disk with Windows 7
Those who already have a Windows 7 installation disc can skip this step. If you do not have such a disc, then you need to burn it or purchase it. Those who want to download Windows on the Internet, look for clean MSDN builds.
This way you protect yourself from possible errors in the operation of the installed system.
Windows 7 installation discs on the Internet are usually distributed as ".iso" disc images. Where to download I will not say. to promote their distribution is not entirely legal. I can advise, before downloading the image, read the comments to the release, problem discs are usually quickly identified in the form of a bunch of angry reviews.
At this stage, it is worth deciding which version of Windows 7 to install on your computer, 32-bit or 64-bit. I will not go into details, since a separate article can be written on this topic. Let me just say that a 64-bit system can work with the entire amount of RAM, while a 32-bit maximum uses only about 3.25 GB. At the same time, a 64-bit system, due to 64-bit address pointers, requires more memory during operation. This increases the amount of memory used by applications.
Also, in favor of a 64-bit system, it is worth considering that when using 64-bit applications, there will be a fairly good increase in their performance.
Conclusion: a 64-bit system should be used if the amount of RAM in your computer is 4 or more gigabytes, which, in principle, is already becoming the norm for a modern computer.
After the image is downloaded, you need to burn it to a DVD, and you can proceed with the installation.
3. Setting up the BIOS of the computer to boot from DVD
To install Windows, it’s not enough just to insert a DVD disc into the drive, you also need to make sure that the computer starts booting from this disc when you turn it on. This is done in the BIOS. There is a BIOS in almost any computer or laptop, it stores all sorts of important settings, one of these settings is the device boot order. This setting is of interest to us at the moment.
In order to get into the BIOS, you need to immediately press a certain key on the keyboard when you turn on the computer. Usually, at boot, the screen says what exactly you need to press to get into the BIOS menu. Most often, this is the Delete, Esc, or F2 key. You will find out that you have entered by seeing the BIOS menu in front of you.
The most common options are:


If the attempt was unsuccessful, then reboot the computer and try again. Below are tables with possible options for entering the BIOS.
| BIOS manufacturer | Keys |
| ALR Advanced Logic Research, Inc. | F2, Ctrl+Alt+Esc |
| AMD (Advanced Micro Devices, Inc.) BIOS | F1 |
| AMI (American Megatrends, Inc.) BIOS | Del |
| Award BIOS | Ctrl+Alt+Esc |
| DTK (Datatech Enterprises Co.) BIOS | Esc |
| Phoenix BIOS | Ctrl+Alt+Esc, Ctrl+Alt+S, Ctrl+Alt+Ins |
| PC manufacturer | Keys |
| Acer | F1, F2, Ctrl+Alt+Esc |
| AST | Ctrl+Alt+Esc, Ctrl+Alt+Del |
| Compaq | F10 |
| CompUSA | Del |
| cybermax | Esc |
| Dell 400 | F3, F1 |
| Dell Dimension | F2, Del |
| Dell Inspiron | F2 |
| Dell Latitude | Fn+F1 |
| Dell Latitude | F2 |
| Dell Optiplex | Del, F2 |
| Dell Precision | F2 |
| eMachine | Del |
| Gateway | F1, F2 |
| HP | F1, F2 |
| IBM | F1 |
| IBM E-pro Laptop | F2 |
| IBM PS/2 | Ctrl+Alt+Ins then Ctrl+Alt+Del |
| IBM Thinkpad | from Windows: Programs > Thinkpad CFG |
| Intel Tangent | Del |
| Micron | F1, F2, or Del |
| Packard Bell | F1, F2, Del |
| Sony VAIO | F2, F3 |
| Tiger | Del |
| Toshiba | Esc, F1 |
After you have entered the BIOS, you need to find the option responsible for the boot order of devices. As a rule, these settings need to be looked for in the menu, in the name of which there is the word BOOT, of course there are other options, but as they say - "Who seeks, he will always find."
To facilitate the search, I will give a few examples of how it looks live:


The choice of the device to boot first is usually done using the arrow keys on the keyboard, but there are other ways to navigate the BIOS menu, so if you can’t figure it out, you can look at the help, which, as a rule, is visible in the BIOS.
Select your CD / DVD drive as the first boot device and exit the BIOS with all changes saved. To do this, use the Save and Exit Setup item. The computer will restart, and thus we have reached the next stage, for which, in fact, everything was started.
4 Install Windows 7
If the disc is recorded correctly and the BIOS settings are set correctly, we will see such an inscription in front of us: Press any key to boot from CD or DVD, which means Press any key to boot from CD or DVD.
It looks like this:

Press any key
If you don’t have such an inscription, then you may have done something of the above written wrong. In this case, check the BIOS again to see if the boot from DVD setting has been saved, if everything is set correctly in the BIOS, then most likely your disk is not bootable and you will have to look for another installation disk or download another Windows 7 image.
At this point I will make a small disclaimer. You may come across a Windows 7 installation disk, on which, in addition to Windows itself, additional utilities are recorded, in which case you will need to select the desired item in the menu of your disk to start the installation. It is also worth noting that in some discs, most of the operations described below will take place automatically, without your participation. Do not worry about this, all these settings can be changed, if desired, after the installation of Windows is completed.

To start the installation, click "Install"

You will be given the choice of which version of Windows to install. You need to choose the one for which you have the key. If you have a laptop, then often a sticker with a key and indicating the version of Windows is glued to the bottom. We will need the key itself at the end of the installation. In principle, it will be possible to introduce it not immediately, but within 30 days.

Agree to the license terms and click "Next"

Select full installation.

Select the partition where Windows 7 will be installed and click "Disk Setup"

At this point, an inexperienced person may have questions, so we will consider it in more detail.
Hard Disk Setup
Often, in addition to the partitions that you know about (such as C: D: E:, etc.), there may be one or more hidden partitions on your computer's hard drive. This is especially true for laptops that were sold with an operating system already installed. The manufacturer makes such sections in order to be able to restore the system and bring the laptop to its factory settings.
Also, a hidden 100MB partition is often found, it is created by Windows 7 itself. This partition is used to implement the BitLocker function, this function is designed to encrypt the system partition. So, in this section there is a program that, when loaded, will decode the encrypted system partition. If you wish, you can get rid of this partition by preparing your computer's hard drive for installing Windows 7 in advance. For this, it is best to use special programs, such as Acronis Disc Director.
Let's get back to the installation.
Click "Disk Setup" and "Format"

The installer will warn you that all data from this section will be deleted, but we are not afraid, because we prepared for this and made a backup copy of all the information we needed in advance, so feel free to agree by clicking the "OK" button.

After finishing formatting, click "Next"

Waiting for installation to complete

After installation, you will be prompted to enter your username and computer name.


We enter the key, it can be glued to the laptop from below, or in the form of a sticker on the system unit.

Set the security mode

Set the date, time and time zone

If the computer has a network connection and the system has found a driver for your network card, Windows will prompt you to select the type of connection

This completes the installation of Windows 7, and you can proceed to install the drivers and programs you need.

Finally, do not forget to return the BIOS settings that we changed in paragraph 3 our leadership. You must set your hard drive as the first boot device in the BIOS, otherwise the computer will try to start booting from DVD every time it starts.
(209 Votes)
Learn how to reinstall Windows, keeping all your important files and settings even after a complete system crash!
It's sad, but true: Windows can stop working at any, even the most inopportune, moment ... So, for example, it happened to me just the day before yesterday. The computer just froze and I had to turn it off with the button. After turning it back on, the system no longer booted up, hanging on the very first startup screen.
All my attempts to boot into safe mode or roll back a restore point were in vain. There is only one thing left - to state the complete collapse of the operating system that has served me for more than three years.
Reinstalling Windows is not a problem at all. Moreover, I have been lying with my "Eight" for a long time. The main trouble was that there were a lot of programs and project files that I needed for work on the system drive C. But how can I save them if the system won't boot?
When do you need to reinstall the system?
More than once I had to deal with users and various computer "specialists" who, at the slightest failure of the system, immediately say that it needs to be reinstalled. If you don't have any valuable data on Drive C, then in principle you can reinstall, but it's usually better and faster.
There are two most common cases where you can avoid reinstalling the system. Both of them are related to errors in the hard drive.
The most obvious error is manifested by the fact that the computer at the very beginning of startup displays the message "NTLDR is missing" on a black background:
The problem is a bootloader malfunction and / or failure of the main boot record on the hard disk (MBR - short for "Main Boot Record"). To solve it, the easiest way is to start a PC from a Windows PE-based boot disk (for example, Alkid LiveCD), open a command prompt and execute two commands in turn:
- bootrec.exe /FixMBR
- bootrec.exe /FixBoot

They should restore the boot sector of the hard drive and your system will be able to boot again. The only exception is the new Windows 10, since it does not use the MBR, but the GPT table.
The second option for a hard disk or file system failure is not so obvious. It may appear:
- in the form of a "blue screen of death";
- in the form of "endless" loading of Windows;
- in the form of a computer failure to boot indicating a corrupted file on a black screen.
You can try to fix such an error through the same Command line of the boot disk with the command:
chkdsk C: (or other drive letter)/f /r (recovery keys)
It will take you very little time to execute the above commands, but the result of their execution can bring the “fallen” system back to life without reinstalling. However, if they did not help, then, most likely, you still have to reinstall Windows ...
How to boot from disk
In the previous section, we already talked about the fact that it would be very desirable for you to have a boot disk to restore and reinstall Windows. You can read more about how to create such a disk in a separate article, but here I would like to talk about how to use them to boot a computer and what can be done.
To boot from a bootable disk or flash drive, we first need to set the boot priority of the computer using the BIOS or a special boot menu. You can access these components by holding down one of the following keys while starting the computer (depending on the model and type of motherboard):
- Delete or Del;
- Escape or Esc;
If the BIOS opens in front of you (usually a blue screen with white text), then you will need to go to the "Boot" section (on some motherboards "Advanced settings") and set the "1st boot device" item in the "Boot device priority" list (or "First boot device") is not a hard drive, as it may be by default, but a CD-ROM or your flash drive (on some motherboards, it must be connected to the computer before booting to be recognized by the system):

After setting the boot path, press the F10 button and confirm saving the new settings. The computer will restart and start booting from the device you specified.
If, instead of BIOS, the boot menu opens, then it's even easier. Select the boot resource with the cursor arrows and confirm your choice by pressing Enter:

And now, as for the possibilities of different types of boot disks:
| Boot disk type | Capabilities |
|---|---|
| Standard Windows installation disc |
|
| Windows PE LiveCD |
|
| Linux LiveCD |
|
| Specialized LiveCDs | performance of any highly specialized tasks (data recovery, disk partitioning, anti-virus scanning, etc.) |
As you can see, boot disks based on Windows PE ("Preinstallation Environment" - from the English "pre-installation environment") provide us with the widest range of opportunities, and I recommend this type of disk to anyone who wants to get a universal tool for data backup and repair systems. Of the best, I would name the assemblies:
- Alkid LiveCD;
- Bart P.E.;
- Windows PE Se7enLIVE.
The first two assemblies work on Windows XP, and the second on the Seven, but you can use them on any PC, since they themselves do not make any changes to the hard drive and run from RAM. Choose any of these LiveCDs and go...
What data to store?
So, we have a non-working Windows in our arsenal and, for example, Alkid LiveCD. We have already tried all the commands for quickly restoring the system's working capacity, but our "Windows" did not work ... What should I do?
If there is no physical damage to the PC (the hard drive did not break, the RAM did not burn out, etc.), then the matter goes unequivocally to reinstalling Windows. However, before that, it is desirable to save the maximum possible amount of data we need that remains on the system drive (usually Drive C:).
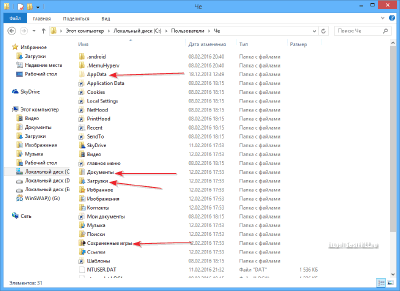
Open the disk with your Windows folder and examine its contents. If you have Windows XP or earlier, then the contents of the system disk will look something like this:

The two key folders here are Program Files, where all your programs are installed, and Documents and Settings, where all documents are stored. These two folders can "weigh" tens and hundreds of gigabytes, so there is no point in copying them completely. You have to be selective.
For example, from the Program Files folder, it is advisable to save only the configuration files of the programs we need, which may have the .INI, .XML, or .DAT extensions. It makes sense to do this only for those programs that you set up personally and that you constantly use, and not for everyone! For example, for various notepads (like Notepad++), music player (like AIMP) or file managers.
If you did not find the necessary configuration files in the Program Files folder, they will most likely be stored in the Documents and Settings folder. Open it and look for either a folder with the name of your account, or with the name "Admin":

Inside there will be several folders that may contain the necessary files:
- Desktop (actually, stores all files and folders on the desktop).
- Documents, My Documents, or Documents (the contents of the My Documents folder on the desktop).
- Application Data (stores settings and temporary files for most programs; hidden by default).
- Local Settings (another hidden settings folder).
On Windows since Vista, the root directory of Drive C looks a little different:

If you have a 64-bit system, then here you will find two Program Files folders at once (64-bit programs will be stored in the folder without additional characters, and 32-bit programs will be stored in the folder with the "(x86)" subscript), the "ProgramData" folder , which stores some additional modules of some programs, as well as the "Users" or "Users" folder - an analogue of the Documents and Settings folder.
In the Program Files and ProgramData folders, I think you will not get confused, but in the Users folder, you will need to find a directory with the name of your account, which will contain a number of subfolders:
First, here, as in Windows XP, the Desktop and Documents are stored. Secondly, the Library folders, such as "Downloads", "Music", "Videos", "Saved Games", etc. Thirdly, an analogue of the Local Settings and Application Data folder called AppData with three subfolders: Local, LocalLow and Roaming, which also store the settings for a number of programs.
Do you need a clean install or a clean reinstall of Windows 7, with a full format of your hard drive, but don't know how to do it? Easily! We will tell you everything in this article step by step and with pictures.
Step 1
In most cases, a clean install of Windows 7 allows you to remove your existing operating system and replace it with a fresh, brand new "Windows 7" operating system.
In other words, it's a process of "erasing everything and starting from scratch" by getting rid of junk, viruses and bugs and malfunctions accumulated over many years.

This article is about how to install Windows 7 if:
You want to remove everything you have and install a new, clean Windows 7
you want to reinstall windows 7
you want to install Windows 7 on a new hard drive
This guide is broken down into 34 steps and details all the ins and outs of installing a clean install of Windows 7. Let's get started…
Backup and Product Key Finder
The most important thing to do before performing a clean install of Windows 7 is to save all your important documents, music, movies, photos, and so on.
You should also look for the Windows 7 Product Key, a 25-character alphanumeric code.
Start the Windows 7 setup process
When you are absolutely sure that all the necessary data from your computer has been successfully saved and written to other media, proceed to the next step. Keep in mind that once you delete all information from this drive (as we will do in the next step), it will be impossible to get the data back!
Step 2

To begin the Windows 7 clean install process, you need to restart your computer and boot from a DVD or USB device, depending on which media you have your Windows installation files on.
1. Insert the Windows 7 DVD or USB into your computer and restart it.
2. You will see a black window (pictured above) with a message to press any button to start booting from CD or DVD.
3. Press the key to force the computer to boot from the Windows 7 DVD or USB drive. If you don't press a key, your computer will try to boot from the next device in the boot order. If you had an old operating system installed, it will start loading.
Note. If this window asking you to press a key does not appear for you, but your current operating system is simply loaded, then the reason is that your BIOS is not configured to boot from external drives. In this case, we restart the computer, at the start of the boot, press the F2 or Del key, go to the BIOS and in the “Advanced BIOS Features” section, go to the “Boot Sequence” item and put the CD / DVD drive in “1st Boot Device”. (USB-flash)
Step 03
Wait for the Windows 7 setup file to load

Here we just wait for Windows 7 to finish downloading files in preparation for setup.
Note. There are currently no changes made to your computer. Windows 7 simply temporarily downloads the files needed for the installation process. You will be deleting everything on your computer in the next step.
Step 04
Wait for Windows 7 Setup to finish downloading

After the Windows 7 setup files are loaded into memory, you will see the Windows 7 splash screen indicating that the setup process is about to begin.
At this stage, you don't need to do anything.
Step 05
Select language and other settings

Select the installation language, time format, and default keyboard layout that you want to use in the new Windows 7.
Step 06
Click the "Install Now" button

Click the Install Now button in the center of the screen below the Windows 7 logo.
Step 07
Wait while the installation of Windows 7 begins

Step 08
Accept the Windows 7 license terms

The next screen that appears is a text box containing the Windows 7 software license.
Read the agreement, check the box I accept the terms of the license agreement, and then click "Next" to confirm that you agree to the terms.
Step 09
Choose your Windows 7 installation type

Click the Custom Install (Advanced) button.
Step 10
Disk partitions for the new Windows 7

On this screen, you will see every partition that Windows 7 recognizes. Since a clean install involves removing all partitions associated with the existing operating system, if it exists, let's remove them.
Important: If you're installing Windows 7 on a new hard drive that doesn't have an operating system, you can skip directly to step 15!
In the next few steps, you will remove the partitions containing the operating system.
Step 11
Removing a partition with an existing Windows

Important. Before proceeding, remember that deleting a partition will permanently delete all data from that drive - all programs, all music, all videos, all documents, etc. stored on that particular drive you selected.
Highlight the section you want to delete and click the "Delete" link.
Note. The list of sections may differ significantly from the one shown in the picture. On my computer, I'm doing a clean install of Windows 7 on a 30 GB hard drive that previously had an older Windows 7 installed.
If these drives have multiple hard drives and/or multiple partitions, be careful confirming that you are deleting the correct partition. For example, many people have two hard drives or partitions that act as spare drives.
Step 12
Confirm partition deletion

After deleting the partition, Windows 7 Setup will prompt you to confirm the action.
Press the OK button.
Step 13
Delete other partitions related to the operating system

Windows 7 Clean Install - step 13.
If there are other sections that need to be removed, you can remove those as well.
For example, the Windows 7 installation on my computer previously created a special 100MB (very small) partition to store system data. Now this section is no longer needed, so I will delete it too.
Note. As you can see, the section we removed in the last step is gone. It might look like it's still there, but if you look closely, you'll see that the same 29.9 GB space is now labeled "Unallocated space" instead of a partition.
Step 14
Confirm removal of additional partitions

As in step 12, the Windows 7 installation will prompt you to confirm the deletion of this partition.
Press the "OK" button to confirm.
Important: As before, remember that all data stored on this drive will be lost.
Step 15
Choose a physical location to install Windows 7

Windows 7 Clean Install - step 15.
As you can now see, all space on the installed hard drive is unallocated. There are no partitions on this computer.
Note. The number of partitions displayed and whether those partitions are unallocated parts of the hard drive, previously partitioned spaces, or previously formatted and empty partitions will depend on your particular system and the partitions you removed in the last few steps.
If you are installing Windows 7 on a computer with a single hard drive that you have just deleted all partitions on, your screen should look like the one shown above, except for the size of your hard drive.
Select the appropriate unallocated space to install Windows 7 and click Next.
Note. You do not need to manually create a new partition, and you do not need to manually format a new partition. Windows 7 will do this automatically.
Step 16
Wait while Windows 7 is installed

Windows 7 will now install a clean copy of Windows 7 to the location you selected in the previous step. Now there is nothing to do but wait.
Depending on your computer, this process may take from 5 to 30 minutes.
Step 17
Restart your computer

Now that the Windows 7 clean install process is almost complete, you need to restart your computer.
If you do nothing, your computer will automatically restart itself. You can also click the "Restart Now" button.
Step 18
Wait while Windows 7 continues installation

Windows 7 installation will continue after the reboot.
Here you don't have to do anything. There are a few more automatic Windows 7 installation steps.
Step 19
Wait while Windows 7 Setup updates registry settings

Windows 7 Setup now updates registry settings in preparation for the final steps of a clean installation of the operating system.
Step 20
Wait for Windows 7 to start the necessary services

Wait for Windows 7 to start various required services.
This service start will happen during every boot of Windows 7 as well, but you won't see it again. Services run in the background during normal Windows startup.
Step 21
Wait for the installation of Windows 7 to complete

Windows 7 Clean Install - step 21.
This final Windows 7 "Installation Complete" screen may take a few minutes to complete. All you have to do is wait - everything is automatic here.
If the Windows 7 installation process is complete, why are we only at step 21?
The rest of the steps in this clean install process include a few simple but important configurations that need to be done before you can use Windows 7.
Step 22
Wait for your computer to automatically restart

Wait for the Windows 7 installation process to automatically restart your computer.
Important. Do not restart your computer manually at this point. Windows 7 Setup will restart your computer for you. If you interrupt the installation process by manually rebooting, the clean install process may fail. You may then need to run the Windows 7 installation again from the beginning.
Step 23
Wait for Windows 7 to load

Windows 7 Clean Install - Step 23.
Wait while Windows 7 loads.
No user intervention is required here.
Step 24
Wait while Windows 7 prepares your computer for first use. The Windows 7 program is now preparing your computer for "first use".
Windows 7 is now loading the drivers, making sure everything is set up correctly, removing temporary files, etc.
Here you don't have to do anything.
Note. Remember that this clean install of Windows 7 completely removed your old operating system. Windows 7 installs and sets up just like you would on a brand new computer.
Step 25
Wait while Windows 7 checks the video performance of your PC

Windows 7 Clean Install - step 25.
Wait while Windows 7 checks the video performance of your computer.
Windows 7 needs to know how well your graphics card and associated hardware is performing so that it can properly tune the performance settings for your computer.
For example, if your video system is too slow, Windows 7 may disable features such as Aero Peek, translucent windows, and other operating system graphics features.
Step 26
Select username and computer name

Windows 7 needs to know what username you want to use and how your computer will be identified on the local network.
In the "Enter username" field, enter your name. You can enter one first name, your first and last name, or any other identifiable text you like.
Note. You can use the name you had on your old operating system.
In the "Enter the computer name" field, enter the name that will be displayed on the local network.
Note. It is better to write the name using only English letters.
Note. If you need multiple users on this computer, don't worry, you can configure this setting later.
Step 27
Choose a password to access Windows 7

Step 28
Enter your Windows 7 product key

Windows 7 Clean Install - step 28.
If your old Windows 7 was a licensed copy, then take and enter the old key here, if you do not have a key, uncheck "Automatic", leave the key field empty and click "Next".
Download activation / crack for Windows 7, you can in it, we described in detail the entire sequence of actions.
Step 29
Select the Windows update option

Windows 7 Clean Install - step 29.
I recommend that you choose "only install important updates". This setting is the most secure because it prevents Windows 7 from doing anything to your data or to your computer, except when important security and stability updates are available.
Note. These settings can be easily changed in Windows 7 later.
Step 30
Choose the correct time zone, date and time
Windows 7 Clean Install - step 30.
On the View Time and Date screen, select the correct time zone, Date, and Time.
The time and date are most likely already correct, but be sure to check the time zone and change if necessary.
Step 31
Select network type

Windows 7 Clean Install - step 31.
In the "Select your computer's current location" window that you see now, Windows 7 asks where your computer is so it can set up proper network security—more secure for public places, and easier for private places like home and work.
Select "Home Network" if this is your home computer.
Select "Public Network" if you have a laptop and frequently use public Wi-Fi networks.
Step 32
Wait for Windows 7 to connect to the network

Windows 7 Clean Install - step 32.
Windows 7 connects your computer to the network.
Here you don't have to do anything. All automatic.
Step 33
Wait for Windows 7 to prepare the desktop

Windows 7 will now add all the finishing touches to your clean install.
Here you don't have to do anything. All these changes are done automatically in the background.
Step 34
Your clean Windows 7 is ready to go!

This completes the final step of your Windows 7 clean install. Congratulations!
Read also our articles on selection:
—
—
—
—
If you need it, then you can download it. And the activator for it is in .
The installation is identical to that of Windows 7.
Hello everyone again in my god!
Preparatory actions
Before installing a new OS from a flash drive or other media, you first need to take care of two important aspects.
First, these are the files you need. Reinstalling the operating system will completely destroy all files on your C drive. Therefore, everything you need must be transferred either to another logical partition of the hard drive, or to a blank or USB container. This applies to directories such as the desktop, my documents (plus any subdirectories) and the " Downloads". This is done on any OS that is on windows xp , that on newer versions.
Secondly, you need to make a backup copy of the drivers. Otherwise, then you will have to search for them all over the network again, and you don’t need to waste time, do you? You can do this with a program such as Double Driver. You can download it by this link.
By the way, there you will also find instructions in Russian, which describe in detail how and what to do.
Place the saved drivers on another logical drive, for example, under the letter D, or on removable media, so that you do not download them via the Internet later.
This is almost all that needs to be done before the demolition of the operating system. On my own behalf, I would recommend that you also rewrite the saved passwords from social networks and from Wi-Fi, otherwise you will have to restore them later, and this is a waste of time.
Distribution entry


This stage is divided into two options. Or you will install windows 8, or any other version, from a USB flash drive, or from a blank. In any case, you need removable media with at least 4 gigabytes of free space. Next, you need to download the distribution itself. It is better to use beta versions. It's legal and safe. I give you link on windows 10. Also, on the network you can find other distributions using a search engine.
Now we will take the method of creating a bootable USB flash drive. Download the UltraISO program here from here. It is installed on any version of Windows, so you will not have problems during the installation process.
Open the software, click on the button " Trial period". You will see the main interface of the program. Click on the tab " file”, in the drop-down list, click “ open» and choose the downloaded distribution kit of the operating system. Then insert the media into the USB port. In the program, click the "" tab, then " recording a hard disk image". Since you are going to install the OS from a USB flash drive, choose it. Click the button " formatting". As soon as the process is completed, click on the word " write down". All you have to do is wait for the end. The bootable flash drive is ready!
If you decide to install Windows from a disk, the steps are exactly the same, but when choosing a media, you select an empty disc, which you must first place in the PC drive. If the media is empty, then you do not need to format anything, go straight to recording.
BIOS setup
This is an important aspect of the entire OS installation process. You must be extremely careful, as the BIOS is one of the most important software parts of your laptop. Now I’ll tell you how to set up booting from removable media through bios. First, you reboot your machine. As soon as the screen turns on, you need to hold and hold one key or combinations thereof. On each laptop they are different, so I give you a sign by which you can navigate.


If everything is done correctly, this window will appear in front of you.


Select the tab " Boot", then go to the line under the number 1, press" enter"And in the list that appears, select the line that begins with the letters USB-HDD. This is if you install Windows from a USB flash drive. If from a disk, then select the line CD-DVD. Next, press the F10 button. The laptop will reboot and start booting from removable media.


OS installation
If you did everything right, a black screen should appear in front of you, with this inscription.


If you see something different, repeat the BIOS setup, most likely you did not save the results of your adjustments.
If everything goes as expected, press any key. A window like this should appear.


This is if you put the seven instead of whist . In other versions, the interface will be slightly different, but the principle of all actions is exactly the same, so you will not get confused. Check the box to the left of the inscription " I accept the agreement” and click the next button. Choose the full installation type, not upgrade. It's much smarter. I read many articles about this, experts advise to always do the installation from scratch.


A window will open to select a local drive. You click on the partition where you previously had an operating system. Next, you need to completely clean it. To do this, select the button Format". This process can take from 10 minutes to an hour. It all depends on how much space is on the local disk on which you will install the OS and how many files are on it. After formatting, it will be absolutely clean. Click " Further».
Now it remains only to wait for the completion of all processes. This takes quite a lot of time. It all depends on the power of your laptop and the speed of reading data. You can drink tea during this time, since you don’t have to do anything special yet. The whole process is automated.


As soon as the computer goes into reboot, you will need to set up booting from the hard drive through bios. I described how this is done above, only now in the line under the number 1 you substitute the value with the letters HDD. Don't forget to save your changes with the button F10. The laptop should reboot, loading from the hard drive will begin.
Completion of installation and configuration


This is the final step. After the reboot, the system will prompt you to enter a username. Write whatever you like. Then you can set a password. Decide for yourself here. I use a computer alone and I do not need it. Then choose the recommended security settings, set the date and time, set up the network and enter the Wi-Fi passwords.
To get started, reinstall Double Driver and install the drivers from a pre-made copy. Then restart your computer. Next, you should check the system for updates. This is also an important aspect, perhaps new service packs have been released. Also, I recommend that you install anti-virus programs. Perfect fit Avast, Panda Cloud Antivirus or AVG AntiVirus FREE
Conclusion
That's all, you have learned how to install the operating system yourself. Everything you need can be downloaded online. The process will not cause any particular difficulties if you do everything according to the instructions. In extreme cases, you can use the numerous videos in which this process is clearly shown. Here is one of them
Most importantly, do not interrupt the installation process! Otherwise, you will have to start over. The worst option - you can damage the software part of the computer!
After installation, you will feel the difference between the previously installed OS, which was littered with unnecessary files, and the fresh version, which will not slow down. I'll give you one more piece of advice. Store all the necessary files not on the logical drive where the system is located, but on another one. This will allow you to avoid situations when information after formatting can no longer be returned.
And on the OS section, let there be drivers, browsers, archivers and antiviruses. They still have to be reinstalled after the demolition of Windows. Let it be better to delete them immediately when formatting. Otherwise, then they will have to be uninstalled manually, and this is quite a long time.
On this I say goodbye to you, my dear readers. Share the link to the article with your friends on social networks, as the information is useful and everyone may need it. Subscribe to blog updates and always be the first to know about new tips and instructions! See you soon!