How to make a laptop hard drive external. How to make an external USB HDD (hard disk) bootable using standard Windows tools? Installing Hitachi Microdrive Driver Instead of Native USB Drive Driver
In this article, we will show you how to make sure that USBflash drive or SDthe card was detected in the Windows system like a normal local hard drive... You are probably asking, why is this necessary? The fact is that Windows by default defines USB flash drives and memory cards as removable drives that cannot be divided into several partitions using Windows standards. And even if you split the flash drive into two or more partitions using third-party utilities (in the same Linux), then only the first of them will be available in the Windows operating system (by the way, a built-in one appeared in Windows 10 1703). Those. Windows supports normal work with multipartitions only for HDD disks, which are defined in the system as local (i.e. non-removable).
RMB bits and USB sticks
Windows operating systems recognize USB flash drives as removable / removable devices due to the presence of a special bit descriptor on each device RMB(removablemediabit) ... If, when polling a connected device via the StorageDeviceProperty function, the system determines that RMB = 1, it concludes that the connected device is a removable storage device. Thus, in order from the system's point of view to convert a USB-flex to a hard disk, it is enough to modify this descriptor. This can be done directly (which is quite risky due to differences in hardware implementations of specific devices, and it is not always possible), or indirectly, by replacing the USB device's response using a special driver that allows filtering information in the device's response.
Advice... Some manufacturers release special utilities for flashing the controller of their flash drives. First of all, try to find such a utility and / or firmware on the manufacturer's website. This is the most correct way. If such a utility is not found, follow the recommendations from this article.
Connect a USB flash drive to any free port on your computer, then open the Disk Management Manager ( diskmgmt.msc) and make sure that its type is defined in the system as Removable(Removable device) .
Also, the device type can be viewed on the Volumes tab in the disk properties (as we can see here Type: Removable). 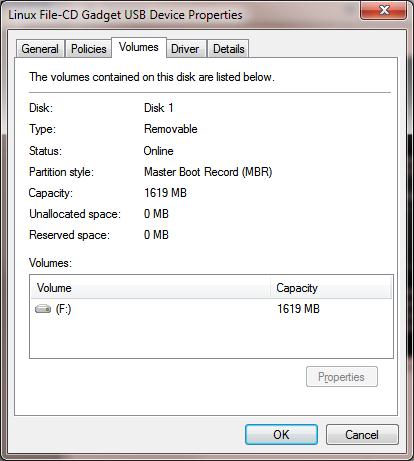
Or using the diskpart command:
List volume

In this article, we will consider two ways to change the RMB bit on a USB flash drive - using the Hitachi filter driver (changes are made only at the driver level of a specific computer) and changing the bit in the controller firmware using the BootIt utility from Lexar (a more universal method, but there is a number of restrictions and does not apply to all models of flash drives and SD cards). While both of these methods are quite old and I initially tested them on Windows 7, they continue to be relevant and work equally well on modern Windows 10.
Lexar BootIt Utility
Recently, I came across a rather interesting utility - LexarBootIt... It is a free portable program that can change the RMB of a removable storage device to a fixed USB device (or vice versa). Despite the fact that the Lexar BootIt utility is designed for Lexar devices (Micron, Crucial), it can work with flash drives from other manufacturers. BootIt utility supports all versions of Windows from Windows XP to Windows 10.
Important... The utility is guaranteed to work for Lexar drives. Judging by the reviews, the "Flip removable bit" function does not work on fast USB 3.0 flash drives. In addition, when you reflash the controller, you void the warranty for the USB flash drive and can make it inoperable.
You can download BootIt on the Lexar website (lexar_usb_tool) or from our website ().
- Run BootIt.exe as administrator
- In the list of devices, select your USB flash drive
- Click on the button Flip Removable Bit
- Save your changes by clicking OK.

Reconnect the device and use Device Manager to make sure it has changed from Removable to Basic.

If the BootIt utility did not help to change the RMB bit on the removable drive, try the following method based on the Hitachi Microdrive filter driver
Filter driver for flash drives Hitachi Microdrive
In order for a USB flash drive or SD card to be recognized in the system as a hard drive, we need a special filter driver that allows us to modify the data passed through the system stack of the current device driver. We will use Hitachi's USB flash drive filter driver ( Hitachi Microdrive driver), which at the OS driver level allows you to change the type of flash drive from removable to fixed (USB-ZIP -> USB-HDD). By using this driver, you can hide from the system that the connected device is removable. As a result, the system will assume that it is working with a regular hard disk, which can be divided into partitions that will be simultaneously available in the system.
Hitachi Microdrive Driver Archives:
- 32 bit systems - (3.0 Kb)
- Hitachi Microdrive version for 64 bit systems - (3.8 Kb)
It is necessary to download the driver version for your system in accordance with its bitness. Both archives have the same structure and consist of two files:
- cfadisk.inf- installation file, with driver settings
- cfadisk.sys- Hitachi driver file
The next step is to identify the device code of our flash drive. To do this, in the properties of the disk on the tab Details in parameter Device Instance Path select and copy ( Ctrl + C) device instance code. 
In our example, this will be:
USBSTOR \ Disk & Ven_Linux & Prod_File-CD_Gadget & Rev_0000 \ 0123456789ABCDEF & 0
Suppose we are planning to install a driver on 64 bit system... Using any test editor, open the file for editing cfadisk.inf... We are interested in the sections cfadisk_device and cfadisk_device.NTamd64.
% Microdrive_devdesc% = cfadisk_install, IDE \ DiskTS64GCF400 ______________________________ 20101008% Microdrive_devdesc% = cfadisk_install, IDE \ DiskTS64GCF400 ______________________________ 20101008
We change the value of DiskTS64GCF400______________________________20101008 to the code of our device.
Important! In the code of the device instance, it is necessary to discard the part after the second "\" (in our example, discard 0123456789ABCDEF & 0).
We get:
% Microdrive_devdesc% = cfadisk_install, IDE \ USBSTOR \ Disk & Ven_Linux & Prod_File-CD_Gadget & Rev_0000% Microdrive_devdesc% = cfadisk_install, IDE \ USBSTOR \ Disk & Ven_Linux & Prod_File-CD_Gadget & Rev_0000
We save the file.
If the driver is installed on a 32 bit system, you need to download the recommended archive, unpack it and open the cfadisk.inf file for editing. Find the section :
% Microdrive_devdesc% = cfadisk_install, USBSTOR \ Disk & Ven_LEXAR & Prod_JD_LIGHTNING_II & Rev_1100% Microdrive_devdesc% = cfadisk_install, USBSTOR \ Disk & Ven_JetFlash & Prod_TS1GJF110 & Rev_0dev%
Then we will change the data in the last line by specifying the code of the instance of our flash drive, i.e. in our example we get:
% Microdrive_devdesc% = cfadisk_install, USBSTOR \ Disk & Ven_LEXAR & Prod_JD_LIGHTNING_II & Rev_1100% Microdrive_devdesc% = cfadisk_install, USBSTOR \ Disk & Ven_JetFlash & Prod_TS1GJF110 & Rev_0dev% Microdisk

Advice... If you want the USB flash drive to be displayed with a specific name in the device manager, you need to edit the value of the Microdrive_devdesc variable, for example:
Microdrive_devdesc = "Transcend 64GB DIY SSD"
Installing Hitachi Microdrive Driver Instead of Native USB Drive Driver
It remains to replace the driver used by the USB flash drive.
Important! If the Hitachi Microdrive USB driver is installed on a 64-bit system, then there is no digital signature for this driver, you have to either.
Open the Drivers tab and click the button Update Drivers. 
Specify the folder to the directory into which the downloaded archive with the Hitachi driver is unpacked: 
Let's choose a new driver. 
We ignore the warning about the missing digital signature of the driver. 
Advice... In Windows 10 and Windows 8, when installing the driver, the following error appears:
Windows found drivers for this device, but an error occurred while trying to install those drivers.
Hitachi microdrive
Third party inf does not contain signature information

To disable verification of the digital signature of the driver, run the commands:
bcdedit.exe / set nointegritychecks ON
bcdedit.exe / set TESTSIGNING ON
Restart your computer and try to install the driver again.
It remains to restart the computer and, opening the disk manager, make sure that your flash drive has become recognized as a regular hard drive ( Type: Basic), and the driver is the Hitachi driver.

Opening the explorer, you can also make sure that the icon of the flash drive has changed, it began to appear as a hard drive, a regular disk. 
Now you can work with this flash drive as with a regular HDD: create partitions, specify an active partition, create dynamic disks, install software that does not work from flash drives, etc.
Important... On other Windows computers without this driver, the second device partition will not be available.
To uninstall the Hitachi Microdrive driver, open the disk properties and on the driver tab, click the Update Driver button - the system will install the native driver by itself.

Advice... If, after installing the Hitachi driver, the system stops booting with BSOD, you need to boot the computer from the Windows / Live CD and manually delete the following files:
- cfadisk.sys in the% windir% \ System32 \ drivers directory
- Directory "cfadisk.inf_amd64_ ..." from% windir% \ System32 \ DriverStore \ FileRepositoty
Reboot your computer
You need to understand that this solution will only work on the system on which the corresponding driver is installed.
To fix a video chip in an old laptop requires a lot of money, and this repair is not worth the expense. But it is perfect for making some other useful things out of its working parts, which we will now do in other matters.
In our video you can see how easy it is to make such an external hard drive and how it works.
For work we need:
- notebook;
- screwdriver;
- box for external hard drive.

A box for an external hard drive can be purchased at any electronics store and usually comes with a cable and case.
We begin to disassemble the laptop to remove the hard drive from it. To do this, turn the laptop over and remove the battery. Using a screwdriver, unscrew the screws around the hard drive.


The hard drive is on a slide, which must be unscrewed, they are held on four screws. Now the hard drive is separate, in this case it goes for 160GB.
We put the laptop aside, it will not be useful to us yet.


Now we disassemble our box, in which we will hide our hard drive. It is easy to understand. There is a scarf inside the box, into which you need to insert a hard drive. After that, we simply close the box with a lid.

Now we connect the cable that came with the box in the kit and insert it into the USB connector of a computer or laptop.
There is an additional connector on the cable, which, in fact, is not needed at all. It was only needed for very old computers.
When connected to a computer, it takes some time for it to recognize the external hard drive. After that, a new corresponding icon appears in the folder of the working computer, by clicking on which with the right mouse button you can see the properties of the connected device, its volume.

Such an external hard drive will perfectly replace your flash card, while it will be large enough to store a lot of useful information.
This external hard drive can be completely formatted to clean up unnecessary information.
One of the easiest ways to give your laptop more hard drive space or back up all your important files without burning them to CD or DVD is to build your own external hard drive. This hard drive can be connected to any computer via a free USB port. You can easily and quickly transfer large files between computers, and also have a form of backup in case something happens to your computer. This external hard drive will work on computers running Windows 2000 / XP, OS X, or Linux.
Steps
-
Good job! You have successfully created your own external hard drive.
- This article can also be easily applied to the process of adding Zip disk, CD ROM / Burner or DVD ROM / Burner. CD / DVD ROM "s / Burners will only be supported in 5.25" enclosures. This case size is special because it also supports hard drives. The zip drive is 3.5 "in size, so you'll need a panel (sometimes comes with the case, but otherwise only costs a few dollars) to fill the void around the smaller drive and secure it to the case. The drives mentioned here are all may use a variety of ribbon cables and power connector sizes, so make sure your chassis is compatible with the hardware you will be inserting.
- If your new drive has both USB and FireWire, use only one (the fastest, compatible with your computer (s)). If you are using USB, connect the cable to the USB High Speed (2.0) connector on your computer. If you do not have a High Speed connector, or use it incorrectly, it will only mean that you will transfer data more slowly between the drive and the computer.
Warnings
- Never strain the ribbon cable! There should be some resistance when plugging it in, but if it doesn't go in, the pins may not be lined up correctly. If you choose to bend the contacts (hopefully not too many of them), it will take time to straighten them out with a pair of pliers.
- Hard drives can be damaged very easily if dropped onto a hard surface. Read / write heads can "bite" into the platter (s) and cause physical damage to the platter, rendering that disk space useless and also making the device as a whole quite damaged to use.
- Keep movement of the actuator to a minimum while it is on. This once again leads to unnecessary vibrations.
- Formatting the drive as ext3 will make it unreadable on Windows, and formatting as NTFS will make it read-only (you cannot copy files to it) on Linux systems without the proper software. FAT32 (called VFAT in Linux) will be read-write on both operating systems.
- You should always use all 4 screws when adding a hard drive to any computer or chassis, and fasten them tight. High RPM rotation and vibration can occur if the drive does not meet safety requirements. These vibrations can cause annoying buzzing noise and even damage to the drive over time.
- Remember that when the hard drive is outside the enclosure, it is not static-safe. So try to keep it from static discharge and their causes.
- Make sure your enclosure does not have a hard drive capacity limit (no more than a certain number of gigabytes (GBt)), or that this limit does not conflict with the capacity of your drive. Unfortunately, some older cases may have a somewhat lower limit (say, 132GB), and do not advertise it. Be careful! And if you try to use a larger HDD, format it to this limit or lower, or you are more likely to run into sector read errors or something :(
- Drivers are required when connecting an external hard drive (using USB) on Windows 98 (and 98 SE)
- Be sure to use the "Remove Hardware" icon on the taskbar before removing the disc from the USB port. Failure to do so may result in the drive not working properly.
You must purchase an internal hard drive (now called HDD). The first step is to determine one of the standard physical sizes for any hard drive. If you already have a spare HDD for this project, skip to step 2. There are basically 3 HDD sizes: 1.8 ", 2.5" and 3.5. 1.8 "2.5" are the standard sizes for laptop hard drives. The laptop HDD can be powered by a USB cable, so there is no need for an AC adapter. Laptop hard drives, however, are more expensive than internal PC HDDs, so if you're not worried about size or other power cords, desktop HDDs may be the method to move around.
Select and purchase a compatible case. Take into account the physical size of your hard drive as well as its interface (ATA100, ATA133, Serial ATA150, Serial ATA II, etc.). Determine the type of connection that meets the needs of all computers that will be connected. USB2.0 is currently a good standard and will work on any computer or laptop with free USB access. FireWire (IEEE1394) is even faster, but it is not yet so common in all computers. Remember to also compare the fan noise levels (if it has a fan and is the noise level displayed). For a hard drive that will run when your computer is on, a fan is a good thing, most likely a must-have, while hard drives used primarily for backups will usually not be needed. Also check if there is a power switch on the 3.5 "case. Without it, you will need to unplug the adapter to turn off the drive. For backups it doesn't really matter, but some people using their drive for secondary storage may find it annoying. when to connect and disconnect it every time you start and shut down your computers.
Expand your case and hard drive.
Follow the instructions on how to open the case correctly.
Install a hard disk with a Master setting (or Master / No Slave, if applicable). This jumper is located between the Molex power connector (4 large round prongs) and the ATA / SATA connector. You will see 2 rows of four or five small pins and a small clamp (jumper) connected to the 2nd of them. Pull out the jumper using a tool such as tweezers or a pencil and place it in the Master position if it is not already there. The various jumpers are usually located right on the top label of the hard drive.
Connect the power connector of your Molex case and the ATA / SATA ribbon cable to your HDD. While it would be very difficult to accidentally reconnect them in reverse order, take a moment to make sure the ribbon cable and power connector are properly aligned before inserting them.
Screw the hard drive onto the chassis. 4 or more screws were supplied with the case. There will be 4 holes, 2 on each side of the HDD, and corresponding holes inside the case.
Take one last look at the inside before closing it. Make sure you don't forget to plug anything in. Read your instructions (you read them too, didn't you? :) And make sure you cover all the steps. You will be disappointed to open it over and over again because you forgot to change the jumper to Master or something else.
Close the case.
Connect the power cable (if necessary) and the USB or FireWire cable to the drive.
USB and FireWire are Plug-and-Play, which means you don't need to shut down your computer before plugging in the drive. Connect the other ends of these cables to your computer and a surge protector (you are using a surge protector, aren't you? :).
Turn on your computer if you haven't already. Open My Computer (or Computer for Windows Vista or Windows 7). These icons are most likely found on your desktop, but can also be found in the Start menu.
You should see the new device under "Devices with Removable Storage".
Right click on it and select Format (about halfway down the list).
Format the disk with NTFS for use on Windows (ext3 for Linux) as the file system. For reading and writing on both Linux and Windows, use FAT32. You can give it a volume label if you like. Example: External, Secondary, Backup, and so on. Be sure to check that Quick Format is not selected. This will allow you to recognize any bad sectors and "fence off" any data that will be stored in the future. ...
Wait for the end of the formatting process. This may take longer for large disks.
Introduction.
Most laptop owners sooner or later face the problem of lack of space. As a rule, laptops with screen sizes up to 15 "do not have a free second slot for a 2.5" device. Therefore, the owners are forced to think about either replacing the laptop itself, or replacing its hard drive. After replacing the hard drive, there is always an old drive that can be easily turned into an external USB drive for data transfer.
Naturally, you can purchase a 2.5-inch mobile hard drive and convert it into an external drive. Fortunately, the cost of external storage allows it. For example, at the time of this writing, they ask for $ 40 for a 250 GB mobile hard drive, and for a 500 GB device from WD they ask for only $ 45.
We decide on the type of hard drive.
For the sake of fairness, it should be noted that an ordinary desktop 3.5-inch hard drive can also be turned into an external drive - you simply cannot call it mobile. If you have an unused 2.5 or 3.5 inch hard drive available, then first of all you need to decide on the type of its interface.
The following interface types exist on the market today: IDE (ATA) and various SATA options. As a rule, all SATA interfaces are backward compatible with each other, and we will not dwell on their variations. The situation is quite different between IDE and SATA interfaces, which are absolutely incompatible with each other and have different connectors.
The picture is clickable -
The figure shows you two hard drives with different interfaces. Winchesters have a mobile format of 2.5 inches. On the left is a SATA hard drive, on the right is an IDE hard drive.

The picture is clickable -
We have in our hands a 250 GB hard drive from Western Digital, Scorpio Blue series with a SATA interface. This drive was used for a long time in the Acer laptop, but its capacity was not enough, and it was replaced by a more spacious 500 GB solution.

The picture is clickable -
Despite the long-term use, the work of the hard drive did not cause any complaints, so it was decided to use it as an external mobile drive. To do this, we had to find an external case for him, which we did. External AGESTAR case for a 2.5-inch mobile hard drive.
In hardware stores, there are many different external cases for 2.5-inch hard drives. Their key difference is as follows:
- body material,
- type of external port (interface),
- cost.
As a rule, various cases with a USB 2.0 interface are presented in stores, cases with an eSATA interface are presented in a much smaller number, and even fewer cases with their combination of USB 2.0 & eSATA. Several cases with a modern USB 3.0 interface were found on sale, but their cost exceeded the cost of the hard drive itself, so we did not consider them.
The key difference between USB 2.0 and eSATA is data transfer speed. Using the USB 2.0 interface allows for maximum compatibility, since these ports are available on all computers. A significant disadvantage of the USB 2.0 interface is the low data transfer rate, which will not allow you to unleash the full speed potential of your hard drive.
The eSATA port is more promising, but it is not widely used and is found only in expensive versions of motherboards, cases and laptops. The eSATA interface allows you to fully unleash the potential of SATA devices.
The material of manufacture can also be very different. In the simple case, it is plastic. In more expensive versions, an aluminum case with a leather case is included.
The cost of external cases also varies. The cheapest option will cost the user $ 3, the expensive versions will cost more than $ 100.
Buying a $ 100 hard drive case that costs less than $ 40 when it's new and half the price once it's started is wasteful, to say the least. Therefore, for testing, we were provided with a case worth a symbolic $ 3 - AgeStar SUB2P1. Completion and external examination of AgeStar SUB2P1.

The picture is clickable -
We didn’t expect any miracles from the $ 3 device, both in terms of equipment and in terms of performance. The device comes modestly packed in a bag. The front wall of the device is covered with a cardboard box listing the key characteristics of the device. This is support for 2.5-inch mobile hard drives or solid-state drives with a SATA interface, the presence of a USB 2.0 data transfer interface and various color options.
In fairness, it should be noted that our suppliers have confirmed that they have not seen anything other than the black color of this case.

The picture is clickable -
After opening the package, we were pleasantly surprised by the fact that the set contains an operating manual completely in Russian.

The picture is clickable -
The case is completely made of plastic. On the front wall there are paper stickers indicating the model, which in any case will be erased, therefore we recommend that they be removed from the surface of the device immediately.

The picture is clickable -
The case is made of soft black plastic, which does not smell, it is homogeneous throughout its structure.

The picture is clickable -
The device covers open in two different directions, which provides easy removal and installation of the hard drive in an external case.

The picture is clickable -
The two sides of the outer case are fixed with a plastic latch made of case material. Thanks to the recesses on the walls of the lid, they are securely fixed and pouring a glass of liquid, or leaving the device in the rain, will hardly lead to any problems.

The picture is clickable -
The device is designed for SATA hard drives, which we have repeatedly emphasized. Controllers with SATA ports for power and data transfer are soldered inside.

The picture is clickable -
A mini USB port for data transfer and power supply to the hard drive is soldered on the side wall. There is no additional port to provide power to the drive, which may cause some problems for users. With a weak power supply that lowers the voltage on the 5 volt line, you often have to face problems with starting the hard drive. As a rule, connecting the drive directly to the port on the motherboard, and not on the case of the system unit, using a high-quality USB cable allows you to forget about this problem.

The picture is clickable -
Sellers of computer components often, as an advantage of one or another external case, talk about the presence of a USB data cable in the kit or offer to purchase it separately if it is not available. We advise our users not to pay attention to this, since a mini-USB-USB cable is usually available in almost every family and is often supplied with mobile phones. In our case, we successfully used a stale data cable from a Nokia mobile phone.

The picture is clickable -
The next step is to install the hard drive in the case. This is done quite simply - by lightly pressing. The most important thing is to first correctly rotate the hard drive according to the SATA power and data ports located in the case.

The picture is clickable -
The absence of any protruding elements on the hard drive controller circuit allows you not to worry about its back surface during transportation and use of the device.

The picture is clickable -
Some users may argue that the plastic case does not provide adequate heat dissipation from the hard drive. Naturally, external cases made of aluminum are much more efficient in this task. At the same time, one should not forget that mobile hard drives do not have such a high power consumption to suffer from overheating, and in laptops, as a rule, they are not additionally cooled by anything.

The picture is clickable -
After the end of the assembly of the device, the stage of testing and using it begins. Applying voltage to the device is accompanied by the glow of a blue LED, which also symbolizes the user about the data transfer process. It should be noted that not everyone will start working with the created external drive smoothly. If the hard drive has already been used, formatted and partitions have been created on it, you will not have any problems getting started. It is defined as an ordinary USB flash drive using the Plug & Play method. But those users who have purchased a new hard drive without formatting and with no partitions will have a problem associated with the absence of a drive letter in the "My Computer" tab.
To do this, you need to create partitions on the hard drive and format it. This can be done through various boot disks, but it is better not to bother and do it in the Windows operating system itself.

The picture is clickable -
To do this, you need to go to the "Control Panel" through the "Start" section, then visit the "Administrative Tools" section. In this section, select "Computer Management", where in the "Disk Management" tab you can mark and format the newly connected external drive. After creating partitions, formatting them, you will have access to them through the "My Computer" tab and you will be able to exchange with the drive, as with a regular hard drive. Test configuration.
The assembled external drive was tested both on a desktop computer based on a modern Core i7 processor and an equally modern motherboard, and on an Acer Aspire 7730 laptop based on a Core 2 Duo processor. It should be noted that the level of performance on two different systems turned out to be comparable.
1. Data reading speed was tested in HD Tach 3.0.4.0 software

The picture is clickable -
It's nice to note that the external drive we assembled shows a much higher level of performance than the WD My Passport Essential external hard drive we tested earlier. The maximum data transfer rate was 34.3 Mb / s, and the average latency was about 17.9 ms.
2. Speed of data reading in HD Tune 4.5.

The picture is clickable -
In the second synthetic test, we got similar data to the previous ones, which also turned out to be slightly better than the official WD My Passport Essential external hard drive.
3. Speed of recording 64 MB files in HD Tune 4.5.

The picture is clickable -
Somewhat more valuable is testing closer to practice, by writing 64 MB files. In this test, we got quite expected results, which were also limited only by the capabilities of the USB 2.0 interface.
Separately, I would like to note that during the entire testing, the temperature of the hard drive did not exceed 35 degrees Celsius, while a similar hard drive installed in the laptop had a temperature of about 43 degrees. Therefore, worrying about the working conditions of the hard drive in this case on the part of users will be unnecessary.
4. Boot speed of the Windows 7 operating system.

During practical testing on the speed of loading an image of the Windows 7 operating system, we obtained results similar to those for other external drives with a USB 2.0 interface.
5. Evaluation of drive performance in Windows 7 environment.

We tested the performance of the external drive we assembled using the Windows 7 operating system. To do this, call the command in the command line: "winsat disk -drive g -ran -write -count 10", where "g" is the letter of the tested disk in the system.
The test results show that the drive we assembled received a much higher rating than the factory-built WD My Passport Essential solution.  Conclusion.
Based on the materials of this article, it can be seen that any mobile hard drive can be turned into a good external drive without unnecessary hassle. Especially for testing, we asked for the cheapest external case, worth $ 3. Three dollars allows you to get an excellent external drive from a mobile hard drive, at least for data storage. Not to mention the fact that the same external case facilitates data recovery from the hard drive of "dead" laptops.
Despite the fact that many people criticize AgeStar products for their poor quality, for many years of using it, I have only a positive impression of it. First of all, it is for a democratic cost. Defects are found in all manufacturers, even though AgeStar has a slightly higher figure than Thermaltake. But the latter has no analogue to the presented external case for three dollars and with a 6-month warranty. We present AgeStar products with a gold medal of honor for the optimal performance / price ratio.
Admin 06/15/2014 - 10:13 Tips
Today, the cost of USB flash drives is still quite high. And a drive with a volume of 128 gigabytes will cost the user about 5,000 rubles. In comparison, a 500 GB hard drive (2.5 ”form factor) will cost in the range of 1500 - 2500 rubles! Naturally, the preferable purchase will be the purchase of an external hard drive, or its own complete set ...
How to build an external hard drive?
The benefits of self-assembling the device are obvious. This is not only an individual selection of external and technical characteristics, but also an opportunity to save money using an existing hard disk.
So in the situation described below, we managed to get by with "little blood". There is a hard drive - 320 gigabytes, removed from the laptop due to replacement with a larger device. We buy in addition a "box for hard drives" (case, pocket, etc.), which costs, quite inexpensively, from two hundred rubles and more. This is followed by the assembly process, which takes 5 to 10 minutes.
If you are unsure of the success of self-completing equipment, then you should contact a specialist. For example, ask about the possibility of assembly at the place of purchase, or trust the service center.
Stages of assembling an external hard drive:
Connecting the drive to your computer:
We connect the resulting drive to the computer using the USB cable supplied with the box. We insert one end (micro-USB) into the corresponding connector on the box panel, and one (or two) into the free USB ports of your PC;
If the hard drive used in the drive was previously installed in the laptop, as in our case, then the installation will not require any additional steps. Windows operating systems older than XP - automatically recognize this type of controllers. If you have completed the drive with a new hard drive, then you will need at least formatting (often, additional steps are not required, since the factory hard drive is ready for use after connection).
Most models of boxes for external hard drives are equipped with an indication marked as "LED" (it can indicate the connection - with a constant light, or an intermittent one - reading and writing information). In addition to the boxing panel, it can have additional functionality. In our case, this is the "Backup" button, designed to start a backup of the specified directories or files (with the installed software).
P.S.
That's it, it took no more than 15 minutes to start copying data to the assembled disk. I hope you managed to assemble your external hard drive, spending a minimum of time and effort.
updated: 25.06.2016
leave a comment
wd-x.ru
Do-it-yourself external drive. USB drive from laptop hard drive.
Introduction. Most laptop owners sooner or later face the problem of lack of hard disk space. As a rule, laptops with screen sizes up to 15 "do not have a free second slot for a 2.5" device. Therefore, the owners are forced to think about either replacing the laptop itself, or replacing its hard drive. After replacing the hard drive, there is always an old drive that can be easily turned into an external USB drive for data transfer. Naturally, you can purchase a 2.5-inch mobile hard drive and convert it into an external drive. Fortunately, the cost of external storage allows it. For example, at the time of this writing, they ask for $ 40 for a 250 GB mobile hard drive, and for a 500 GB device from WD they ask for only $ 45.We decide on the type of hard drive.
For the sake of fairness, it should be noted that an ordinary desktop 3.5-inch hard drive can also be turned into an external drive - you simply cannot call it mobile. If you have an unused 2.5 or 3.5 inch hard drive available, then first of all you need to decide on the type of its interface.
The following interface types exist on the market today: IDE (ATA) and various SATA options. As a rule, all SATA interfaces are backward compatible with each other, and we will not dwell on their variations. The situation is quite different between IDE and SATA interfaces, which are absolutely incompatible with each other and have different connectors.

The picture is clickable -
The figure shows you two hard drives with different interfaces. Winchesters have a mobile format of 2.5 inches. On the left is a SATA hard drive, on the right is an IDE hard drive.

The picture is clickable -
We have in our hands a 250 GB hard drive from Western Digital, Scorpio Blue series with a SATA interface. This drive was used for a long time in the Acer laptop, but its capacity was not enough, and it was replaced by a more spacious 500 GB solution.

The picture is clickable -
Despite the long-term use, the work of the hard drive did not cause any complaints, so it was decided to use it as an external mobile drive. To do this, we had to find an external case for him, which we did. External AGESTAR case for a 2.5-inch mobile hard drive. In hardware stores, there are many different external cases for 2.5-inch hard drives. Their key difference lies in the following: - the material of the case, - the type of external port (interface), - the cost. As a rule, various cases with a USB 2.0 interface are presented in stores, cases with an eSATA interface are presented in a much smaller number, and even fewer cases with their combination of USB 2.0 & eSATA. Several cases with a modern USB 3.0 interface were found on sale, but their cost exceeded the cost of the hard drive itself, so we did not consider them. The key difference between USB 2.0 and eSATA is data transfer speed. Using the USB 2.0 interface allows for maximum compatibility, since these ports are available on all computers. A significant disadvantage of the USB 2.0 interface is the low data transfer rate, which will not allow you to unleash the full speed potential of your hard drive. The eSATA port is more promising, but it is not widely used and is found only in expensive versions of motherboards, cases and laptops. The eSATA interface allows you to fully unleash the potential of SATA devices. The material of manufacture can also be very different. In the simple case, it is plastic. In more expensive versions, an aluminum case with a leather case is included. The cost of external cases also varies. The cheapest option will cost the user $ 3, the expensive versions will cost more than $ 100.
Buying a $ 100 hard drive case that costs less than $ 40 when it's new and half the price once it's started is wasteful to say the least. Therefore, for testing, we were provided with a case worth a symbolic $ 3 - AgeStar SUB2P1.
Completion and external examination of AgeStar SUB2P1.

The picture is clickable -
We didn’t expect any miracles from the $ 3 device, both in terms of equipment and in terms of performance. The device comes modestly packed in a bag. The front wall of the device is covered with a cardboard box listing the key characteristics of the device. This is support for 2.5-inch mobile hard drives or solid-state drives with a SATA interface, the presence of a USB 2.0 data transfer interface and various color options.
In fairness, it should be noted that our suppliers have confirmed that they have not seen anything other than the black color of this case.

The picture is clickable -
After opening the package, we were pleasantly surprised by the fact that the set contains an operating manual completely in Russian.

The picture is clickable -
The case is completely made of plastic. On the front wall there are paper stickers indicating the model, which in any case will be erased, therefore we recommend that they be removed from the surface of the device immediately.

The picture is clickable -
The case is made of soft black plastic, which does not smell, it is homogeneous throughout its structure.

The picture is clickable -
The device covers open in two different directions, which provides easy removal and installation of the hard drive in an external case.

The picture is clickable -
The two sides of the outer case are fixed with a plastic latch made of case material. Thanks to the recesses on the walls of the lid, they are securely fixed and pouring a glass of liquid, or leaving the device in the rain, will hardly lead to any problems.

The picture is clickable -
The device is designed for SATA hard drives, which we have repeatedly emphasized. Controllers with SATA ports for power and data transfer are soldered inside.

The picture is clickable -
A mini USB port for data transfer and power supply to the hard drive is soldered on the side wall. There is no additional port to provide power to the drive, which may cause some problems for users. With a weak power supply that lowers the voltage on the 5 volt line, you often have to face problems with starting the hard drive. As a rule, connecting the drive directly to the port on the motherboard, and not on the case of the system unit, using a high-quality USB cable allows you to forget about this problem.

The picture is clickable -
Sellers of computer components often, as an advantage of one or another external case, talk about the presence of a USB data cable in the kit or offer to purchase it separately if it is not available. We advise our users not to pay attention to this, since a mini-USB-USB cable is usually available in almost every family and is often supplied with mobile phones. In our case, we successfully used a stale data cable from a Nokia mobile phone.

The picture is clickable -
The next step is to install the hard drive in the case. This is done quite simply - by lightly pressing. The most important thing is to first correctly rotate the hard drive according to the SATA power and data ports located in the case.

The picture is clickable -
The absence of any protruding elements on the hard drive controller circuit allows you not to worry about its back surface during transportation and use of the device.

The picture is clickable -
Some users may argue that the plastic case does not provide adequate heat dissipation from the hard drive. Naturally, external cases made of aluminum are much more efficient in this task. At the same time, one should not forget that mobile hard drives do not have such a high power consumption to suffer from overheating, and in laptops, as a rule, they are not additionally cooled by anything.

The picture is clickable -
After the end of the assembly of the device, the stage of testing and using it begins. Applying voltage to the device is accompanied by the glow of a blue LED, which also symbolizes the user about the data transfer process. It should be noted that not everyone will start working with the created external drive smoothly. If the hard drive has already been used, formatted and partitions have been created on it, you will not have any problems getting started. It is defined as an ordinary USB flash drive using the Plug & Play method. But those users who have purchased a new hard drive without formatting and with no partitions will have a problem associated with the absence of a drive letter in the "My Computer" tab.
To do this, you need to create partitions on the hard drive and format it. This can be done through various boot disks, but it is better not to bother and do it in the Windows operating system itself.

The picture is clickable -
To do this, you need to go to the "Control Panel" through the "Start" section, then visit the "Administrative Tools" section. In this section, select "Computer Management", where in the "Disk Management" tab you can mark and format the newly connected external drive. After creating partitions, formatting them, you will have access to them through the "My Computer" tab and you will be able to exchange with the drive, as with a regular hard drive. Test configuration. The assembled external drive was tested both on a desktop computer based on a modern Core i7 processor and an equally modern motherboard, and on an Acer Aspire 7730 laptop based on a Core 2 Duo processor. It should be noted that the level of performance on two different systems turned out to be comparable.
1. Data reading speed was tested in HD Tach 3.0.4.0 software

The picture is clickable -
It is pleasant to note that the external drive we assembled shows a much higher level of performance than the WD My Passport Essential external hard drive we tested earlier. The maximum data transfer rate was 34.3 Mb / s, and the average latency was about 17.9 ms.
2. Speed of data reading in HD Tune 4.5.

The picture is clickable -
In the second synthetic test, we got similar data to the previous ones, which also turned out to be slightly better than the official WD My Passport Essential external hard drive.
3. Speed of recording 64 MB files in HD Tune 4.5.

The picture is clickable -
Somewhat more valuable is testing closer to practice, by writing 64 MB files. In this test, we got quite expected results, which were also limited only by the capabilities of the USB 2.0 interface. Separately, I would like to note that during the entire test the temperature of the hard drive did not exceed 35 degrees Celsius, while a similar hard drive installed in the laptop had a temperature of about 43 degrees. Therefore, worrying about the working conditions of the hard drive in this case on the part of users will be unnecessary.
4. Boot speed of the Windows 7 operating system.

During practical testing on the speed of loading an image of the Windows 7 operating system, we obtained results similar to those for other external drives with a USB 2.0 interface.
5. Evaluation of drive performance in Windows 7 environment.

We tested the performance of the external drive we assembled using the Windows 7 operating system. To do this, call the command in the command line: "winsat disk -drive g -ran -write -count 10", where "g" is the letter of the tested disk in the system.
The test results show that the drive we assembled received a much higher rating than the factory-built WD My Passport Essential solution.
Conclusion. Based on the materials of this article, it can be seen that any mobile hard drive can be turned into a good external drive without unnecessary hassle. Especially for testing, we asked for the cheapest external case, worth $ 3. Three dollars allows you to get an excellent external drive from a mobile hard drive, at least for data storage. Not to mention the fact that the same external case facilitates data recovery from the hard drive of "dead" laptops.
Despite the fact that many people criticize AgeStar products for their poor quality, for many years of using it, I have only a positive impression of it. First of all, it is for a democratic cost. Defects are found in all manufacturers, even though AgeStar has a slightly higher figure than Thermaltake. But the latter has no analogue to the presented external case for three dollars and with a 6-month warranty. We present AgeStar products with a gold medal of honor for the optimal performance / price ratio.
megaobzor.com
Turning a USB stick into a hard drive
Any USB flash drive can be easily turned from the point of view of Windows into a natural hard drive. That is, for the operating system, a USB flash drive will be perceived as a regular, fixed disk, and not as an external portable device. Why might this be needed?
This technique is described primarily for those who want to prepare a USB flash drive for installing Windows 7 from Windows XP using the DISKPART utility. The whole problem is that in Windows XP, the DISKPART utility does not see the USB flash drive at all. Entering the list disk command for DISKPART at least a hundred times is useless: as a result, we will be shown only available hard disks and nothing more.
Therefore, from Windows XP using DISKPART, you cannot make a bootable USB flash drive with Windows 7 at all.
However, what a blessing - this problem can be solved in a clever way. Namely: we will turn the USB flash drive into a regular fixed disk. In other words, for Windows XP, the flash drive will become another hard drive. And then DISKPART will show the disc we need as cute. Cool? Still would!
Such a transformation of a flash drive will be useful to you for other purposes, wherever you decide to use a USB flash drive instead of a removable hard drive.
By the way, are you wondering why the hell does DISKPART not display a USB flash drive at all? It's all about the RMB (removable media bit) descriptor recorded on each flash drive. It is because of it that Windows XP (and other versions of Windows) perceive a USB flash drive as a removable device. It is enough to delete this descriptor and the flash drive will mutate into a hard disk, it will be displayed as a disk in the My Computer window, all file managers and in general everywhere.
A wonderful driver from Hitachi will allow us to make such a feint with our ears. Therefore, first of all, we need to download it, and then modify it.
Download Hitachi USB Flash Drive Driver
Unpack the driver archive and find the cfadisk.inf file. Let's open it up. There is a lot of stuff in the file, but we need one section, it's called.
And it has the main line with which we do street magic. In the file, it looks like this:

Now all we need to do is replace the highlighted part of the record with the identification data of the flash drive, which we will turn into a hard drive. And then we will change its name.
How to do it? First of all, plug the USB stick into the USB port. Now open Device Manager (for example, select Start> Run, type devmgmt.msc and press the key).
Expand the Disk drives section, right-click on the name of the flash drive and select Properties.

Click the Details tab. There, the Device Instance Code menu will immediately open; this is the code we need. Select the code with one click with the left mouse button and press the key combination to save it to the clipboard.

Well, then everything is simple. Open the cfadisk.inf file, find a section, in it a line that starts with% Microdrive_devdesc% and change the specified value after% Microdrive_devdesc% = cfadisk_install to the one copied earlier.
In other words, you need to change the line in bold below to the one you copied. Then save the cfadisk.inf file.
% Microdrive_devdesc% = cfadisk_install, USBSTOR \ DISK & VEN_JETFLASH & PROD_TS1GJF168 & REV_0.00 \ A7B03577C3F1B5 & 0
Now we change the name of the flash drive. At the very end of the cfadisk.inf file, we find the Microdrive_devdesc = line in the section and change the value in brackets to any other. Initially, the value “UsbToFix” is indicated there, you can leave it.

The most important thing remains: install the updated cfadisk.inf driver for our USB stick. To do this, again click on the name of the flash drive in the Device Manager window and select the Update driver command.

The Hardware Update Wizard window will open. Now step by step.
- In the first window, select the radio button No, not this time and click the Next button.
- Select the Install from a list or specific location radio button, click the Next button.
- Select the Don't search radio button. I will choose the driver I need and click the Next button.

- Click the Have Disk button.
- In the Install From Disk window, click the Browse button and select the driver folder where the cfadisk.inf file is located.
- Windows will ask you if you really want to install the driver, click on the Continue installation button and then on the Finish button.
Now it's done and the flash drive has turned into a hard drive, hurray. Unplug it, plug it back in and format. And now look: instead of a portable device icon, the flash drive will be displayed as a hard drive.
Well, that's all, the flash drive has successfully turned into a hard drive, and now it will become available for the DISKPART utility, or maybe you will find another use for it.
windata.ru
How to connect a hard drive to USB
Let's say you upgraded your laptop and replaced some of the parts with more powerful, capacious and faster ones. Everything is fine, but you still have old parts that are still quite working and it is a pity to throw them away. Of course, you can sell them online or give them away. But among them there is a little thing that may still be useful, and this is a hard drive.