How to create a local network between two computers? Computer networks. Local network via Internet Connection via cable
There are many reasons why you need to access your own local network from global network Internet: someone needs to connect in order to be able to view remote files and folders, some need access to security systems, cameras and other objects, someone “set up” a web server and does not want to pay for hosting, while others need advice on setting up a computer with a remote connection. There are many reasons, as well as options for solving the problem.
Formulation of the problem
According to network theory, to access the resources of a server or an individual computer, two main parameters are used - the IP address and the port on which the service is running, providing a connection to the resource using a specific protocol. Therefore, conscious configuration of the router, computer and server is necessary to ensure collaboration and correct access.
According to generally accepted standards, access for each protocol occurs via the following ports:
- Web server or access via HTTP protocol. Remote connection is provided via TCP ports 80 and 8080.
- Secure data transfer to the web server - port 443.
- The primary file transfer protocol, or FTP, uses port 21.
- Secure protocol for access from an SSH terminal on port 22. Typically used to perform device settings.
- An open protocol for connecting to a remote terminal is TCP - port 23.
- Access to mail servers SMTP and POP3 use ports 25 and 110 respectively.
Specialized programs use their own ports, for example, to gain access from the Internet to local network using the VNC program you need to open port 5900, Radmin - 4899, and to connect to the built-in remote worker service Windows desktop(RDC) - 3389.
It is worth noting that opening ports on the server adds vulnerabilities and attracts attackers. Therefore, ports are opened only as needed, i.e. if there is no need to use access via the protocol, then the port used by the service must be closed. A good practice is to initially deny access to any service and then adjust access to the service as needed. Particularly vulnerable are ports that do not provide user authorization, for example, port 21 in Windows is open by default, which makes it possible for unauthorized connections.
Once specific goals have been defined, e.g. why and to what resources you need access, you can start setting up remote access.
Setting up a router - address translation
Address translation or forwarding is necessary for the router to switch the internal local address to an external one. This means that when connecting, the IP that “looks” at the Internet will be indicated. An external IP address can be “gray” (dynamic) or “white” (static), but the specifics of setting up a router in each case are beyond the scope of the article, so setting a static address will be used as an example.
Setting up access is done using the example Zyxel router Keenetic family with firmware version v2. This router is well suited for the implementation of the assigned tasks. To configure, you need to go to the configuration page through the web interface.
The computer connects to the router via DHCP. This means that every time a request is made to add to the network, it receives a new IP address. To provide access to the local network via the Internet, it is necessary to assign an IP to each device. This is done on home page in the “Home Network” tab by clicking the green arrow (when hovered, a hint appears - “Assign an IP address to the device”).
Next in the configuration, select the “Security” menu item and the “Broadcast” tab network addresses" On this tab, you need to add your own access rule and socket broadcast to the Internet for each selected service. A socket is a combination of an IP address and a port number, for example, 192.168.1.1:8080 for connecting to a Web server.
In the window that opens by clicking the “Add Rule” button, you need to specify specific fields to create a rule:
- “Interface” - select from the drop-down list WAN interface. There may be several options to choose from depending on the provider settings: PPTP, PPPoE, L2TP or ISP (Broadband Connection).
- “Protocol” - select a protocol from the list for remotely connecting incoming connections.
- “Redirect to address” - indicates the local address of the machine for which you want to redirect.
- “New destination port number” is the local port number of the specified computer.
These steps must be performed for each device on the local network and for each protocol, i.e. Each device and service on it will have a separate rule. Don't forget to click the "Save" button. After all the necessary rules have been added, you can begin setting up a specific computer.

Setting up access on a Windows computer
To configure your computer, you need to open ports on it for incoming connections. This is done in the standard delivery program " Windows Firewall" The program is launched from “Control Panel - System and Security - Firewall” or “Start - Run - cmd - firewall.cpl”.
Ports are opened as follows:
- In the program, you need to select the “Advanced options” menu item.
- A new window will open that will allow you to configure advanced computer protection settings.
- When you click the “Rules for incoming connections - Create rule” button, the “Rule Creation Wizard” modal dialog opens.
- The first item in the dialog allows you to select the type of rule: for specific program(usually, when installing the program, you add rules yourself for correct operation), for the port, preset rules and custom rules.
- You need to select the “For port” switch.
- The protocol type is selected (TCP or UDP), and a specific port or range of ports separated by a hyphen is entered in the corresponding field.
- After selecting the port, the rule itself is created, i.e. connection is allowed or denied. In our case, when opening a port, you need to check the switch next to “Allow connection”.
- Profile is determined network connection. You can check the boxes next to all profiles.
- At the last point, you need to come up with a name for the rule and click “Finish”.
This opens a port on the computer. Similarly, as in a router, you need to create a separate rule for each port. To avoid adding access to each port, you can completely disable the firewall, but this is strongly not recommended.
Setting up access using third-party programs
Accessing a local network from the Internet when using third-party specialized programs usually does not require special knowledge or skills. It is enough that the program is installed on the client machine and launched on the server. In some cases, you will need to open addresses on your router for translation.
An example is popular program TeamWewer. It allows you to connect to a remote desktop, transfer and download files and other functions. To connect, you just need to know the UserID and password of the computer you want to connect to.
Hello.
Even 10-15 years ago, having a computer was almost a luxury, but now even having two (or more) computers in the house does not surprise anyone... Naturally, all the advantages of a PC appear when you connect it to a local network and the Internet, for example: network games, sharing disk space, fast file transfer from one PC to another, etc.
Not long ago I was “lucky” to create a home local network between two computers + “share” the Internet from one computer to another. I’ll tell you how to do this (from fresh memory) in this post.
1. How to connect computers to each other
The first thing you need to do when creating a local network is to decide how it will be built. A home local network usually consists of a small number of computers/laptops (2-3 pcs.). Therefore, 2 options are most often used: either computers are connected directly using a special cable; or use a special device - a router. Let's look at the features of each option.
Connecting computers “directly”
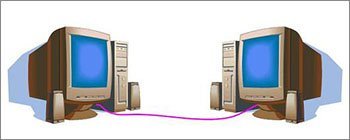
This option is the simplest and cheapest (in terms of equipment costs). In this way you can connect 2-3 computers (laptops) to each other. At the same time, if at least one PC is connected to the Internet, you can allow access to all other PCs on such a network.
What is needed to create such a connection?
1. Cable (also called twisted pair), slightly longer than the distance between the connected PCs. It’s even better if you immediately buy a crimped cable in the store - i.e. already with connectors for connecting to the computer’s network card (if you crimp it yourself, I recommend that you familiarize yourself with it:).
By the way, you need to pay attention to the fact that the cable is needed specifically to connect a computer to a computer (cross connection). If you take a cable to connect a computer to a router - and use it to connect 2 PCs - such a network will not work!
2. Every computer should have LAN card(all modern PCs/laptops have it).
3. Actually, that’s all. Costs are minimal, for example, a cable in a store to connect 2 PCs can be bought for 200-300 rubles; There are network cards in every PC.
All that remains is to connect cable 2 system units and turn on both computers for further settings. By the way, if one of the PCs is connected to the Internet via a network card, then you will need a second network card - to be used to connect the PC to the local network.
The advantages of this option:
Fast creation;
Easy setup;
The reliability of such a network;
High speed when exchanging files.
Minuses:
Extra wires around the apartment;
To have access to the Internet, the main PC that is connected to the Internet must always be turned on;
Inability to gain access to the network for mobile devices*.
Creating a home local network using a router
A router is a small box that greatly simplifies the creation of a local network and Internet connection for all devices in the house.
It is enough to configure the router once - and all devices will be able to immediately connect to the local network and access the Internet. Nowadays you can find a huge number of routers in stores, I recommend reading the article:
Desktop computers connect to the router via a cable (usually 1 cable is always included with the router), laptops and mobile devices- connect to the router via Wi-Fi. You can see how to connect a PC to a router (using the example of a D-Link router).
The organization of such a network is described in more detail in this article:

Pros:
Set up the router once, and Internet access will be available on all devices;
No extra wires;
Flexible Internet access settings for different devices.
Minuses:
Additional costs for purchasing a router;
Not all routers (especially those from low price category) can provide high speed on the local network;
It is not always so easy for less experienced users to set up such a device.
2. Setting up a local network in Windows 7 (8)
After the computers are connected to each other by any of the options (whether they are connected to a router or directly to each other), you need to configure the Windows OS for full operation of the local network. Let's show the example of Windows 7 OS (the most popular OS today; in Windows 8 OS the setting is similar + you can familiarize yourself with it).
2.1 When connecting via a router
When connecting via a router, the local network, in most cases, is configured automatically. The main task comes down to setting up the router itself. Popular models have already been discussed on the blog pages earlier; I will provide several links below.
After setting up the router, you can start setting up the OS. So…
1. Setup working group and PC name
The first thing you need to do is set a unique name for each computer on the local network and set the same workgroup name.
For example:
1) Computer No. 1
Working group: WORKGROUP
Name: Comp1
2) Computer No. 2
Working group: WORKGROUP
Name: Comp2
To change the PC name and workgroup, go to the control panel at the following address: Control Panel\System and Security\System.


Properties Windows systems 7
2. General access to files and printers
If you do not take this step, then no matter what folders and files you provide for public access, no one will be able to access them.
To enable the option for sharing printers and folders, go to the control panel and open the “Network and Internet” section.


Now click in the left column on the item “ change Extra options public access«.

Several profiles 2-3 will appear in front of you (in the screenshot below there are 2 profiles: “ Home or work" and "General "). In both profiles you need to allow file and printer sharing + disable password protection. See below.

Setting up sharing.

More sharing options
After making the settings, click " save changes" and restart your computer.
3. Sharing shared folders
Now, in order to use files on another computer, the user needs to share folders on it (share access to them).
This is very easy to do - in 2-3 mouse clicks. Open File Explorer and right-click on the folder you want to open. IN context menu select " General access - home group(reading)«.

Next, you just have to wait about 10-15 seconds and the folder will appear in public access. By the way, to see all the computers in home network- click on the “Network” button in the left column of Explorer (Windows 7, 8).

2.2 When connecting directly + sharing Internet access on a second PC
In principle, most of the steps for setting up a local network will be very similar to the previous option (when connecting through a router). To avoid repetition, I will mark steps that are repeated in parentheses.
1. Setting up the computer name and workgroup (similarly, see above).
2. Setting up file and printer sharing (similarly, see above).
3. Configuring IP addresses and gateways
The setup will need to be done on two computers.
Computer No. 1.
Let's start setting up with the main computer that is connected to the Internet. Go to the control panel at: (Windows 7 OS). Next, turn on “ LAN connection"(name may vary).

Then go to the properties of this connection. Next, find “Internet Protocol version 4 (TCP/IPv4)” in the list and go to its properties.

Then enter:
ip - 192.168.0.1,
subnet mask - 255.255.255.0.
We save and exit.

Computer No. 2
Go to the settings section: Control Panel\Network and Internet\Network Connections(OS Windows 7, 8). We set the following parameters (similar to the settings of computer No. 1, see above).
ip - 192.168.0.2,
subnet mask - 255.255.255.0.,
default gateway -192.168.0.1
DNS server - 192.168.0.1.
Save and exit.

4. Sharing Internet access for a second computer
On the main computer that is connected to the Internet (computer No. 1, see above), go to the list of connections ( Control Panel\Network and Internet\Network Connections).

Then in the “access” tab we allow other network users to use given to the connection to the Internet. See screenshot below.
We save and exit.

5. Opening (sharing) public access to folders (see above in the subsection when setting up a local network when connecting through a router).
That's all. Good luck to everyone and quick setup local network.
Hello, dear users. Here I have presented the material in an accessible way for those people who spend most of their time playing various games. computer games. But it will be useful not only for avid gamers, but also for ordinary users, who will also find something to learn for themselves. So, today you will learn everything about how you can independently organize a network via the Internet.
Not long ago I came across quite useful program, which is called "Hamachi". It is with its help that our virtual one will be created via the Internet. Therefore, now I will outline for you in detail the entire principle of operation of this software. So, let's assume that you wanted to play this or that game with your friend or friend. However, the application you need does not contain a function that supports this action through world wide web, but only has the option of distribution over a local network. Dont be upset. This will be enough for us.

In order to play using this feature, we must have a local network via the Internet. The above-mentioned program will provide us with a network through which you can not only play with friends, but also transmit and receive any data. To do this, start by downloading this miracle to your computer. After this, you will be ready to have a local network over the Internet on your device. Once you have done this, you will need to install it on your HDD. There is nothing complicated about this, so describe this procedure I won't.
So, the program is installed, and now we must launch it and configure it accordingly. Activate the application. You should see a big blue button in the window that appears. This is the one you should click on first. Next, you need to enter the client's name. Here your imagination has room to run wild, since nothing fundamentally will depend on what you write here.

Confirm the entered data and see the following window. There you select and click on the creation tab new network. Another window will appear in front of you, in which you will need to indicate the name of your connection. It must be entered in the line called "identifier". There is also a password field there. You don't have to enter it. But it’s still better that he exists. In this case, unwanted people will not be able to join you.
When you have filled in all the necessary data, click on the button called “Create”. This way you will have a local network via the Internet. When this operation is completed, your comrades should join you. To do this, you need to click on the button in the main menu called “Connect to an existing existing network" After this, you just need to enter the desired identifier, as well as the password for the connection. This is all. Now this local network will connect computers via the Internet, which will “think” that they are in a regular “local area”. Play together, transfer data - all this is possible thanks to Hamachi.
Hello my dears! Today in the article we will continue construction home media network. But this time, our tasks will be more global. Together with you, we will connect devices located far from each other into a network.
Yes, yes, guys, we have become cramped within the walls of one room and therefore the main topic of the article will sound like this - local network via Hamachi. And there is no need to be afraid of incomprehensible words and names. Everything here is much simpler than it seems.
But so as not to bore you, let's get to the heart of the matter.
So, I’ll tell you right away what was the reason for writing this post.
There were many and different photos: against the backdrop of the city’s attractions, on the then calm Maidan, on the bus while traveling, etc. And if you consider that the road is long (about 850 km) and it’s difficult to drive “dry”, then it was very cool to look at some of the faces: :)

But at work, you know what happens, sometimes you get distracted, and sometimes your boss suddenly bursts into the office with blazing eyes. In general, in a war it’s like in a war. Therefore, the question arose: how can this matter be viewed in a more comfortable environment?
Of course, the easiest way is to take and copy photos to a flash drive, and then view them at home. But at that moment I didn’t have it at hand, and I didn’t want to bother with lengthy file copying. We need some original solution.
And it was found using a little program called Hamachi. It allows you to connect computers via the Internet as if they were on the same local network. That is, within one room or office.

Such a local network via Hamachi is scientifically called a VPN connection (Virtual Private Network). A significant advantage of connections of this type is the fact that all data is transmitted in encrypted form. So no one will know anything.
Of course, if you have a permanent dedicated IP address, then you can do without this utility. It’s enough just to register on the router required settings. But in my case, not everything is so simple - all addresses are dynamic (gray).
You may now think that this is completely impossible. But this is not so, everything is solvable and very simple. Look what the author did to implement this idea without special knowledge and complex settings.
So, the first thing you need to do is create a virtual local network between your work and home computers using the Hamachi utility. Download it from the link here. It must be installed on both computers - home and work.
The installation process itself is quite simple, everything is as usual. You just need to uncheck the box in two places, as shown in the screenshot below:

After completion, run the program and click on the “On” button, and then “Create”:

Now on one of the computers we do the following simple steps. Click on the item "Create a new network":

In the window that opens, in the “Network ID” field, enter any name for the future network and come up with a password. After that, don’t forget to click the “Create” button:

At this step, on the first computer, all settings are completed. Now let's move on to the second. In order for the virtual local network via Hamachi to work, you need to make the following settings on it.
In the main program window, select "Connect to an existing network". Then, in the “Identifier” column, enter the name you came up with earlier. Remember, we already talked about it earlier in the article. We also indicate the password and click on “Connect”:

If everything was done correctly, then on both computers in the main window of the Hamachi program, the created network with the computers included in it will be displayed. Hurray, comrades:

A green icon next to the name means that there is a connection with the computer. If the circle is gray (second line in the screenshot), then there is no access to the machine. In this case, you need to double-check that the settings you have made are correct.
Now, on the remote (working) computer, you need to open shared access to the folder or partition that we want to access over the network. How to do this in Windows XP and 7 is shown in great detail in the video below:
Well, that’s all, the preparatory work is completed. Let's move directly to our plan - viewing content on TV. In this article, we will consider two ways how this can be done.
Option #1. The simplest and most convenient. With the help of what we already know. With this option, the settings will be minimal. Let's start.
In order for the program to see the contents of the remote computer and display it on the TV screen, you need to connect it network drives to your home computer. This is done as follows.
Opening file manager Total Commander ( I think everyone has it) and follow the path “Network - Map network drive”:

Then in the "Browse Folder" window, you need to find remote computer and select the drive we are interested in:
 The result of our successful actions should be displayed on home computer connecting a remote partition:

Now let's go to Samsung TV Smart TV, launch the NstreamLmod widget and select the “My Computer” folder. Next, click on the red “A” button, then the “Network Drives” section:

Basically, at this step it's all in the bag. You can view content on a remote (work) computer. Here's the first picture I came across:

As you can see, VLAN via Hamachi works great. Thus, you can view any media content. I tried listening to music, it also started without problems.
The only nuance that was noticed on the author’s equipment is that for some reason folders with a large number of files were not opened. For example, if there are 20-30 songs in the catalog, access is no problem. If it’s 100-120, you get an error when opening.
Well, in general, the system works without problems. Everything is limited only by the speed of the Internet. By the way, the author’s connection using the good old ADSL technology gives a return of as much as 512 Kbps. So you won't speed up much.
Option No. 2. With help . In principle, the settings are also simple, everything is done quite quickly. Let's start.
So, all computers that we want to connect to the network must have this program. Now let's make one of the computers the main one. He will do the summary processing. That is, collect information about the content on other machines.
To do this, launch the Twonky Server program and follow the path “Settings - Summary processing”. Then check the box "Enable summary processing":

Now we make simple settings on other computers that we want to include in the media network. In the case of the author of the article, this is one computer at work.
We launch the server on it and in its settings, in the section “Sharing - Summary Processing Servers”, put a checkmark next to the desired server:
 In my case, for some reason the checkbox was not checked, but access still worked. Chickpeas, that's all. Local media networking via Hamachi using the Twonky Server application is ready to use. Let's see what happened.
To do this, open the server and select required section. In our case, this is “photo”:
At this step, in the “My Library” section we find a remote server with the computer name, and in the “Media Receivers” section we indicate our “smart” TV:

Now we can watch all files in slide show mode (screenshot above), or one by one. As you can see, there is a choice, and this is good:

When you first start viewing in this way, a message may appear on the TV asking you to allow the application to access the TV, answer in the affirmative.
The only drawback when working with Twonky Server is the fact that you need to launch media files from a computer, since network folder It is not displayed on the TV itself.
Well, this is where our story comes to an end. Let's assume that the question is how it works local network via Hamachi you understand completely. If not, ask your questions in the comments.
Now relax and listen to a world-class masterpiece. A beautiful song.
Local networks are no longer something unusual, as they were at the dawn of their creation. The advantages of such networks are obvious. Users of computers united in a single local network will have access to shared files and folders and can easily exchange necessary information, edit documents, play games that use command modes, etc. However, this only applies to computers that are connected to each other using wires and a fairly large amount of hardware. But what to do when the computers are quite far from each other? This is where they come to the rescue software products to create virtual local networks. Among them quite often there are absolutely free programs. Downloading free programs for creating local networks and installing them on your computer is not a problem now. As they say, there would be a desire. Among the free burnouts for local networks of such applications, two main types can be distinguished. The first type allows you to create a virtual private network in such a way that one of the computers will act as a server. And this also includes programs that use computers alternately as the main server. Data exchange in this case is carried out using P2P (peer-to-peer) technologies, that is, using the universal BitTorrent protocol. The second type includes programs where the role of the central server is performed by a remote server of the software manufacturer. Here you only need to register on the manufacturer’s website. If we talk about free programs of this kind, then, in comparison with paid analogues, they allow you to create networks with the connection of about one and a half dozen computers or accounts. It's clear that paid analogues can create networks connecting even several hundred computers. However, for home use or for small offices 15-20 users are absolutely enough. It must be said that networks created using such applications have all the capabilities of conventional wired networks. And the setup, in most cases, is very similar. The difference in such programs may also be that sometimes one computer is bound to only one specific IP address. In some other cases, the IP address may be assigned automatically. To work on such a network, you will only need a program installed on your computer. Some free programs for creating private virtual networks even allow you to use the registration data of many Internet messengers, for example, Jabber accounts. However, the capabilities of such programs are quite similar. Some additional functions may differ, for example, in the presence of built-in chats or the ability to exchange short text messages. I think today virtual networks still preferable, since they allow you to combine single network computers located even in different parts of the world. On our website you can download the most modern programs for creating local networks.