Graphic editors Raster graphics Paid Adobe Photoshop. Concept of computer graphics. Adobe Photoshop graphic editor What is the name of Adobe Editor
You can download photoshop in Russian for free by instructions below, a multifunctional program for working with photos and images.
Distinctive advantages of the editor Adobe Photoshop.:
- Support graphic formats: jpg, jpeg, png, gif, bmp, tiff, svg, 3ds, well-known audio and video extensions, and others;
- Convenient to create realistic images;
- Excellent instrument for retouching, color correction, collage, flowering and other effects;
- Processes colored and black and white scanned photos;
- Works with point pictures, uses layers and contours;
- Prepares the documents for printing and high quality output.
- In a new assembly: management of brushes (sorting, creating and setting); Access to Lightroom cloud images; New smoothing algorithm; Settings and upgrades of fonts; Work with 360-degree panoramas, microsoft support Dial (control of elements without mice) and much more.

IMPORTANT! Below will go instructions for downloading and installing photoshop in Russian and other languages, please read carefully!
A couple of words about the method below: We download the installer from the official website, put photoshop 2018 (V19) or 2019 (V20) in Russian with a trial period, then turn into an eternal (forever - we make a free full version).
Download photoshop in Russian for free
Work method for Windows How to download Photoshop CC 2018 in Russian FREE 64 bit and 32 bits or how to download 2019 assembly and activate.
The instruction begins here! Perform all steps in a strict sequence and then everything will turn out.
IMPORTANT! Who already has a program or ended a trial period (it writes to buy and does not open), then we immediately go to the instruction point, where you need to download and replace the file (all installation items are missing).
- Downloading from the official site, the 64-bit installation archive from the Photoshop software section. If you have a 32-bit Windows, then scroll down to section 2018 and download the archive with a 32-bit photoshop. How to find out what kind of you can read your OS below on this page of our site in frequent issues and answers.
- Unpack the archive! The right mouse click (PCM) is to extract. Check that there are about 10 GB of free space on the disk.
- After retrying, find the set-up.exe file in the folder, click on it PCM and select Run on behalf of the administrator. The installation process will begin.
- A login window will appear in the account, select Sign up to Adobe ID (Get the Account), specify all the data. In the Password field, you must specify the numbers, as well as large (for example: qpwod) and small letters (VSFA). Example casual password: IWO28SJJS19SSK. You can specify any mail, you do not have to confirm.
- If a window appears, where they are asked to specify the phone number, simply skip this item by pressing the corresponding link button.
- At the next stage will begin automatic installationif not, then click the demo button.
- The process lasts 20-40 minutes, after completion, click on the blue demo button to run photoshop.
- After the program opens, a trial period will be displayed - agree by clicking confirming (continue the trial period).
- Close Photoshop!
- If the 2019 version was installed, then download (Password Softfile) if 2018 (SoftFile Password). If the link is blocked, see fAQ below. And if you are generally afraid to download anything from the Internet, then with an integrated antivirus and download anything, forgetting about "malware".
- Unpack the downloaded archive! Passwords are indicated in the previous step.
- If the 2019 version was installed, then copy the photoshop.exe file from the unpacked archive and insert it into the C: \\ Program Files \\ Adobe \\ Adobe Photoshop CC 2019 folder with the original.
- If you installed the 2018 version and you have a Windows 32-bit, then copy AMTLIB from folder 32 and insert it in C: \\ Program Files \\ Adobe \\ Adobe Photoshop CC 2018. For 64-bit windows, respectively, from the folder 64 copied and insert.
- Run Photoshop through the icon on the desktop or through the start. Adobe program Photoshop should not show a trial period at the start. Run through Cloud, as updating Photoshop, not recommended.
If you managed to download and install photoshop free, then we will be pleased to hear your gratitude in the comments and get classes in the social. Networks 🙂

Frequent questions about downloading photoshop
Specify your questions in the comments, and the most frequent will be made here:
- I already have a Photoshop program and ended a trial period, what should I do?
- What is the top and bottom registers?
- I did (-Y) all actions according to the instructions, but trial version remained. What to do?
- If access to the archive download is locked (limited in access) What to do?
- How to choose the interface language you need?
- If the club does not work or other problems with it and Photoshop.
- How to find out what kind of body tricks to insert me? What is my Windows System?
- Is it possible to update photoshop for free through cloud?
You need to download and unpack the archive on the instructions starting from paragraph number 10.
These are small and big letters. The password, usually, is indicated on Latin, for example Parol222.
If the restriction is shown in Creative Cloud - nothing terrible. And if the photoshop itself displays it at startup, it is scary, it means that something did wrong.
The easiest way to download this VPN to the computer (just run) or install the Yandex browser and enable in it any addition VPN from the extension directory. You can also download Opera and open. Press on the menu - Create a private window. Click on the VPN icon next to the update and turn on the icon.
First of all, check in the Photoshop settings: Menu - Edit (EDIT) - Settings (Interface). If you need an English interface, then the easiest way is to close Photoshop, go to folder C: \\ Program Files \\ Adobe \\ Adobe Photoshop CC 2018 (or 2019) \\ Locales \\ RU_RU \\ Support Files and rename the file tw10428_photoshop_ru_ru in any name and start the editor . If you need any other language not English, then you will have to reinstall the program. In the Cloud settings (three points on top of the right - settings), select the desired and reinstall.
You can directly download photoshop for free in Russian and any other language.
Right click of the mouse (PCM) on the My Computer icon (on the slave table or in the Start menu) - Properties. Inscription type system.
You can update, but then the activation flies and it will be proposed to buy photoshop, or a trial period will be displayed. But nothing terrible, just download and paste the file according to the instructions.
Errors in the process of starting or work Adobe Photoshop
- Error №16 Unable to install the application. Try right-click Mice on the icon with the program and select "Run on the name of the administrator."
- Error 0x000007B when you start the application.
- Error The entry point in the AmtretrieveLibraryPath or AmtRecordCodecInVocation procedure is not found in the DLL library.
- Pictures photoshop while trying to open a graphic document or create a new one. The problem is related to the fact that drivers are not supplied to one of the video cards (integrated or additional, more often onto the second).
- RAM memory error: an integer is required in the range from 96 to 8
- Error: Unable to execute the request before the JPEG SOS marker is missing a Sofn, DQT or DHT JPEG marker
- Error 213: 11 (a problem with a license for this product).
99% of not that genius was copied and replaced by amtlib.dll.
Usually this error occurs when the replaceable file is designed for photosop 2017, and set 2018. Check the version in the start-e.
Click Start-Service-Run, enter the REGEDIT, click OK, open HKEY_CURRENT_USER \\ Software \\ Adobe \\ Photoshop \\ 120.0 (the number may be different). In the right window at the right place right-click and add a DWORD 32 bit parameter Name Specify the "overridephysicalmemorymb". Assign the number to the number equal to your random access memoryIf 8 GB means specify the number 8192, if 16 - 16384. The principle of this: the number of GB is multiplied by 1024.
The problem occurs when you open the JPG or JPEG pictures to correct enough to open a problem image in Paint (there is in all Windows), select "Save As" with the other name and, optional, other expansion (PNG, JPEG, JPG, etc. d.).
Solution One-time: PCM on the application icon and launch on behalf of the administrator. Forever: PKM there is also properties - compatibility - put a tick on behalf of the admin.
How to reset the mail binding to Creatvie Cloud if it is impossible to confirm e-mail
Sometimes it happens that it is necessary to confirm the e-mail, and you in the process of installing a free photoshop introduced a random address that does not belong to you. Cloud does not allow you to change the mail name and the closed circle is obtained.
Decision!
- Close Program (output) Adobe Photoshop.
- We go to the disk with, then the username folder accountFurther \\ APPDATA \\ LOCAL \\ ADOBE \\
- Rename Oobe Catalog in 123_OOBE or any other name.
- Remove the AMUPDATER directory
- Run. A window should appear with new registration.
If the AppData directory is not visible, you need to select the view - parameters, laying the view, scroll to the bottom and press show hidden files, folders and discs, then approx.
If the directory is not renamed, press Ctrl + Alt + Delete and the task manager. In the Process tab, find the Creative Cloud process or just cloud and complete it. Then try to rename again.
Have you successfully downloaded photoshop for free in Russian? Please leave your feedback and share in Soc. Networks 🙂
When you start AdobePhotoshPo, you can see the program window shown in Figure 1.4.
Figure 1.4.InterfaceAdobephotoshop.
At the top of the AdobePhotoshop window main menuprograms containing almost all commands to configure and edit the image.
Figure 1.5The main menu of programAdobephotoshop program
Consider the main items of the main menu:
Filecontains main teams By opening, creating, preserving, closing graphic documents, as well as functions for import, printing, etc.
Editing- Contains commands designed to perform the main operations on the image, such as: copying, cutting, insert, fill, transform, etc.
Picture- Commands are concentrated here to work with the image: image viewing mode, size, contrast and other
Layers- The commands of this item allow you to make operations with layers, namely create, delete, unite, etc.
Selection- Submenu to create and edit selections. Allow you to invert the selection, set the color range, save and load the selected areas.
Filter- The commands of this group are designed to impose various effects for images.
Analysis- The item contains tools for detailed image analysis. With their help, you can determine and calculate the distance, perimeter area and other sizes.
3 D.- serves to work with three-dimensional objects
View- To contain commands that allow you to change the method of displaying the picture, the screen mode, as well as additional elements, as a ruler and guides.
Window- Point commands allow you to show / hide all windows that are in the program.
reference- Allows you to open the documentation for the work of CADOBEPHOTOSHOP.
Also at the top of the window is control Panelwhich allows you to configure and run a lot of functionality of the program.
Figure 1.6.Control Panel VladobePhotoShop
Consider the control panel buttons:
-RunBridge, Button that runs an additional program for easy viewing of photos on your computer.
-View auxiliary elements, Button designed for more convenient operation with graphics by setting a ruler, grid and guides.
-Scale, Button that allows you to set the desired image to display on the screen.
-Sort documents, Button allowing you to select different options for displaying windows with open images.
-Screen Modes, Button that allows you to select the optimal configuration mode of the working area of \u200b\u200bthe program.
In CS5, various tasks are solved using a variety of tools, but sometimes it is difficult to switch from one dialing of the palee and the palette to another. To facilitate this task, a panel was created Main working environment-
This panel has sets of tools that are intended for a specific type of work with pictures. Each of the sets includes the most necessary and frequently used parameters and panels both when processing photos and to create animated images or 3D graphics.
Tool palette
Figure 1.7.Tool palette (rotated 90 degrees)
The toolbar can be made with one column or two. Little black triangles are drawn on the buttons of many tools. This means that they are hidden a pop-up panel with additional tools, alternative main. All PHOTOSHOP tools can be divided into four groups:
drawing and painting tools;
tools for highlighting and moving selected areas;
editing tools and retouching images;
text tools;
Tool attribute panel
On the attribute panel for any active tool, all of its settings are displayed. This panel changes its appearance depending on the tool selected.
Figure 1.8.Poll Attribute Panel Pouring
Floating palettes
The palettes are located on the right side of the window program interface, in which some of the PHOTOSHOP controls are grouped. Displaying all palettes on the screen are not always appropriate, as they are too climbing the work space of the screen. Therefore, the "extra" palette can be hidden. Consider the main palettephotoshop:
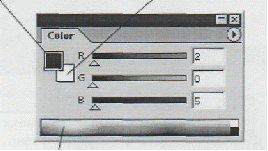
Color(Color) - Displays the values \u200b\u200bof current front and rear colors, which can be edited by moving the sliders of the corresponding components of the color model. Tab Swatches.(Samples) This palette contains a set of available for use of colors and allows you to add new and remove unnecessary colors to the set. Tab Styles.(Styles) Contains the options for fills in the workspace.

Figure 1.9.Palettecolor (color)
History.(History) - In this palette, the program records each step editing a step. It displays all the operations that you have done using the tools and teams of a graphic editor.

Figure 1.10Palettehistory (History)
Layers.(Layers) The palette contains all the layers of the image, starting with the top and ending with the background. This palette is used to determine the parameters of the layers.

Figure 1.11Palettelays (layers)
Tab Channels.(Channels) This palette is designed to create and edit channels. Tab Paths.(Contours) Contains a list of all user-generated contours.
Status bar -located along the bottom limit of the program window, designed to display information about the current file, image scale and active in this moment Tool.
Figure 1.12Status bar

 Karaganda State Medical University
Department of Medbiophysics
And informatics
ON THE TOPIC: "Concept computer graphics. Adobe Photoshop Editor
Work prepared
Student c. 123 Omph
Sibel Natalia
Checked: teacher
Kultenova M. T.
Karaganda 2009.
Introduction
View of the working window of the programPho Toshop.
Palettes
Images in Photoshop Program
Working with images
Conclusion.
Introduction
In the digital world there are two main ways of representing images.
In both cases, the actual continuous image is divided into elementary objects, but described various methods. One method - vector graphics - is a mathematical description of the components of the elements (objects) of the image - curves and straight lines, as well as elementary geometric figures (rectangles, ellipses, etc.). Another method, raster graphics, is that the real continuous image is divided into points, called pixels, and each point has exactly certain coordinates (row number and column, as table cells). In addition to these two types of graphics, in some types of fractal graphics, three-dimensional (3D) images, animation (2D and 3D) and images for the Web, although they are essentially any kind of either vector Imagesor raster, or use mechanisms and that, and the other at the same time.
This graphic editor is designed to work with raster images, that is, with images consisting of individual points. A program developer, which is often referred to as Photoshop or even Photoshop, Adobe Systems Corporation. Using the Adobe Photoshop editor, you can edit images that are printed by a house printer or in printing houses, as well as cook images to display various devices - monitors, televisions, plasma panels. First official version Photoshop programs appeared in 1990. This version of photoshop was designed to work on Macintosh computers. Now Photoshop can be installed on "Macs" and on personal computers.Editor Adobe Photoshop It is considered the best raster graphic editor. The ability to work with photoshop - the alphabet of computer graphics. Each computer schedule should well own Photoshop (Photoshop). And now, with the distribution of digital cameras, the ability to work with the Adobe Photoshop editor may be needed and unprofessionals.
1. Adobe Photoshop and its capabilities
Editor Adobe Photoshop (Photoshop) - computer program To work with computer graphics.
The main features of this program:
Processing of digital and scanned photographs, color correction, special effects, elimination of various shooting defects.
The ability to create a multi-layer image. In this case, each element of the illustration can be saved in its own, separate layer, which can be edited separately, move relative to other layers, etc.
Photomontage, compilation of collages.
Retouching and restoring old photos.
Hand-drawn sketches.
Improved text tools. Using various tools, effects and filters can be obtained very interesting effects. Creating textures for 3D models.
Creature graphic elements Design and design for sites, documents, printing and printing.
Preparing images for printing or publishing on the Internet.
Support for various image standards (RGB, CMYK, GRAYSCALE, etc.);
Support for various graphic formats, both raster (BMP, JPEG, GIF) and vector (AI, CDR).
Coloring photos. You can also twist the pictures of the image on black and white photos.
2. View of the working window of the program P.hO. toshop.
Toolbar
In order to activate the tool, the pictogram of which is currently visible on the screen, click on it. Near some pictograms there is a small arrow. If you click on it, the pop-up palette will open, where you can select the tool entering the same group.
Fig. 1.1. Toolbar on the toolbar
It is even more convenient to call the tools using the keyboard (each tool matches its "hot key"). If you forget the keyboard combination, hover over the tool icon, hold for a few seconds, and the pop-up tip will remind you to you. For each tool, their own parameters are set (for example, mixing mode, opacity value) on the options panel located at the top of the screen.
The composition of the parameters on the options panel varies depending on which tool is selected.
Installations The options panel are saved for each tool if you do not change or not restore the default accepted. Download, add and save various combinations of buttons, as well as restore the default tool features using the drop-down panel menu commands. In order to restore the default options for all tools, select the command.RESETALLTOOLS. (Restore all tools).
The toolbar contains in yourself:
Tools for the allocation of the region of the geometric shape
Tools for highlighting an arbitrary form (Lasso, magic wand)
Tools for elimination of imaging defects (attending brush, insert)
Cloning tools (stamp, model stamp)
Erase tools (eraser, background eraser, magic eraser)
Tools controlling the clarity of the image boundaries (erosion, sharpness, finger)
Direct selection tools (direct choice, path selection)
Contours tools (feather, free feather, adding and removing the engagement point)
Tools for creating notes (notes, sound notes)
Tools for working with slices (fragment Selection of a fragment)
Drawing Tools (Brush, Pencil)
Tools for working with the history of creating an image (brush, patterned brush)
Pouring tools (bucket, gradient)
Tools for lightening and dimming images (clarification, dimming, sponge)
Tools for working with text
Vector drawing tools (rectangle, ellipse, polygon, rounded rectangle, line, user form)
Tools for working with color, corners and distances (pipette, color sample, measurement)
Tools for changing image viewing mode (magnifier, hand)
View of the screen when working with the programPhotoshop.
In fig. 1.2. Showing a screen view when working with the programPhotoshop.
Clicking the button (1) The application management menu is called. It contains the following commands:Restore. (Restore), Move. (Move), Size (The size), Minimize.(Collapse), Maximize (Expand) and Close (Close). Using the button under it, the document management menu is called. The main menu of the document contains such commands asRestore. (Restore), Move.(Move), Size (The size), Minimize.(Collapse), Maximize (Expand), Close(Close) and Next (Following).
Click on any menu panel element (2) to access various dialog boxes, submenu and commands.
To determine the parameters of the selected tool, the options panel (3) are intended.
Click on the buttonMinimize.(4) to minimize the application window; As a result, its icon will be located on the taskbar. In order to restore the former window size, simply click on this icon.
Button Maximize(Expand) Annex (5) or Document (9) Allows you to increase the window size as possible. If you want to restore the former window size, click the button.Restore.. After the window size is restored, the buttonRestore. turns into the buttonMaximize.
Fig. 1.2. View of the program screenPhotoshop.
The closing button (6) closes the application window.
Title (7) contains the name and scale of the image, the name of the current layer or identifierBackground.(Background) and image mode information.
You can roll the document by clicking the buttonMinimize. (8) the document, the document icon will be located in the lower left corner of the application window.
Click on the buttonRestore. (Restore) (9), and the previous size of the document window will be restored.
If you want to close the image or palette, click on the icon (10).
The program has 13 palettes (11), which can be moved across the screen and change their grouping to the default. Click on the tab (palette name) in the palette group, and it will become the uppermost in this stack.
In order to show / hide the toolbar (12) and all open palettes. Press the keyTab.
The status bar displays the values \u200b\u200bof the following parameters:Document Size (Document size)Document Profile(Document profile).Scratch. Sizes. (Memory) - the amount of RAM, currently available for the programPhotoshop, Efficiency(Efficiency) - the proportion of the RAM used.Timing. (Time) and Current Tool.(Current tool) - tool name.
Menu
Menu File
Commands from the File menu (File) are used in cases where you need to create, open, place, close, save, scan, import, or deport, print an image, transfer the file over the network, automate-technically operations and finally exit the programPhotoshop.
Menu Edit.
In the Edit menu (Edit), contains image editing commands: copy, transformation, insert and redefine image colors, as well as the creation team of a certain size and shape, various patterns and figures. Commands submenuFade (Weaken) allow you to weaken the effect of many operations (for example, the last applied filter, adjustment or drawing commands by any tool). Commands submenuPurge. (Clear) free memory. Also using the menuEdit. you can open dialog boxesColorsettings. (Color characteristics),PRESETMANAGER. (Settings manager) andPreferences.
Menu Image.
Using the submenuMode (Mode) Menu Image (Image), the image can be converted to any of the eight representations. Commands submenuAdjustments. (Adjustments) change tone, saturation, color brightness, or image contrast. With the help of the teamImagesize (Image size) You can resize the file, image size or permission. Dialog windowCanvassize. (Canvas size) is used in the case when you need to change the size of the working space in which the image is located.
Menu Layer.
Commands located in the menuLayer. (Layer), allow you to add, copy, delete, change, group, change the order of the layers in the stack, control the mutual arrangement of the associated layers, combine layers, add masks to them and turn the image into one single layer. Access to some commands can be obtained faster by using the menu of the paletteLayers (layers).
Menu SELECT
All command from the Select menu (Select) - allocates whole layer entirely. Same TeamDeselect. (Remove the selection), on the contrary, removes the selection from all the previously dedicated areas. TeamReselect. (Restore the selection) again allocates the area to which the last command was appliedDeselect. Colorrange team (Color Range) Creates a selection with color. Other commands of this menu are expanding, compressed, smoothed or decide the boundaries of the selected area, as well as save the selected areas in the channels or load areas from the channels.
Menu Filter.
Menu Filter. (Filter) contains filters that fulfill a wide range of image editing operations and grouped by submenu. FilterDigimarc. (Didenk) inserts a copyright sign invisible for the human eye.
Team Extract. (Extract) allows you to create dedicated areas of complex shape.
Team Liquify.(Distorting) shifts the image points in any direction.
Menu VIEW.
Commands Menu View (View), control what is displayed and what is not displayed on the screen. TeamGamutwarning (Warning about the gamma) highlights those colors that will not be displayed during four-color printing. Commands submenuProofSetup. (Trial print settings) allow you to see how the image will look like when printing in various modes. Other commands from the menuVIEW. control the image scale, and also display a ruler, a coordinate grid, auxiliary lines and areas to which the image is divided.
Menu Window.
Commands from Window menu (Window), manage the show or hide different palettes. This menu also contains open images, and any of them can be done active.
When working in the operating system environmentWindows this menu Allows you to manage the interconnection of windows of images and show / hide the status bar.
Menu Help.
Commands from the Help menu (Help) will help you get access to the manual) on the programPhotoshop. In the interactive mode, find out latest news from companyAdobe , connect to the siteAdobeonline Or perform any other actions using prompts appearing on the screen.
3. Palettes
Many operations produced in the programPhotoshop. Performed with a palette that can be moved. In order not to occupy a large space on the screen, the default palettes are connected to groups:Navigator / Info. (Navigation / information),Color / Swatches / Styles (Color / samples / styles),History / Actions / ToolPresets (History / Actions / Tool Kit),Layers / Channels / Paths (Layers / channels / contours) andCharacter / Paragraph (font / paragraph).
In order to open any palette, you must use the teamWindow (window).
The specified palette will be located on top of the remaining in the same group.
Some palettes open by clickingTour on the options panel, for exampleCharacter / Paragraph with the tool selectedTour (Text). In order to turn / deploy the palette, you must double-click on its name or once along the corresponding button located in the upper right corner of the window. If the palette size differs from the default, first click on the buttonMinimize to restore the default palette size, then click again to roll the palette.
Palette Color
Palette Color (Color), designed to mix and select colors. Colors apply to the image using any tool for drawing or editing or commands, for example,Fill (pour) or canvassize (Canvas size). From the palette menu, select the color model. You can mix colors by moving the slider.
Color.
To open the panelColorpicker. (Color selection), where you can also choose a color, click once in the square or basic color square, if it is currently active or twice, if it is not active.
Palette Swatches.
Palette swatches (Samples) - Used if you want to choose ready-made colors. Separate samples can be added or deleted from the palette. The menu commands of this palette also allow you to upload, attach and save the color panels defined by the user.
Palette Styles.
Palette Styles. (Styles), used in the case when you need to apply the previously stored effects or a combination of them. Previously such an opportunity was already in the programImageReady now she is in the programPhotoshop.
Palette Navigator
With the help of paletteNavigator (Navigation), you can select the image fragment visible in the window or change the scale of such a fragment.
Palette Info
On the info palette (Information) Displays the color components of the pixel, which is currently indicating the cursor. Also, there are data on color samples (maximum four) selected in the image. If the color adjustment dialog box is open, the color samples will be displayed on the palette before and after the modification. In addition, the coordinates x and at the cursor are shown here.
Other information may be displayed on the palette, depending on which tool is activated: for example, the distance between points when moving the selected area, when building a figure or when using the tool
Measure(Meter); the dimensions of the selected area or the framework on which the image will be cropped; or width (W. ), height (H), angle (a) vertical (V. ) and horizontal (H) slope during transformation of the selected area.
Usually, when creating a new image, its background is opaque. PaletteLayers. (Layers) Allows you to add, delete, show / hide, copy, group, bind and change the order of layers located on top of the background.
Each layer may correspond to its own mixing mode and the level of transparency, and each layer is allowed to be edited without changing the others. Also with the layer you can associate a mask (mask).
If the layer apply the effect (for example,Innerglow. (Internal glow),DropShadow. (Throw shadow)), the effect icon and the pop-up button will appear next to the layer name.
You can only edit the current layer (also called selected or active). Select a layer just - just click on his name on the paletteLayers.
In order for the lowest layer of a new image instead of an opaque background, the transparent layer has become the check boxTransparent (Transparent) in the groupContents. (Content) in the command dialog boxFile\u003e New (File\u003e New).
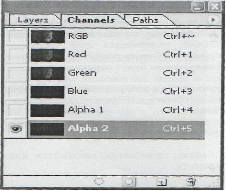
Palette Channels.
In the Channels palette (Channels) Displays one or more channels, which make up the image. Also, using this palette, you can create alpha channels used to save selected areas, and registered channels, or spotted, colors (spotcolorchannel. ) necessary during flowering.
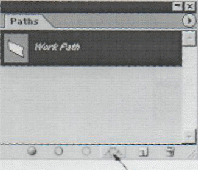
Palette Paths.
Contour (Path. ) It is a figure consisting of segments of curves and segments of direct lines interconnected by nodal dots. There are two ways to draw contour: directly with any of the tools for building shapes or toolsRep (Feather) or by creating a dedicated area, and then converting it into the contour. The contour can be pouring or out. In order to create a selected area of \u200b\u200bthe specified form with high accuracy, it is better to first draw the contour, and then convert it to the selected area.
Using the palettePaths. (contours), you can save the contour and access it tool Rep and the tools related to itAddanchorpoint. (Add a nodal point),DeleteanchorPoint. (Remove the nodal point) andConvertpoint (Convert a point) allow you to change the outline of the contour.
Palette History.
With the help of paletteHistory. (History) You can selectively cancel one or more image editing actions. Each brush stroke, filter application and any other operation is presented as a separate item in the list of events on this palette, while the lowest event is the most latter.
HistoryBrush Tool (Restoring brush) restores the image to the specified event in the area of \u200b\u200bthe image area where they spend the brush.Tool Art.
Historybrush. (Artistic restoring brush) produces the same action. But only strokes of a certain style.
Palette Actions
The main purpose of the paletteActions (Actions) is automation of image processing. You can write the sequence of commands, and then apply them to one image or to a whole group of images. Also paletteActions Allows you to set and access "hot" keys for any action.
Palette Character.
In new versions Photoshop In order to create text, you do not need to call a special dialog box. All text administration and editing operations can be performed using a palette.CHARACTER (font).
4. Images in Photoshop
Pixels
The image (Figure 1.3) is raster, i.e. It is a combination of points of various colors located in the nodes of the rectangular grid. Each point called pixel depicts any color or shadow. Increased part of the image, you can edit separate pixels.
Fig.1.3 Image close-upon which separate pixels are visible
Any image in the programPhotoshop. It is raster, regardless of whether it was scanned, imported from another application or fully created in this program using drawing and editing tools. Programs working with bitmap images are ideal for creating picturesque, photographic or photorealistic images containing barely catchy differences in colors. If you drag the cursor through any layer area while one of the drawing tools is selected, the pixels under the cursor will be repainted.
Resolution
Image resolution is the number of pixels contained in the image; Resolution is measured in pixels per inch. Options windowImagesize (Image size) allow you to resize image, as well as its resolution.
The monitor resolution is also measured in pixels per inch. Its own resolution, measured at dotbles, there is also output devices.
file size
The file size of any image is measured in bytes, kilobytes, megabytes or gigabytes. The image has dimensions - width and height.
Color representationsRGB and CMYK.
To display color images to the monitor used red, green and blue (Red, Green, Blue - RGB ) Rays. If you mix these three main colors in pure form, it turns out white color.
With four-color printing, three main paint are used: blue (C,cyan), purple (m, magenta) and yellow (y, yellow).
When mixed it, it turns out dark, opaque color. In order to get a rich black color, black ink is mixed in printers (K,black. ) With a small amount of blue, purple and / or yellow ink.
The display of color on the monitor screen is often changing and depends on the features of lighting, monitor temperature and color surrounding items. In addition, many colors visible in real life cannot be displayed when printing, not all colors displayed on the screen can be printed, and some print colors are not visible on the monitor screen. All monitors display colors in accordance with the modelRGB, CMYK. -This is just simulated. But the modelCMYK. Important only for printing.
Channels
Each image in the programPhotoshop. consists of one and more translucent drawings certain color, Channels called. For example, image in modeRGB. Compiled from red, green and blue channels. (To get a visual view about them, open the color image, and then on the paletteChannels. click one of the items.Red, Green, Blue To display only this channel). Sometimes color adjustment concerns only a separate channel, but usually changes are carried out and displayed in a multichannel, composite image (the highest element on the paletteChannels) and affect all image channels at the same time. Special halftone channels used to save the selected area as a mask are called alpha channels, and they can be added to the image (Fig. 1.4). Only currently allocated channels are allowed to edit.
Fig. 1.4. Channels Images
Image Modes
Image can be converted, display and edit in any of eight modes: Bitmap (bitmap), GRAYSCaLE (halftone), duotone (dowling), indexedcolor (Indexed color),RGB, CMYK, Lab and Multichannel (Multichannel).
In order to use the inaccessible mode (its name looks dim), you must first convert the image to another view. For example, if you want to convert the image to modeIndexedColor, it must be in modeRgBil GRAYScale.
Some changes in the image mode cause noticeable color shifts; Others concern only intimate nuances. Reliving changes may occur when converting an image from modeRGB in CMYK mode since the print color will be replaced by saturated, brightRGB. - Tseivers. The accuracy of color matching may decrease if repeatedly convert the image from the modeRGB in CMYK and back.
Middle Scanners I. low class usually allow only to getRGB. -Images. If you create an image that will be subsequently printed, to speed up editing and using filters, work with it in mode.RGB, A. Then, when you are ready to display a print image, convert it into viewCMYK. . In order to preview the image in modeCMYK. So what it will be on the seal, use the submenu commandsView\u003e proofsetup. (View\u003e Test Print Setup) in combination with submenu commandsView\u003e Proofcolors. (View\u003e Trial Print Colors). We will look at the most necessary modes for work.
In Bitmap mode, pixels or 100% white or 100% black, no access to layers, filters, as well as commands submenuAdjustments. (Adjustments) except for the teamInvert. (Reverse). Before converting an image into this presentation, it is necessary that it has a presentationGRAYScale.
In GrayScale mode pixels can be black, white and have up to 254 shades of gray. If you convert a color image to halftone, then save and close, the brightness information will be saved, but the color information will be irretrievably lost.
Image in modeIndexedColor contains one channel, and in the colors table there can be a maximum of 256 colors or shades (8-bit color representation). This is the maximum number of colors available in the most suitable forWeb formats GIF and PNG -eight. Often when using images in multimedia applications, it is useful to reduce the number of colors to the 8-bit presentation. You can also convert the image to modeIndexedColor, to create artistic color effects.
RGB mode - the most universal, since only in this mode all filters and tool options are available in the programPhotoshop. . Some video I. multimedia applications Can importRGB. - image in formatPhotoshop.
Photoshop. - one of the few programs that allow display and edit the image in modeCMYK. . The image can be converted to this mode when it is ready for printing on a color printer.
Duotone mode corresponds to the printing method at which two or more printed forms are used to obtain a more saturated and deep color in the halftone image.
Sources of images
Any image can be created, open, edit and save in 12 different formats.Photoshop. . But only a few formats are usually used:TIFF, GIF, JPEG, EPS and your own program file formatPhotoshop. . Due to the fact that the programPhotoshop. Perceives such a variety of formats, the image for it can be obtained from almost any source: from the scanner, from a graphic editor, from a CD, photo, video image and even from others operating systems. Also, the image can be fully created in the program itselfPhotoshop.
5. Working with images
Increase the sharpness and blurring of images
Blur Tool (Blur) reduces contrast between points. Take advantage of themto soften borders between image fragments. ToolSharpen increases the contrast between pixels, so it is used to outline the sharpness of the figures none of these tools can beused for the image in modeBitmap or indexedColor.
Using line and guide lines
Grid, ruler and guide lines help accurately arrange objects.
So that the rules are visible on the screen, select Menu item.View\u003e Rulers. (View\u003e Rulers). The lineups will appear in the image window from above and on the left, and the current position of the cursor will be designated by a dotted pointer on each of the lines. In order to hide the rules, select the menu item.View\u003e Rulers (View\u003e Rulers).
To attach the guides to the desired area, drag the starting point with the intersection of the Linek, located in the upper left corner of the image window, diagonally diagonally. Pay attention to where the zeros are now located on the rules.
Cloning areas in one image
CloneStamp Tool (Cloning stamp) Used to transfer a clone of an object from a single layer to another within the same laminated image or from one image to another (Fig. 1.5).
Fig. 1.5. Dragging the cursor in the area where the clone of the image should be, when the flag is installedAligned
In the image window by pressing the keyAlt. Click on the layer area you want to clone to create a starting point. (Do not click on the transparent area of \u200b\u200bthe layer, there is nothing to clone). After releasing the key, you will transfer the cloned area to the right place. To create a new source point for cloning operation, press the key.Alt. and click on another area of \u200b\u200bthe original image. To clone an image that meets the earlier step of work, use the toolHistoryBrush.
Use tool Patch. Tool. (Figure 1.6.)
This tool is designed to correct sufficiently large damaged areas in the image and the similarity of the preserved. To take advantage of the toolPatch Tool, follow these steps:
Call this tool by clicking on its icon on the toolbar.
Click on the buttonSource. on the tuning tool palette and select the area-source with Lasso.
Click on the buttonDestination and highlight the damaged area.
Click on the buttonHeal Selection.
Fig. 1.6. Tool options panelPatch.
Events
Palette History. (History), selectively cancels up to 99 editing operations, each of which corresponds to a specific image status. PaletteHistory. (History) Contains a list of recent operations performed above the image, and the lowest element of the list is the latest operation. If you click on any previous list item, the image will be restored until the specified edit torque.
Using pictures
Snapshot ) - this is something like copies of the state, but in contrast to the status of the picture will remain on the palette, even if the element on the basis of which it was created, will be deleted (due to the fact that the maximum number of states in the palette or the palette was achieved Cleared). Therefore, it is better to create a snapshot before performing a series of steps to edit or apply a sequence of action to the image.
When you close the image, all pictures are deleted.
To create a new snapshot, click on the item on the basis of which you want to create a snapshot then click on the buttonCreateNewsNapshot (Create a new snapshot).
Recovery and erasing image fragments
On the history palette (History) You can choose any snapshot or state and use it as a source for the tool.Historybrush. (Restoring brush). Dragging the cursor of this tool, you restore the pixels of the image to the selected state. Cannot use toolHistorybrush. (Restoring brush) for the image, the total number of pixels of which was changed after its opening (for example, after re-sample, trimming, changing the image mode or the size of the canvas).
Main color background color
Color panel
Fig. 1.7. Palette Color
Primary and background color
When using any tool drawing, creating text or executing a commandStroke. (Stroke) applies current main color (fore- GroundColor. ). When using toolEraser. (Eraser), increasing the size of the canvas or moving the selected area located on the background using the toolMove. (Relocation) The opening area is automatically filled with current background color (backgroundColor). Tool Gradient. (Gradient) mixes various colors, including basic and / or background.
The main and background colors are presented on the toolbar in the form of squares of the corresponding color, as well as on the paletteColor (color).
There are several ways to choose the main and background flowersAnd they are described in the following sections:
enter values \u200b\u200bto certain fields or click on a large color square on the colors selection panel;
in the dialog boxCustomColors. (Colors of user choosing) Select a previously defined colors system;
enter values \u200b\u200bin numeric fields or move the slider on the paletteColor (color);
click on the color on the paletteSwatches (samples);
select color on the image using the toolEyedropper (Pipette).
Contours
Contours are vector objects consisting of nodal points.(Anchorpoint) which are interconnected by the segments of curves or straight lines. They can be created using the Rep (Pen) group tools. To change the outline of the contour or shape, you need to move, add or remove the nodal point or move the segment. The form of curvilinear contour sections can also be adjusted by changing the direction of tangents.
In addition, the tools of the PRP group are used to create layers of typeshape (Figure), visible areas of which controlcutting contoursClippingPath ). Layers this type Contain the fill areas that can be edited, and the cut-off contour, which determines the border of the shape. The cut-off contours of the layers are vector masks, practically identical to masks of layers, but having one advantage: they set the exact boundaries that occupy much less RAM than channels.
Contours created using rep (feather) tools orFreeFormpen. (Free feather), display, open, closed, rearranged in the stack, retain and removed using a palettePaths. (Contours). Also with a palettePaths. You can performconverting the selected area into the contour, convert the contour to the selection, stroke and fill the contour.
Make Work Path From Selection
Fig. 1.8. Work circuit creation button
New circuit built using toolRap automatically get calledWorkpath and it will be saved with the file. However, the next circuit you created will replace the existing one. To quickly save the working circuit, drag his name to the buttonCreateNewPath, located at the bottom of the palettePaths. PHOTOSHOP program I assign him the default name. To rename the outline, double-click on its name and enter the new one.
Work with text
In Photoshop program Text is vector. It has hard, clearly defined boundaries, because the program when creating and changing the text uses a vector circuit. At the same time, the text is raster and has the same permission as an ordinary image. Created text in the programPhotoshop. , automatically appears on its own layer. At any time, you can change its attributes: font, style, kege, color, kerning, tracking, line interval, alignment, position relative to the baseline. In addition, various attributes can be installed for different letters in the same text layer.
It is also allowed to change the text content, to apply different layer effects to it, change the mixing mode and the level of opacity. What can be done with the editable text layer? You can apply filters, outline text or fill it with a gradient or pattern. To carry out these operations, you must convert a text layer into raster format using the menu command.Layer\u003e Rasterize \u003e Tour (layer\u003e convert to raster format\u003e text). But everything is not so simple. Once the text is converted to raster format, its typographic attributes (for example, a font or style) cannot be changed. Any text types (editable and other) are created using the Ture Tool (text), menu "Layer »(Layers), Character palettes (font).
Editable text can be moved, transform, change its position relative to other layers, in a word, perform above it various operationswithout affecting other layers. INPhotoshop. There is also a spell check. To call this module, right-click on the text block and in the context menu that appears, select the commandCheckspelling . When a word is discovered in the dictionary, the spelling control program will propose to replace it, enter into a dictionary or ignore.
Channels and masks
If you save the selected area in a specially created halftone channel, calledalpha Channel, its at any time can be downloaded to the image. It is especially convenient for the allocated area of \u200b\u200bthe wrong shape, which is very difficult to reproduce. The file may contain up to 24 channels, but since each channel increases the file size (depending on the size of the selected area), it is prudent when they are added.
Access to alpha channels can be obtained using a paletteChannels. (Channels), and you can save or download them using commands from the menuSELECT (Allocate) or paletteChannels. (Channels). To save a dedicated area using current options, follow these steps: Highlight any area, bottom paletteChannels. (Channels) Click the buttonSaveselectionaschannel. (Save the selected area as a channel). To load the selection channel to the image, on the paletteChannels. (Channels) by pressing the keyCtrl , simply click on the Alpha Channel name you want to download.
Using the modeQuickMask. (Fast mask) in the programPhotoshop. Selected and unused areas of the image can be coated with a translucent color mask, the form of which can be subsequently changed using any tool for drawing or editing. Disguised areas are protected from changes. Unlike the alpha channel, it is impossible to maintain a quick mask, but when returning to the regimeStandard (Standard) The mask will be converted to a dedicated area that can be saved.
Filters
In a programmePhotoshop. viafilteryou can get the countless number of effects, starting from a slight increase in sharpness and ending with ridiculous distortions. For example, filtersBlur (Blur) orSharpen. (Sharpness) can be used for hardly noticeable retouching of the image; FiltersColorhalftone. (Color Raster)Findedges. (Edge selection),EMBOSS. (Relief) orWind (Wind) -for more vivid effects;ARTISTIC (Art),Brushstrokes. (Brush strokes),Sketch. (Sketch) orTexture. (Texture) - to create an image, "drawn" manually;LightingEffects. (Effects of lighting) - in order to illuminate the image.
All filters are grouped into 13 categories listed in the menuFilter. (Filter). Imported filters appear in their own submenu. The filter can be applied both to the layer as a whole and its dedicated part. Before applying the filter to the selected area, it is necessary to grow it so that it does not stand out on the image after filtering.
Some filters can be applied directly (selecting the appropriate command from the submenu). Other filters can be used only by setting certain values \u200b\u200bof variables in the dialog box. Selecting the menu commandFilter. > LastFilter. (Filter\u003e Last Filter) (key combinationCtrl + F. ), you can re-apply the last used filter with the same characteristics. To install other characteristics, select the filter from the corresponding submenu. In order to open the last filter dialog box, in which the latter will be displayed. installed characteristics, Press the key combinationCtrl + Alt. + F. .
In modeRGB. andMULTICHANNEL. All filters are available; And in modeCMYK. , GRAYScale andLabcolor - Only some of them. Filters are not applicable to images in modeBitmap. andIndexedColor And to images in which there are 16 bits per channel (Fig. 1.9) ..
Fig.1.9. Preview window for filters
The dialog boxes of most filters have a preview window, in which you can also adjust the degree of exposure to the filter used. In order to weaken the effect of using the filter and select the appropriate mixing mode, follow these steps:
Create a duplicate layer to which the filter should be applied.
Apply the filter to this duplicate.
In the paletteLayers. (Layers) Move the sliderOpacity (Opacity) to the left to weaken the effect of the filter action, and select another mixing mode.
Since the filter was applied to copies of the layer, then you can later change the mixing mode or the opacity of the filter layer so that you can different ways Mix it with the source layer, or create a layer copies mask to hide or change the filter effect, or completely remove the filter layer. When the image change is completed, perform a fusion of a copy of the base layer.
Strengthening the filter effect
An increase in brightness and contrast values \u200b\u200bcan help enhance the filtering effect. Select Menu commandImage. > Adjustments. > Levels. (Image\u003e Adjustments\u003e Levels) and in the dialog box that appears dialog boxLevels. (Levels) Move the black sliderInput (Input) to the right, and a white sliderOutput. (Output) - slightly left and click on the OK button.
In order to change the color of the layer after applying the filter to it, which deleted some colors (for example, when using the filterCharcoal (Coal)), use the menu commandImage. > Adjustments. > Hue. / Saturation. (Image\u003e Adjustments\u003e Tone / Saturation) and check boxColorize (Tint).
Conclusion
The main plus editors of vector graphics is the ability to arbitrarily scaling the image, that is, to increase and reduce its size without losing the quality. However, in vector editors it is impossible to create small strokes, soft color transitions, the easiest smear of light and shadow. But point editors, the best of which is generally accepted - is Photoshop, just designed for this.
Let's summarize:
If you need a graphic editor to create drawings, logos and other hand drawn images consisting of primitives and one-color flooded, your choice - vectors. (CorelDRAW, the largest vector editor with a mass of features).
If you draw, work with a photo and want to do all this with the Completeness, boldly choose the editor of the point graphics, that is, photoshop.
Many distinctive features of this program are based on user interface. Here is some of them:
The first plus is a clear structuring of tools and panels. All tools are in one place, on the so-called toolbar located on the left side of the desktop, while they are reduced to groups that combine several tools similar to the functions performed. On the right side, there are panels of control layers, tools, channels, etc., which can be folded, close when there is no need for them, as well as randomly group to facilitate work with the program.
Another distinctive feature of Photoshop is the ability to work with multiple images simultaneously in scalable windows (Fig. 1.2). It is simply indispensable when working with collages and other composite images, but many others graphic programs This feature does not give.
The ability to work with the layers has been practically in almost all programs designed to create and edit raster graphics, but only Photoshop gives inexhaustible freedom when working with layers.
List of used literature
Methodical manual at the rate "Adobe Photoshop"
E. Volkova "Artistic techniques and tricks Adobe Photoshop"
http://www.piter.com.
http. :// www . informatik. . ucoz. . ru /
The most advanced graphics editors like Adobe's tools are considerable money. But there are free and quite worthy alternatives whose opportunities are enough for the majority. Edition for photographers and designers Creative Bloq chose THE BEST FREE GRAPHIC DESIGN SOFTWARE The best among such programs and services.
Free vector editors
Designed to create and edit logos, interfaces and other scalable graphics.
Gravit Designer - previously known as GRAVIT is a full-featured vector editor. It is suitable for any tasks: from design interfaces and icons to work with presentations, illustrations and animation.
Neat intuitive GRAVIT Designer interface can be configured. The editor contains a mass of tools to create excellent detailed vector images. Among them are non-destructive (their action can be canceled) functions for working with Boolean operations, tools "Knife" and "Count of ways" plus a plus of fill and mix modes, as well as a powerful text engine.
If you need access to work on the go, cloud Service Gravit Cloud will allow return to the project on any device.
2. Vectr.

- Platforms: Web, Windows, MacOS, Linux.
Vectr offers all functions that can only be needed to create vector graphics, plus a variety of options for using filters, shadows and. This is enough to cope with most everyday design tasks. The possibilities of joint editing and synchronization are particularly useful, thanks to which you can work when and anywhere in tandem with other people.

- Platforms: Web.
If you need to quickly create or edit a simple SVG file, there are several to be suitable for this task no worse Adobe Illustrator. Among the best of them - SVG-EDIT.
This entire editor is created on HTML5, CSS3 and JavaScript and does not use servers for data processing. The SVG-EDIT code is open. Therefore, if you wish, you can download it and modify to create your own version of the editor.
SVG-EDIT has all the basic tools. vector editor. But only the SVG format is supported.

This powerful editor offers many tools and functions that are often unavailable in other similar programs. Among them are alpha mixing, cloning of objects and markers.
Full support for various color models makes an inkscape worthy Adobe Illustrator for both web design and in the field of printing. With all the simplicity of the interface in this program, you can create incredibly complex work.
Separate attention deserve such opportunities as transformation raster images In vector, creation of stroke with variable width and support of Illustrator files.
Free raster editors
Designed to create and edit any unsecable drawings and photos.
1. Gimp.

- Platforms: Windows, MacOS ,.
Free open source graphic editor. GIMP is equipped with a rich set of functions for drawing, color correction, cloning, highlighting, improvements and other actions. The GIMP interface is different from the most popular Photoshop, but for a long time to search for the necessary tools you will not have.
The GIMP team took care of compatibility, so that you can easily work with all popular image formats. In addition, the GIMP has a built-in file manager similar to Bridge from Adobe programs.

- Platforms: Windows.
If you work on Windows and do not need this number of tools like GIMP, your ideal editor can be Photo POS Pro. The latter is created with an eye on editing images and perfectly copes with typical tasks like adjusting contrast, lighting and saturation. But photo POS Pro is suitable for more complex manipulations.
This program can boast a very friendly interface and a detailed help that helps to understand beginners. If you do photo POS Pro more functional, there are many extensions and plug-ins.
3. Krita.

- Platforms: Windows, MacOS, Linux.
Another open source editor. Krita has existed since 1999 and is constantly improving to fit the needs of concept artists, illustrators, visual effects specialists, drawing and textures.
The program includes a set of a variety of brushes and supports many plug-ins: from advanced filters to auxiliary tools for working with the prospect.
Among the merchants interesting functions - Stabilizers of brushes that smooth lines, looping mode to create seamless patterns and textures, as well as a pop-up palette for quick color choice.
4. Pixlr.

- Platforms: Web, IOS, Android.
PIXLR offers more than 600 effects, overlays and frames. In this service, you can do everything that it is worth waiting from: change the size of images, crop them, remove the effect of red eyes, whiten your teeth and much more.
If you are familiar with Photoshop, then very quickly master the Pixlr web version. Interfaces of these editors are very similar.

- Platforms: Windows.
Paint.net is an alternative paint programembedded in all windows version. But let the similarity of the titles do not confuse you: Paint.net is a much more advanced and useful editor.
The development team makes focus on ease of use and improves in Paint.NET rather functions for editing pictures than graphics design capabilities. Nevertheless, paint.net allows you to manage the prospect, manipulate pixels on canvas, cloning the selected zones and so on.
Thanks to the support of the layers, wide selection Tools for highlighting and settings like brightness / contrast and curves, Paint.Net can be viewed as a decent replacement of Photoshop.

- Platforms: Web.
Sumo Paint works quickly on the web and copes with tasks not worse than desktop editors. But for his launch you need Adobe Flash. Player. So Sumo Paint is not for iOS devices.
Arsenal settings and functions of Sumo Paint includes pencils, brushes, text, gradients, cloning, form and not only. All this is always in the visibility zone on a floating panel like the one you could see in.
Free editors 3D graphics
Designed to work with 3D models, effects and animations.

- Platforms: Web.
Sketchup Free can be called the perfect point in the world's 3D graphics. This editor is friendly introducing a beginner to the case and forgives him all the mistakes. You can start with simple drawing of lines and forms, and then transform them into 3D objects.
If you need inspiration, you can download free models of various objects from the 3D Warehouse library through the search form on the Sketchup website.

- Platforms: Windows, MacOS.
With DAZ Studio, you can customize, move in space and various 3D objects like people, animals, items.
You can create unique characters, worlds, various design elements and much more. But in Daz Studio there are no simulation and texturing capabilities available in paid alternatives. For a detailed table with comparison of editors, see the project website.

- Platforms: Windows, MacOS.
Hexagon - free tool For 3D modeling. It has everything you need to create detailed models ready for final rendering.
Among the tools and functions of the program, you will find the ability to quickly import from Daz Studio, blanks for various objects, hand-modeling brushes, UV-raised (applying flat textures on a three-dimensional object), advanced drawing tools and instant shading (Instant Ambient Occlusion).
DAZ Studio and Hexagon are created by one developer and complement each other. Together they constitute a complete free set for working with 3D graphics.

- Platforms: Windows, MacOS ,.
Blender is an advanced free editor 3D open source graphics available for all major platforms.
Developers are constantly developing Blender. It supports all possible operations with 3D graphics: allows you to simulate, texture, animate, render and component.

- Platforms: Windows, MacOS.
If you are interested in the art of digital sculpture, try the Sculptris program from the Pixologic developer. It is suitable equally good for any level of preparation. Newbies get a good starting tool, and already experienced digital artists - a platform for quick and convenient implementation of ideas.
Sculptris is based on the ZBrush editor from the same developer - the most popular application for digital sculpture. When you are ready to go to the next level, you can easily switch to zbrush.

- Platforms: Windows, MacOS, Linux.
Houdini is a tool for working with 3D animation and visual effects, which is often used when working on films, telecasts and other media content.
The cost of the editor begins with 2,000 dollars. But program developers - Side Effects Software - allow you to use the Houdini Apprentice version for free. Thanks to her, you can access all functions. full version And wrap skill at personal projects. Only Houdini Apprentice is designed exclusively for non-commercial and educational purposes.
The toolbar is the main (although not the only one) to the image to work with images. The main tools are combined in four groups of icons on the toolbar.
A feature of the PHOTOSHOP toolbar toolbar is the presence of alternative tools. Icons such tools have a special label in the form of a small triangle. Hold the pointer on this icon when the mouse button is pressed, and the line with additional tools will open (Fig. 3).
Fig.3. Tools editor
1. The first group of icons make up tools to work with objects. Using tools Region and Lasso (from the left side of the panel) you can highlight the image areas, and using the tool Move - move the selected areas and copy them. Tool Magic wandit serves to automatically highlight the area on the basis of the color similarity. Magic wand and Lasso Used to perform fraud - accurate stroke operations complex contours Graphic objects.
2. A group of tools intended for drawing includes such traditional tools as Aerograph, Brush, Pencil and Eraser. Tool Stamp Apply for packing operation, with which it is convenient to restore damaged patterns (for example, an old photo), copying small parts of the image with intact areas. Tool Finger Mimics the shift of raw paint and is used for ercking operations. Tools with an alternative choice Blur / sharpness allow you to control the sharpness of individual sites, and the group tools Lighter / Dimmer / Sponge Serve for local brightness adjustment and color saturation. The sponge imitates the operation of the washing.
3. Tools of the third group are designed to create new objects, including text. Penand its alternative tools are designed to create and edit smooth curvilinear contours. Tool Text Perform inscriptions. This uses fonts installed in windows system. Tool Linedesigned to draw straight segments. Instruments Fill and Gradient serve to fill selected areas by one of the main colors or with a smooth transition between colors. Accurately select the color from the number already used allows the tool Pipette (Set color according to the sample).
4. The last group make up view management tools. Tool Scale Allows you to work with enlarged pattern fragments, and tool Hand Used to move the pattern that goes beyond the program window.